boost wifi signal in laptop

Title: Make Your Laptop's Wifi Signal Faster On Windows 1087 Tutorial
Channel: MDTechVideos
Make Your Laptop's Wifi Signal Faster On Windows 1087 Tutorial by MDTechVideos
increase wifi signal in laptop, increase wifi range in laptop, improve wifi signal laptop, boost wifi reception on laptop, how to boost wifi signal on laptop, how to boost wifi signal on laptop windows 10
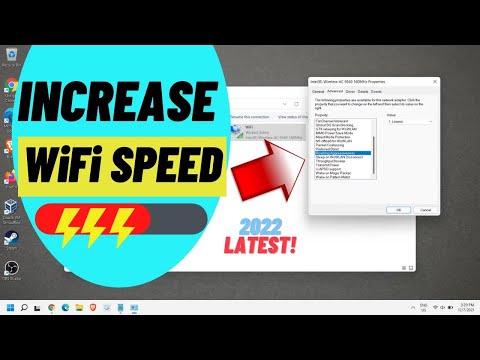
Laptop WiFi Nightmare? This ONE Trick Boosts Your Signal INSTANTLY!
Battling Bad Wi-Fi? Conquer Your Laptop's Signal Strength!
Have you ever wrestled with a laptop that refuses to connect? Is your Wi-Fi signal a flickering ghost in the machine? We've all been there. The frustration is real. It's time to troubleshoot and find a solution. I'm here to help you. These connectivity woes can be a productivity killer. Let's banish those annoying dead zones.
The Silent Struggle: Understanding Weak Wi-Fi
Think of your Wi-Fi signal like a radio broadcast. It needs a strong antenna. It needs a clear path to reach your device. Walls, appliances, and even your neighbor's network can interfere. These things weaken your connection. Your laptop’s internal antenna might be the problem. Its small size limits its range. Consequently, it struggles to grab a solid signal. Several environmental factors also play a vital role.
Unleash the Power: One Trick to a Stronger Signal
Here's where the magic happens. We're talking about improving your Wi-Fi performance. There’s a surprisingly simple solution. This single trick can instantly improve your laptop's Wi-Fi. It bypasses complicated settings and expensive hardware. This trick involves a simple change in your laptop's position. Then why not try it?
Position Yourself for Success: The Angle of Attack
Your laptop's orientation matters. The position directly impacts your signal strength. Try rotating your laptop. Experiment with different angles. Sometimes, a slight adjustment makes a massive difference. Think about it. The antenna emits signals in a particular pattern. It may be in a horizontal line. Rotating your laptop can align it with the router. This positioning helps to optimize signal reception.
Beyond the Basics: Optimizing Placement
Now, let's elevate this strategy. Consider where you're using your laptop. Are you in a crowded room? Are you too far from the router? Moving closer to the router is essential. Reduce the distance. Remove any obstructions. Try to get a more direct line of sight. Metallic objects can absorb or refract the signal. Make sure the router is placed somewhere that's central and elevated. This approach spreads the signal evenly.
Troubleshooting Further: Additional Signal Boosters
What if repositioning doesn't do the trick? Then, let's explore further options. Update your network drivers. Outdated drivers can create problems. Search for the latest ones on the manufacturer's website. Restart your router. This resets the system. Finally, check for interference. Bluetooth devices can cause issues.
The Digital Detox: Minimizing Interference
Wireless interference is a common enemy. Bluetooth speakers, microwaves, and other devices can fight your signal. Try turning off or moving them. This reduces interference. Furthermore, switch to the 5 GHz band. It offers faster speeds. However, it comes with a shorter range. However, it's less crowded.
Boosting the Boost: Advanced Techniques
Ready to take things up a notch? Consider using a Wi-Fi extender. These devices amplify the signal. They significantly boost your coverage. Alternatively, upgrade your router. Newer routers boast advanced technologies. They offer better range and speed. These options provide lasting solutions.
The Bottom Line: Reclaim Your Connectivity
Poor Wi-Fi doesn’t have to be the norm. You can improve your laptop's signal strength. Start with the simple trick of repositioning your laptop. Combine it with smart placement. Then, explore other troubleshooting steps. You'll experience faster downloads. You'll also get smoother streaming. Furthermore, you’ll enjoy more reliable browsing.
Final Thoughts: Your Wi-Fi Freedom Awaits
Don't let weak Wi-Fi hold you back. By implementing these strategies, you're taking control. You are taking back your internet. It’s time to enjoy a strong, stable connection. So, reclaim your online experience. Embrace the possibilities of flawless Wi-Fi. Now, go forth and conquer those digital dead zones!
Laptop WiFi Nightmare? This ONE Trick Boosts Your Signal INSTANTLY!
Ever feel like your laptop’s WiFi signal is a grumpy cat, always hiding in the shadows, refusing to perform when you need it most? We've all been there, staring at that frustratingly weak signal, cursing the internet gods, and wondering why your streaming video is buffering faster than a toddler on a sugar rush. But what if I told you there's a remarkably simple trick, a digital magic wand, that can instantly banish those WiFi woes? Believe me, it's not a mythical creature or an expensive piece of tech. It's a setting, hidden in plain sight, that can transform your laptop's connection from a snail's pace to a cheetah's speed. Let’s dive in!
1. The WiFi Woes: A Modern-Day Curse
Let's be honest, unreliable WiFi is the bane of our existence in the 21st century. It's right up there with slow drivers and lukewarm coffee. From crucial work presentations to binge-watching your favorite show, a weak WiFi signal can derail everything. Imagine trying to video chat with your loved ones, only to have their faces freeze mid-sentence; or downloading an important file, only to watch the progress bar crawl at a glacial pace. The frustration is palpable, right? It's like trying to navigate a swamp with a map written in disappearing ink. We need a solution, and we need it now.
2. Decoding the WiFi Jargon: What’s Actually Happening?
Before we unveil the secret weapon, let's quickly demystify the technical jargon. WiFi, you see, is essentially radio waves carrying data between your laptop and your router. Your router is the hub broadcasting this signal, and your laptop’s WiFi adapter is the receiver. The strength of the signal – and therefore your connection speed – depends on several factors: distance, obstructions (walls, furniture), and interference from other devices. It's like trying to listen to a radio station with a tin can in a crowded room. The more obstacles and noise, the weaker the signal.
3. The Hidden Gem: Understanding "Preferred Band"
Now, the secret weapon isn’t some high-tech gadget or software download (phew!). It lies within your laptop's WiFi settings, specifically, the "Preferred Band" setting. Most modern routers broadcast on two frequencies: 2.4 GHz and 5 GHz. The 2.4 GHz band has a longer range, but it's also more prone to congestion and interference (think of it as a busy highway). The 5 GHz band, on the other hand, has a shorter range but generally offers faster speeds and is less crowded (a smooth, open freeway).
4. The ONE Trick: Switching to 5 GHz – Your WiFi Salvation
Here's the magic. The one trick to boost your signal instantly is to ensure your laptop is prioritizing the 5 GHz band. This is where the "Preferred Band" setting comes in. By configuring your laptop to favor the 5 GHz band, you're essentially telling it to connect to the faster, less congested "freeway" whenever possible.
5. How to Apply the Magic: Step-by-Step Guide
Let’s walk through how to access and adjust this setting. The exact steps might vary slightly depending on your operating system (Windows, macOS), but the general idea remains the same:
Windows:
- Go to Control Panel (you can search for it in the Windows search bar).
- Select Network and Internet > Network and Sharing Center.
- Click on Change adapter settings.
- Right-click on your WiFi adapter and select Properties.
- In the properties window, look for Configure. Click on it.
- Go to the Advanced tab.
- Find the option labeled something like "Wireless Mode" or "Preferred Band." This is where the magic happens.
- From the dropdown menu, select "802.11ac" or "5 GHz preferred" (or similar phrasing).
- Click OK to save the changes. Restart your laptop, if prompted.
macOS:
- Click on the Wi-Fi icon in the menu bar.
- Select Open Network Preferences.
- Click on Advanced.
- In the Wi-Fi tab, you might see a similar “Preferred Networks” setting, where you can manually select the 5 GHz network if it's available.
- If not, you may need to connect directly to the 5 GHz network (it will have a similar name to your 2.4 GHz network, but with a "5G" suffix or similar extension).
Important Note: If the 5 GHz band isn’t available, it might be because your router and/or laptop doesn’t support it, or it's too far away from your router. In such cases, consider relocating your router or upgrading your equipment.
6. Troubleshooting: What if it Doesn’t Work?
Not seeing immediate results? Don't fret! Here are some troubleshooting tips:
- Is 5 GHz available? Double-check that your router is broadcasting on the 5 GHz band. (Many routers do this by default). Look in your router’s settings (often accessed through a web browser by typing in your router's IP address). You might also see two separate WiFi networks listed on your devices.
- Distance Matters: The 5 GHz band has a shorter range. Move your laptop closer to the router, or consider a WiFi extender if distance is an issue.
- Interference: Keep your router away from other electronic devices that might cause interference (microwaves, cordless phones, etc.)
- Restart Everything: Sometimes, the simplest solution works. Restart your router and your laptop.
7. Speed Test Showdown: Before and After
Once you've made the change, run a speed test to see the difference! There are many free online speed test tools available (like Speedtest.net or Fast.com). Compare your download and upload speeds before and after making the change. You should notice a significant improvement, especially in download speeds. It's like going from dial-up to fiber optic internet, all thanks to a simple setting tweak.
8. Beyond the Trick: Maintaining a Strong WiFi Connection
While the "Preferred Band" trick is a game-changer, remember that overall WiFi performance depends on multiple factors:
- Router Placement: Place your router in a central, elevated location, free from obstructions.
- Router Updates: Keep your router’s firmware updated for optimal performance and security.
- Limit Devices: The more devices connected to your WiFi, the slower it will be.
- Security: Protect your WiFi network with a strong password to prevent unauthorized access.
9. The "Why" Behind the Change: Decoding the Impact
Why does this simple setting make such a difference? When you switch to the 5 GHz band, you're essentially giving your laptop a wider, faster lane on the information superhighway. This leads to:
- Faster speeds: Enjoy quicker downloads, smoother streaming, and faster browsing.
- Reduced latency: Experience less lag during online gaming and video calls.
- More stable connection: Minimize buffering and interruptions, ensuring a more seamless experience.
10. Optimizing Your Home Network: A Holistic Approach
Think of your home network as a well-oiled machine. The "Preferred Band" trick is like tuning the engine. But to get the best performance, you might also need to:
- Upgrade Your Router: Consider upgrading to a newer router with the latest WiFi standards (like Wi-Fi 6 or Wi-Fi 6E).
- Use a WiFi Extender: If your house has dead zones, a WiFi extender can boost the signal range.
- Optimize Channel Selection: Your router automatically selects a channel to broadcast your WiFi signal, but sometimes you might need to manually change the channel to avoid interference from other networks in your area.
11. Mythbusting: Common WiFi Misconceptions
Let’s debunk some common WiFi myths:
- Myth: The more bars you have, the faster the speed.
- Reality: Signal strength (the bars) isn't always directly correlated with speed. A strong signal doesn't always mean a fast connection.
- Myth: A strong signal always means a reliable connection.
- Reality: Obstacles and interference can degrade reliability, even with a strong signal.
- Myth: More expensive routers always equal better WiFi.
- Reality: Price doesn't always guarantee superior performance. The best router depends on your specific needs and home environment.
12. The Future of WiFi: What's Next?
WiFi technology is constantly evolving. We're already seeing the emergence of Wi-Fi 6 and Wi-Fi 6E, offering even faster speeds, greater capacity, and improved performance in crowded environments. We can expect even more advancements in the coming years, including more efficient devices and smarter network management.
13. Real-World Transformation: The Stories Speak Volumes
Many people have already experienced the magic of
Make Your Laptop's WiFi Signal Faster On Windows 111087

By EasyTechGeek Make Your Laptop's WiFi Signal Faster On Windows 111087 by EasyTechGeek
Best Way To Improve Wi-Fi Connection On PCLaptop 2022
By EasyTechGeek Best Way To Improve Wi-Fi Connection On PCLaptop 2022 by EasyTechGeek
Dont Waste Money on WiFi Repeaters

By GGSheed Dont Waste Money on WiFi Repeaters by GGSheed

Title: His Ethernet is SLOWER than WiFi
Channel: Zach's Tech Turf
His Ethernet is SLOWER than WiFi by Zach's Tech Turf
Laptop WiFi Nightmare? This ONE Trick Boosts Your Signal INSTANTLY!
We've all been there: staring at our laptop screens, willing the WiFi signal to magically strengthen. That dreaded "weak signal" icon, the buffering videos, the dropped video calls – these are the modern-day digital demons that plague our productivity and entertainment. But what if we told you there's a simple, often overlooked solution that can dramatically improve your laptop's WiFi performance almost immediately? Forget expensive upgrades or complicated technical jargon. The answer lies within a readily available tool—the humble tin foil. Yes, you read that correctly.
Understanding the WiFi Wireless Signal's Battlefield
Before we delve into the tin foil technique, let's briefly understand the war your WiFi signal is fighting. Your laptop's wireless adapter is constantly battling interference. This interference comes from various sources: other WiFi networks, microwave ovens, Bluetooth devices, cordless phones, even solid objects like walls and furniture. These obstacles absorb and scatter the radio waves that carry your precious internet data. The weaker the signal, the more likely it is to be disrupted, resulting in slow speeds, dropped connections, and a frustrating online experience.
The Science Behind the Foil: Antenna Amplification
The core principle behind using tin foil is relatively straightforward. A simple WiFi antenna is designed to both transmit and receive radio waves. These antennas are directional. The laptop's internal antenna is typically omnidirectional, meaning it radiates and receives signals in all directions. However, by strategically shaping the tin foil, we can effectively create a reflector that redirects and concentrates the WiFi signal, much like a satellite dish focuses radio waves. The tin foil acts as a barrier, reflecting the signal that would otherwise dissipate or be absorbed by surrounding objects. This reflection strengthens the signal reaching your laptop's antenna, improving its ability to pick up the WiFi router's signal and transmit data back to it.
Step-by-Step: Crafting Your WiFi Signal Booster
This is where the magic happens. You don't need any technical expertise or specialized tools. You can craft your own WiFi booster using just a sheet of tin foil. Follow these simple steps:
Gather Your Supplies: You'll need a standard sheet of tin foil (the wider, the better) and a pair of scissors.
Assess Your Router's Location: Determine the location of your WiFi router in relation to your laptop. Where is the WiFi source, and where is your laptop? This will help you aim your booster.
Fold and Shape the Foil: The goal is to create a reflector. There are several effective shapes:
- The “U” Shape: Fold the tin foil in half lengthwise. This creates a slightly rigid, U-shaped structure. Curve the open ends of the U outwards. This method provides a good balance of simplicity and signal enhancement. Position the U shape behind your laptop's screen, with the curved ends facing the router.
- The Parabolic Reflector: This is a more advanced, more effective approach. Cut the foil into a wide, shallow parabolic shape. Imagine a satellite dish. The curvature is crucial for focusing the signal. This shape is then positioned behind your laptop and facing the source of the WiFi signal.
- The Flat Reflector: If you are in a rush, simply folding the foil neatly into a rectangle or card shape and propping that behind the laptop can still increase performance.
Position and Test: Place your created reflector behind your laptop screen or at the back of your laptop, ensuring it's facing the WiFi router. Experiment with the angle. Aim the reflector towards the router. Test your WiFi speed by navigating the internet, running a speed test, or checking your signal strength indicator.
Fine-Tune and Optimize: Monitor the signal strength and adjust the angle of the tin foil reflector as needed. You might need to experiment with the reflector's position to find the optimal configuration for your particular setup. The best position will vary depending on your router's antenna placement and your laptop's positioning
Troubleshooting and Optimizing Your Setup
Sometimes, the initial results might not be dramatic. Here are some tips to troubleshoot and further optimize your setup:
- Experiment with Positioning: Try moving the reflector a little to the left, right, up, or down behind your laptop. Even a slight adjustment can have a significant impact.
- Consider Router Antenna Placement: If your router has external antennas, make sure they are positioned correctly. Try adjusting the angle of the router's antennas to maximize the signal strength in your desired direction.
- Minimize Obstructions: Clear any obstructions between your laptop and the router. This includes furniture, walls, and other electronic devices. Place the laptop out of reach of water so that the laptop remains dry.
- Eliminate Interference: Run a WiFi analyzer app on your laptop (available for free on most app stores) to identify other WiFi networks operating on the same channel as your router. If possible, change your router's channel to minimize interference.
- Consider Laptop Lid Angle An often-overlooked factor, the laptop lid angle can sometimes impact signal strength. Experiment with slightly opening or closing the lid to see if it alters the signal.
- Test with Different Devices: Check the WiFi signal strength on other devices (smartphones, tablets, etc.) to determine if the problem is isolated to your laptop or is a more general WiFi issue. This will help isolate whether the issue is your laptop's antenna, the router, or the surrounding environment.
- Reboot Everything: A simple reboot of both your router and laptop can sometimes resolve unexpected WiFi issues. You can try also resetting the modem if a reboot does not function.
Beyond the Foil: Additional WiFi Optimizations
While the tin foil technique is a quick and surprisingly effective fix, it's not a panacea. For more comprehensive WiFi optimization, consider these additional strategies:
- Upgrade Your Router: Older routers may not support the latest WiFi standards (like 802.11ac or 802.11ax), which offer faster speeds and better range. Consider upgrading to a modern router for improved performance.
- Placement Matters: Place your router in a central, elevated location in your home, away from walls and obstructions. Avoid placing the router in areas with lots of electronic devices.
- Use a WiFi Extender/Repeater: If you have a large home or experience dead zones, a WiFi extender or repeater can help boost the signal in areas where coverage is weak.
- Optimize Router Settings: Log into your router's configuration panel and review the settings. Ensure the router is using the latest firmware and appropriately select the right channel.
- Consider a Mesh WiFi System: For complete home coverage and seamless roaming, a mesh WiFi system can wirelessly connect multiple access points throughout your home.
The Bottom Line: Instant WiFi Enhancement
The tin foil trick is not just a gimmick. It's a simple, cost-effective, and easily accessible technique that can significantly improve your laptop's WiFi signal strength. Whether you're struggling with slow speeds, dropped connections, or dead zones, this often-overlooked solution is worth a try. By understanding the principles of signal reflection and following the simple steps outlined above, you can transform your WiFi experience in minutes. So grab that foil, experiment with the shapes, and enjoy a stronger, more reliable WiFi connection.
