cara menampilkan layar hp ke laptop via wifi
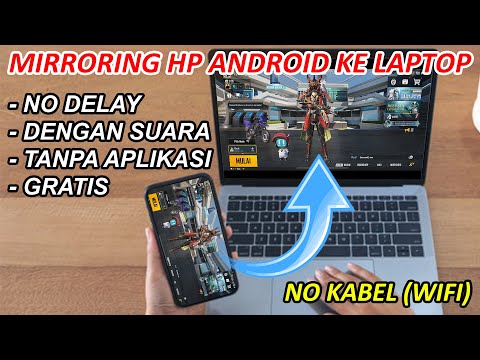
Title: CARA Menampilkan Layar HP Android Di Laptop Mirroring HP KE PC Dengan Suara Via WIFI
Channel: Creative AG
CARA Menampilkan Layar HP Android Di Laptop Mirroring HP KE PC Dengan Suara Via WIFI by Creative AG
Mirror Your Phone to Your Laptop Wirelessly: The Easiest Trick Ever!
Unlock Wireless Display Magic: Seamlessly Mirror Your Phone to Your Laptop
Ever wished you could effortlessly display your phone's screen on your laptop? You are not alone. The desire to share content or work seamlessly across devices resonates with many. This isn’t just a dream. Believe it or not, it’s a modern-day reality. This article reveals the secrets behind this simple trick. This wireless connection empowers your workflow and elevates your digital experience.
The Wireless Mirror Marvel: Breaking Down the Basics
The technology to mirror your phone to your laptop is readily available. It often involves built-in features or third-party apps. These tools essentially create a wireless bridge. This bridge relays your phone's screen to your laptop. Consider it like a digital mirror reflecting your phone's interface. The process, surprisingly, is often remarkably straightforward. But firstly, remember to check compatibility. Make sure your devices support the necessary functionality. It can be frustrating if compatibility isn’t there.
Step-by-Step Guide: Your Phone-to-Laptop Mirroring Journey
Let's get started. Firstly, recognize the operating systems involved. This is crucial. Whether Android or iOS, the steps may vary slightly. Generally, the process involves these steps in most cases.
Step 1: Ensure Compatibility. This is vital. Confirm both your phone and laptop are capable. Look for features like screen mirroring or casting. Check the settings. The compatibility check saves frustration.
Step 2: Connect to the Same Wi-Fi Network. This is a fundamental requirement. Both devices must be on the same Wi-Fi. This network connection is critical. It allows the devices to communicate.
Step 3: Utilize Built-in Feature or App. Android and iOS offer differing methods. Android often uses "Smart View" or "Screen Mirroring." iOS utilizes "AirPlay." Alternatively, explore dedicated apps. These apps often provide enhanced functionality.
Step 4: Select Your Laptop. Once the feature is running, select your laptop from the list. This action initiates the mirroring. The phone's screen should then appear.
Step 5: Enjoy the Wireless Display. Now, your phone's screen is visible. You can now view content on your laptop. You can interact with your phone through your laptop. Experience the ultimate convenience.
Android vs. iOS: Decoding the Differences
The process is fairly similar across both platforms. Nevertheless, subtle differences exist.
Android: Android typically offers more choices. You could use the built-in "Smart View" or Google's "Cast." There are also numerous third-party apps available.
iOS: iOS uses AirPlay. AirPlay offers seamless integration with Apple devices. The setup is incredibly simple and intuitive. AirPlay typically provides a high-quality mirroring experience.
These differences are important. They might slightly alter your initial steps.
Troubleshooting Common Mirroring Roadblocks
At times, difficulties will inevitably surface. Problems happen with technology. So, here are troubleshooting tips.
Connectivity Issues: First, double-check your Wi-Fi. Ensure both devices are linked. A weak signal can create interruptions. Also, consider moving closer to your router.
Software Updates: Make sure both your phone and laptop are current. Outdated software can cause compatibility issues. Update to the latest versions promptly.
App Problems: Should you use a dedicated app, uninstall and reinstall. This resolves glitches. Always check for recent app updates. This assures optimal performance.
Firewall Concerns: Sometimes firewalls block mirroring. Check your firewall settings. Allow necessary permissions for the mirroring apps.
Device Restart: When in doubt, restart both devices. This often fixes minor software hiccups. Restarting can clear temporary glitches.
These steps address common difficulties. They will likely get you back on track.
Enhancing Your Mirroring Experience: Practical Applications
Beyond mere convenience, phone mirroring provides enormous utility. Think about its practical value.
Presentations: Easily share presentations. Display them directly from your phone. This helps you avoid the awkward transition.
Gaming on a Bigger Screen: Enjoy mobile games on a larger display. The bigger screen amplifies the experience. You can immerse yourself more deeply.
Content Sharing: Share photos and videos with ease. Showcase your memories instantly. Share them with a group or just yourself.
Productivity Boost: With mirroring, you can work more effectively. Respond to emails. Answer texts quickly on a larger screen. Stay incredibly organized.
These use cases only scratch the surface. The potential is almost limitless.
Elevating Your Digital Life: The Final Word
Mirroring your phone to your laptop is not only possible. It is also remarkably easy. Following these steps, this is a task you can achieve today. It's a simple trick delivering significant benefits. Embrace this technology. Unlock a new dimension of convenience. Improve your digital life significantly. So, start mirroring. It’s time to experience the difference. The future of seamless connectivity is now in your hands.
Is Your Wi-Fi REALLY Slow? This Laptop Trick Finds the REAL Problem!Mirror Your Phone to Your Laptop Wirelessly: The Easiest Trick Ever!
Hey tech enthusiasts, gadget gurus, and anyone who’s ever wrestled with a tangled USB cable – let’s talk mirroring! You know, that magical ability to see your phone screen, apps, and everything else right on your laptop? It's like having a second, bigger phone, and trust me, it's way more convenient than it sounds. We're not talking about some complicated, tech-heavy process here. We're diving into the easiest trick to mirror your phone wirelessly to your laptop. And no, you don’t need to be a coding wizard or have a degree in astrophysics to pull this off.
1. Why Mirroring Your Phone Matters: The Big Picture (and the Big Screen!)
Think about it. How often do you find yourself squinting at your tiny phone screen, trying to watch a video, read a long article, or share a presentation? Mirroring solves that problem instantly. It's like upgrading your smartphone experience to IMAX without the pricey ticket. We’ll explore why this seemingly simple act of mirroring is a game-changer. We'll delve into the benefits, illustrating how mirroring boosts productivity, entertainment, and even helps in those tricky work-from-home scenarios.
2. The Wireless Liberation: Ditching the Cables, Embracing the Freedom
Remember the days of fumbling with cables? The frustration of not having the right adapter? Good riddance! Wirelessly mirroring your phone to your laptop liberates you from those constraints. Imagine setting up your phone, kicking back on your sofa, and controlling everything right on your laptop screen. Feels good, right? This section focuses on the core power of going wireless, highlighting the simplicity and convenience that it entails.
3. Prerequisites: What You Need to Get Started (Spoiler: Not Much!)
Before we get into the nitty-gritty, let’s get the basic requirements out of the way. The good news? You probably already have everything you need.
- A Smartphone: (Android or iOS – we'll cover both!)
- A Laptop: (Windows or macOS – we’ll cover both too!)
- A Stable Wi-Fi Connection: This is crucial for a smooth, lag-free mirroring experience. Think of it as the invisible highway that connects your devices.
See? Easy peasy!
4. Android Marvels: Mirroring Your Android Phone to Your Laptop
Alright, Android users, let's dive in. The process differs slightly depending on your laptop and phone, but the core principle remains the same.
Using Built-in Features: Many Android phones have built-in screen mirroring options. Look for terms like "Smart View," "Screen Mirroring," or "Cast" in your settings menu or quick settings panel. Your laptop must support Miracast.
The Power of Third-Party Apps: If your phone or laptop doesn’t have native mirroring capabilities or if you're looking for a smoother experience, consider apps like:
- LetsView: Free, easy to use, and supports both Android and iOS.
- ApowerMirror: Offers more features, like screen recording and control of your phone from your laptop.
- Vysor: Lets you control your phone with your mouse and keyboard!
- Screen mirroring apps are widely available across app stores, and the best one depends on your device and use case.
Personal anecdote: I’ve used LetsView for years, and it’s been a lifesaver for presentations and watching movies while I’m working. It's like having a built-in second screen!
5. iOS Adventures: Mirroring Your iPhone to Your Laptop
Apple users, don’t worry, we haven’t forgotten about you! Mirroring your iPhone is just as simple.
- AirPlay to the Rescue: The easiest method on macOS is using AirPlay. Your phone (iPhone/iPad) should automatically detect AirPlay enabled devices, and your laptop should automatically have the feature.
- Third-Party Apps for Windows: If you’re on Windows, you'll need a third-party app, similar to Android. Apps like:
- Reflector: A user-friendly app for mirroring iOS devices to Windows.
- LonelyScreen: A free alternative, great for basic mirroring.
- AnyDesk: A team favourite!
The Crucial Step: For both Android and iOS, make sure your phone and laptop are connected to the same Wi-Fi network. Otherwise, they won't be able to "see" each other!
6. Step-by-Step: A Simple Guide to Android Mirroring (LetsView Edition)
Since LetsView is a popular choice, let's walk through a quick guide:
- Download and Install: Download LetsView on both your Android phone and your laptop.
- Connect: Open the app on both devices. Your laptop should be visible on your phone. Tap on its name.
- Start Mirroring: On your phone, choose to mirror the screen and it will appear immediately.
- Enjoy!
This procedure is broadly similar across most apps and devices.
7. Step-by-Step: A Simple Guide to iOS Mirroring (Reflector Edition)
Let's use Reflector on a Windows laptop as an example:
- Download and Install: Download and install Reflector on your Windows laptop.
- Install Reflector on the Device: Open Control Center on your iPhone and then tap on Screen Mirroring or AirPlay.
- Select Your Computer: Select your computer name in the list of available devices.
- Enjoy!
8. Optimizing Your Mirroring Experience: Smooth Sailing Tips
Here are some key tips to ensure a smooth, lag-free mirroring experience:
- Strong Wi-Fi: A stable, high-speed Wi-Fi connection is the most important factor.
- Close Unnecessary Apps: Close apps on both your phone and laptop to free up resources.
- Keep Devices Updated: Ensure both your phone's and laptop's operating systems and apps are up to date.
- Position Yourself: If using a mirroring app, experiment with positioning your devices to improve image quality or lag issues.
9. Beyond Screen Mirroring: Unlock Extra Features & Possibilities
Mirroring isn't just about replicating your screen. Many apps offer extra benefits:
- Screen Recording: Record your phone screen directly from your laptop – perfect for tutorials or gameplay videos.
- Remote Control: Control your phone with your laptop's mouse and keyboard.
- File Transfer: Transfer files between your phone and laptop.
10. Troubleshooting Common Mirroring Issues: Quick Fixes
Encountering problems? Don’t worry, it happens to the best of us.
- Connection Issues: Double-check that both devices are on the same Wi-Fi network and that the Wi-Fi signal is strong.
- Lagging/Stuttering: Try closing unnecessary apps, restarting your devices, or moving closer to your Wi-Fi router.
- App Compatibility: Make sure your chosen mirroring app is compatible with your phone and laptop models.
11. Mirroring for Productivity: Elevating Your Work Game
Mirroring isn’t just for entertainment; it’s a productivity powerhouse. Imagine working on a presentation while having your phone open to check on emails. Or, using your phone for real-time information while taking notes on your laptop. The possibilities are endless.
12. Mirroring Entertainment: Level Up Your Viewing Experience
Binge-watching your favorite shows? Mirroring is the best choice! Watch movies on a bigger screen without the need for a USB cable. Have a watch party with friends that doesn't require you to huddle around your phone for a few hours.
13. Mirroring for Presentations: Impress Your Audience
Presentations are easier and more engaging when you mirror your phone. Do you need to show off a new app? Does your audience need to see a clear view of the screen? Mirroring allows you to engage with your audience in a way that makes the whole sharing process more accessible.
14. Comparing Mirroring Apps: What's the Right Fit For You?
Choosing the right mirroring app can feel overwhelming. We’ve touched on a few, but let’s quickly compare some popular options:
- LetsView: Great for beginners, free, and easy to use.
- ApowerMirror: Offers more advanced features, like recording and control.
- Reflector: Solid performance.
The best app depends on your needs and budget. Try a few free options to see what works best for you.
15. The Future of Mirroring: What to Expect Next
Mirroring technology is constantly evolving. We can expect:
- Improved Wireless Performance: Faster speeds and lower latency.
- Enhanced Features: New ways to interact with your phone from your laptop.
- Wider Compatibility: Seamless mirroring across all devices, regardless of brand or operating system.
Closing Thoughts: Embrace the Mirroring Revolution!
So there you have it! Mirroring your phone to your laptop wirelessly is not only easy but also incredibly useful. It’s a game-
Laptop to WiFi Hotspot: Windows 10 Trick You NEED to Know!Cara Mirroring Dari HP Ke laptop Tanpa Aplikasi & Tanpa Kabel USB

By Arik Channel Cara Mirroring Dari HP Ke laptop Tanpa Aplikasi & Tanpa Kabel USB by Arik Channel
Cara CAST Layar HP Android ke Laptop PC Gratis Hubungkan Ponsel ke Laptop PC
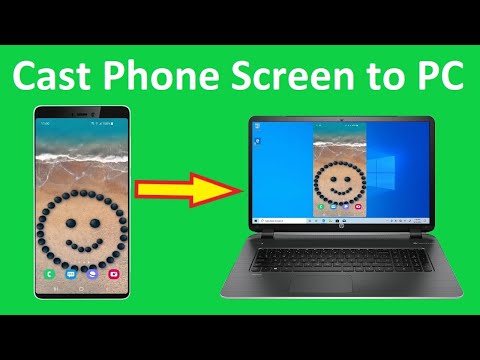
By Howtosolveit Cara CAST Layar HP Android ke Laptop PC Gratis Hubungkan Ponsel ke Laptop PC by Howtosolveit
Cara Menghubungkan Ponsel ke Laptop Share Layar Ponsel di Laptop

By Gadget Lover Cara Menghubungkan Ponsel ke Laptop Share Layar Ponsel di Laptop by Gadget Lover

Title: Cara Menampilkan Layar HP ke Laptop atau PC , cara mirroring hp ke laptop
Channel: makin VIRAL
Cara Menampilkan Layar HP ke Laptop atau PC , cara mirroring hp ke laptop by makin VIRAL
Wifi On Laptop
The Ultimate Guide to Crafting the Perfect Sourdough Starter
The intoxicating aroma of baking bread, the satisfying crunch of a crust, and the tangy complexity of the crumb – these are the hallmarks of sourdough, a culinary tradition that has captivated generations. But the magic doesn't start with the flour and the oven; it begins with the heart of sourdough: the starter. This living culture of wild yeasts and bacteria is the key to unlocking the unique flavors and textures that make sourdough so beloved. This guide will serve as your comprehensive companion in the journey of creating and maintaining a thriving sourdough starter, ensuring your bread rises to new heights of deliciousness.
Understanding the Science Behind the Starter
Before you begin, it’s helpful to grasp the fundamental science at play. A sourdough starter isn't just a mixture of flour and water; it's a carefully cultivated ecosystem. Naturally occurring yeasts and lactic acid bacteria (LAB) in the air and on the flour’s surface colonize the mixture, feeding on the carbohydrates in the flour. The LAB create lactic and acetic acids, which give sourdough its characteristic tang and help preserve the bread. The yeasts produce carbon dioxide, the leavening agent that makes the bread rise. The interplay of these organisms is what gives your starter its unique personality and flavor profile.
Assembling Your Starter: A Step-by-Step Approach
The process of creating a sourdough starter is remarkably simple, yet requires patience and consistency. Here’s a proven method to follow:
Materials: You'll need a clean, non-reactive container, such as a wide-mouthed glass jar (a mason jar is ideal). Ensure it has a lid, but don't seal it airtight, allowing for gas exchange. Invest in a digital kitchen scale for precise measurements – accuracy is key in the early stages. You'll also need unbleached all-purpose or bread flour, and filtered, unchlorinated water.
The Initial Mix: In your jar, combine 50 grams (approximately ¼ cup) of flour with 50 grams (approximately ¼ cup) of water. Stir thoroughly until all the flour is moistened. The consistency should resemble a thick pancake batter. Cover the jar loosely and let it rest at room temperature (ideally between 70-75°F or 21-24°C).
Daily Feeding (Days 1-7): Over the first week, you will feed your starter daily. This is where consistency is crucial. Each day, discard about half of the starter (this is known as "discard" and you'll learn how to creatively reuse it later). Add 50 grams of flour and 50 grams of water, mixing well. Observe the starter for signs of life. Some bubbles may appear early on, but don't be discouraged if it’s slow going. The environment and the quality of your flour play a significant role in how rapidly your starter develops.
Monitoring the Development: The most significant telltale signs that the starter is ready to bake with are doubling in size, the appearance of bubbles throughout, and a slightly tangy or fruity aroma. The timeframe can vary depending on the environment, but it takes a week or two, or even longer. You may need to feed more often to gain activity.
Troubleshooting and Troubleshooting: Common Challenges and Solutions
Even with the best intentions, your starter might encounter some bumps along the road. Here are solutions to address potential issues:
- No Activity: If your starter shows no signs of activity after several days, don't give up. Ensure the room temperature is warm enough. Try using a different type of flour, as some flours are more conducive to starter development than others. Consider using bottled water, which is less likely to contain chlorine that can inhibit yeast growth.
- Mold: The appearance of mold is a clear indicator that your starter is contaminated. The most common type of mold will be colored. Discard the entire starter. Clean the jar thoroughly and start again with the process above.
- Hooch (Liquid on Top): A layer of dark liquid called “hooch” on top of your starter is normal if your starter has not been fed recently and indicates that your starter is hungry. It is a byproduct of the fermentation process and is safe to consume. If you are ready to feed, stir the hooch back into the starter. If it is a very dark color, drain off most of the hooch before feeding.
- Weak Rise: If your starter doesn’t provide enough lift in your dough, it might need more feedings to build up its strength. Feed it more frequently (twice a day) for a few days.
Maintaining Your Thriving Starter: The Long-Term Commitment
Once your starter is active and reliable, the maintenance phase begins. This is where consistency and a little understanding of your starter's needs become paramount.
- Regular Feeding: Once your starter is established, you can transition to a maintenance schedule tailored to your baking frequency. If you bake frequently (once or twice a week), you can keep your starter at room temperature and feed it daily. This requires a stable and consistent environment. If you bake less frequently, refrigerate the starter.
- Refrigerated Storage: Refrigeration slows down the fermentation process, allowing you to reduce the feeding frequency. When refrigerated, feed your starter once a week. Before baking, take it out of the refrigerator and feed it at least 12 hours before use.
- Feeding Ratios: You can adjust the feeding ratio to suit your needs. While a 1:1:1 ratio (starter:flour:water by weight) is common, experimented with ratios like 1:2:2 (1 part starter, 2 parts flour, 2 parts water) to see what works best for your starters' activity.
- Knowing When to Feed: The timing of your feedings depends on the strength of your starter. Observe its rise and fall. Feed your starter when it has nearly doubled in size and is showing signs of deflation.
- The Importance of Water Quality: Chlorine and other chemicals in tap water can hinder fermentation. Use filtered, unchlorinated water for the best results.
- Using the Discard: The discard from your starter is a valuable ingredient in other recipes. Don’t throw it away! It adds a tangy flavor and contributes to the texture of baked goods. You can incorporate it into pancakes, waffles, crackers, pizza dough, and more.
- Reviving a Dormant Starter: If your refrigerated starter hasn't been fed in a while, you may need to revive it. Take it out of the refrigerator, let it come to room temperature, and feed it daily for a few days until it becomes active again. If the starter has any mold, you must discard it.
Baking with Your Sourdough Starter: Turning the Tang into Deliciousness
Once your starter is vibrant, you are ready to bake. The process is more than just mixing ingredients; it encompasses a relationship to the dough and the ongoing development of flavors.
- Pre-Ferment: Many sourdough recipes call for a pre-ferment, often called a levain or a "chef." This is a small portion of the starter that is fed a specific amount of flour and water a few hours before the dough is mixed. The levain encourages flavor development and impacts the final texture of the bread.
- Autolyse: The autolyse step, allowing the flour and water to combine and rest, is another technique to improve the finished product. This enables the gluten to develop, resulting in a more tender crumb.
- Mixing and Kneading: When mixing the dough, the flour, water, starter, and salt should be combined. Kneading is essential for developing gluten and creating structure.
- Bulk Fermentation: This is the initial rise, where the dough develops flavor and texture. Folding the dough occasionally helps to strengthen the gluten and distribute the gases produced by the yeast.
- Shaping: After bulk fermentation, the dough is shaped into the desired form (e.g., a boule, batard, or loaf).
- Proofing: The shaped dough then proofs, or rests, before baking. The duration of proofing depends on the recipe and the strength of your starter.
- Baking: Baking sourdough bread can be achieved in various ways, including a Dutch oven to help the bread rise to the right size, and a stone in your oven to obtain the right crust.
Beyond the Basics: Advanced Techniques for Sourdough Enthusiasts
Once you've mastered the fundamentals, there’s a world of advanced techniques to explore.
- Variety of Flours: Experimenting with different flours (whole wheat, rye, spelt) will influence the flavor and texture of your bread.
- Cold Fermentation: Slowing down the fermentation further by proofing your shaped loaves in the refrigerator can intensify the flavor and improve the crumb.
- Scoring: Scoring the dough before baking allows the loaf to expand evenly in the oven. Experiment with different scoring patterns to create unique designs.
- Flavor Additions: Once you have a well-established starter, you can add a variety of herbs, seeds, cheeses, and other additions during the mixing process.
The Joy of the Sourdough Journey
Creating and maintaining a sourdough starter is a journey, not a destination. There will be learning curves, failures, and successes. Embrace the process, be patient, and relish the transformation of simple ingredients into something truly remarkable. The satisfaction of baking a loaf of
