how to get better reception on laptop wifi

Title: How to Improve Wi-Fi Signals in Windows Laptop Speedup Wi-Fi
Channel: MJ Tube
How to Improve Wi-Fi Signals in Windows Laptop Speedup Wi-Fi by MJ Tube
how to get better wifi signal on laptop, how to get more wifi signal on laptop, how to improve wifi reception on pc, how can i improve the wifi signal on my laptop, laptop wifi reception weak
Laptop WiFi Nightmare? This ONE Trick Fixes EVERYTHING!
Say Goodbye to Wi-Fi Woes: A Surprisingly Simple Solution for Your Laptop
Life, as we know it, revolves around the internet. Its silent hum accompanies us through work, entertainment, and keeping in touch. However, that seemingly endless stream of data can screech to a halt. That's when your laptop's Wi-Fi connection turns into a frustrating foe. Are you tired of dropped connections and sluggish speeds? Then, prepare for a game changer.
The Wi-Fi Struggle: Sound Familiar?
We've all been there. You're right in the middle of an important video call. Suddenly, everything freezes. Or, perhaps you're trying to stream your favorite show. The buffering wheel of doom starts its relentless spin. It's maddening, isn't it? Furthermore, it's even more frustrating when you've got a deadline. The problem isn't always your internet provider. Sometimes, it’s your laptop itself.
Unveiling the Culprit: Why Your Wi-Fi Fails
Many factors might cause this issue. Your laptop’s internal settings often contribute. Obsolete drivers can be a significant impediment. They are critical for communication. Furthermore, network congestion can slow you down. Also, physical obstructions can be the culprit. Walls, appliances, and other devices can interfere with the signal. But, there's something else we often overlook.
The Secret Weapon: Resetting Your Network Settings
Before you chuck your laptop out the window, take a deep breath. There's a surprisingly simple fix. It's a trick that often resolves the issue. Resetting your network settings can work wonders. It refreshes the communication between your laptop and the Wi-Fi router. Consequently, it clears out potential glitches. This simple method can effectively solve your Wi-Fi problems.
Step-by-Step: The Easy Reset Process
Don't worry; it's straightforward. You don't need to be a tech expert. First, navigate to your laptop's settings. Now, this varies slightly depending on your operating system, but it's generally found in the control panel. Next, the search bar comes in handy. Type "network reset" or "network settings." You'll find the option there. Afterward, click on the "reset" button. Your system will prompt you to confirm. Be patient during this process. It might take a few moments. Afterward, your laptop restarts. That’s it, in a nutshell.
Reconnecting and Testing Your Internet
Once your laptop restarts, you’ll need to reconnect to your Wi-Fi network. Click on the Wi-Fi icon. Choose your network. Enter your password. Then, you’re back online. Therefore, test your connection. Browse a website, stream a video, or make a quick call. You should see a noticeable improvement. However, if the problem remains, investigate other possibilities.
Troubleshooting Further: What if the Trick Doesn't Work?
If the reset doesn't completely fix it, don’t despair. A few more steps will likely help. First, ensure your Wi-Fi drivers are up to date. Go to your device manager. Look for your network adapter. Right-click on it. Then, select "update driver." Another possibility is to check your router. Sometimes, a simple power cycle can solve the issue. Unplug your router, wait thirty seconds, and plug it back in. Furthermore, consider your physical environment. Remove obstructions. Move closer to your router. These steps can often make a difference.
The Benefits of a Stable Wi-Fi Connection
When your Wi-Fi works reliably, you benefit. You can work without interruptions. You can stream your favorite shows without buffering. Moreover, you can stay connected to the people you love. Furthermore, it boosts your productivity and reduces stress. Imagine the possibility of uninterrupted online gaming or smooth video conferencing.
Beyond the Fix: Maintaining a Healthy Connection
This simple trick is a great start. However, you can take further steps. Regularly update your drivers. This helps prevent future issues. Consider using a Wi-Fi analyzer app. It will help you identify the best channels for your router. Keep your router's firmware up-to-date. Consequently, you will enhance performance and security.
The Bottom Line: A Quick Fix for a Common Problem
So, if your laptop's Wi-Fi is giving you grief, don't panic. Instead, try this simple reset. It could be the solution you have been looking for. It’s a quick, easy fix that can save you a lot of headaches. With a stable connection, you'll be back online in no time. Then, you can get back to doing what you do best.
Laptop to WiFi Printer: Setup in 60 Seconds (Guaranteed!)Laptop WiFi Nightmare? This ONE Trick Fixes EVERYTHING!
Ever found yourself staring blankly at your laptop screen, the dreaded "no internet" message mocking you during a crucial deadline? Or maybe you're stuck with agonizingly slow speeds, making even simple tasks feel like climbing Everest? We've all been there. Seriously, the frustration of a flaky Wi-Fi connection can be soul-crushing. But hey, breathe easy! Because, after years of wrestling with Wi-Fi woes, I've stumbled upon a secret – a single trick – that has transformed my laptop's connection from a sluggish snail to a lightning-fast cheetah. Ready to unleash your Wi-Fi potential? Let's dive in!
1. The Wi-Fi Woes: A Shared Struggle
First things first: you're not alone. A terrible Wi-Fi connection is a universal problem. It's like that unreliable third cousin everyone pretends to like at family gatherings – you know you need it sometimes, but it's always causing issues. We've all experienced it: the dropped video calls, the buffering YouTube videos, the sheer exasperation of waiting for a webpage to load. It’s infuriating. It’s distracting. And, frankly, it’s often completely unnecessary.
2. Identifying the Culprit: Is It Really Your Router?
Before we jump to conclusions and start throwing money at new routers, let’s pause. Often, the problem isn’t your router. Sure, a dated router can contribute, but more often than not, the issue lies elsewhere. Think of it like this: you have a fantastic, powerful car (your internet connection), but the roads leading to your destination (your laptop) are filled with potholes and traffic jams. The culprit is frequently closer than you think, lurking within your own laptop's settings.
3. The Secret Weapon: The Power of Airplane Mode (Seriously!)
Here's the one trick, the simple solution, the secret sauce: turning Airplane Mode on and then immediately off.
I know, I know. It sounds ridiculously easy, almost too good to be true. But trust me, it works. Think of it as a digital reset button for your Wi-Fi adapter. It's like giving your laptop a mini-vacation, forcing it to briefly disconnect and then re-establish its connection. I discovered this by accident, years ago after a particularly frustrating session of video conferencing. I was about to throw my laptop out the window when, in a moment of desperation, I flicked on Airplane Mode, then immediately switched it off. And bam! Instant, glorious Wi-Fi.
4. Why Airplane Mode Works: A Techy Breakdown (But Simplified!)
Let’s break down the magic. When you activate Airplane Mode, your laptop shuts down all its wireless radios – Wi-Fi, Bluetooth, cellular data, everything. This action essentially clears the pathway of any conflicting signals or glitches that might be hindering your Wi-Fi performance. Then, when you turn Airplane Mode off, your laptop’s Wi-Fi adapter re-initializes, seeking out the strongest, cleanest signal available. It's like rebooting your computer, but specifically for your internet connection.
5. The Step-by-Step Guide: Unleashing the Wi-Fi Beast
Okay, let's get practical. Here’s how to execute the Airplane Mode trick like a pro:
- Step 1: Locate the Shortcut: Usually, you'll find the Airplane Mode toggle in your system tray (the area in the bottom right corner of your screen – the clock area). It’s often represented by an airplane symbol. You can also find it in your laptop's settings, usually under "Network & Internet."
- Step 2: Activate Airplane Mode: Click on the Airplane Mode toggle to turn it on. Your Wi-Fi icon will likely change, indicating that you’re disconnected.
- Step 3: The Waiting Game (It's Short!): Wait for about 10 seconds. Don't overthink it. Just a short pause.
- Step 4: Deactivate and Reconnect: Turn Airplane Mode off again. Your laptop will now automatically scan for and reconnect to available Wi-Fi networks.
- Step 5: Celebrate!: Test your connection. Open a webpage, stream a video, do whatever you need to do. If it’s running faster, then you’ve done it!
6. Beyond the Trick: Other Wi-Fi Troubleshooting Tips
While the Airplane Mode trick is often a lifesaver, it's not always a perfect solution. Here are a few other troubleshooting tips to keep in your arsenal:
- Restart Your Router: The old faithful! Sometimes, a simple router restart can work wonders. Unplug it for 30 seconds, then plug it back in
- Check Your Distance: Are you too far from your router? Walls, especially thick ones, can interfere with your signal.
- Update Your Drivers: Outdated network drivers can also cause problems. Check your laptop's manufacturer’s website for driver updates.
- Analyze Your Network: If you're tech-savvy, you can use network diagnostic tools to identify potential signal interference.
7. Common Wi-Fi Killers: What's Interfering?
Think of Wi-Fi signals as invisible radio waves. Just like radio stations, other devices can “jam” these waves, which interferes with your connection. Some common culprits are:
- Microwaves: Yes, those sneaky kitchen appliances!
- Bluetooth Devices: Especially if they’re actively transmitting data.
- Other Wireless Devices: Cordless phones, baby monitors, and even some older electronic devices.
8. Optimize Router Placement: Position for Power!
Your router’s placement is critical. Don't tuck it away in a closet! Here’s how to optimize:
- Elevate it: Place your router on a shelf or table, away from the floor.
- Central Location: Put it in a central location in your home for the best coverage.
- Clear of Obstacles: Keep it away from walls, metal objects, and other potential obstacles.
9. Security First: Securing Your Wireless Network
Protecting your Wi-Fi network is crucial for both security and performance.
- Strong Password: Use a strong, unique password for your Wi-Fi network.
- Enable Encryption: WPA2 or WPA3 encryption are the best options.
- Guest Network: Consider setting up a guest network for visitors.
10. Boost Your Signal: Wi-Fi Extenders & Mesh Networks
If you have a large home or consistently experience dead zones, consider these options:
- Wi-Fi Extenders: These amplify your existing Wi-Fi signal, extending its reach.
- Mesh Networks: These systems use multiple access points to create a seamless Wi-Fi network throughout your home.
11. Diagnose Your Speed: Testing Your Internet Connection
Knowing your internet speed is vital. Use online speed tests (like Speedtest by Ookla) to assess your bandwidth.
- Compare to Your Plan: Does your speed match what you're paying for?
- Test at Different Times: Network congestion can fluctuate throughout the day.
12. Laptop Hardware Check: Is Your Wi-Fi Card the Problem?
In rare instances, the Wi-Fi card in your laptop might be faulty.
- Troubleshooting: Try all the above tips first.
- Technical Support: If the issues persist, consult a computer technician.
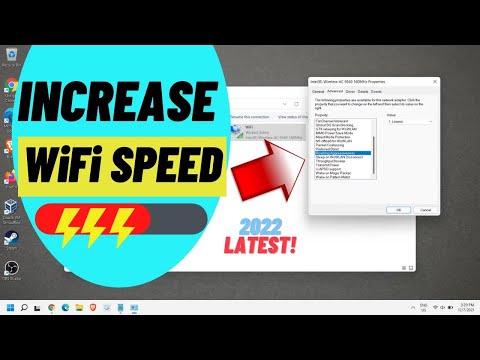
13. The Power User’s Touch: Network Adapter Settings Tweaks
For the advanced users, some adjustments in your network adapter settings may help:
- Check Power Management: Prevent your computer from disabling the adapter.
- Update Drivers: Ensure your drivers are updated.
14. The Psychological Factor: Managing Your Expectations
Let's be real: the internet can be gloriously fast, and sometimes, it can be agonizingly slow. Manage your expectations.
- Be Realistic: Understand that speeds can vary depending on the time of day and network congestion.
- Patience Is a Virtue: Try not to get overly frustrated.
15. Embrace the Speed: Your Wi-Fi Nirvana
Now that you've armed yourself with these tips and tricks, you’re ready to reclaim your Wi-Fi sanity. It's like finally being able to enjoy a perfectly brewed cup of coffee – the small things in life that make a big difference.
The Closing Thought
Wi-Fi woes are no match for the power of knowledge and a little digital magic, which usually comes from the simple trick involving Airplane Mode and a good understanding of your laptop’s connection. Implementing these strategies can significantly improve your laptop’s Wi-Fi and enhance your overall online experience. So ditch the frustration, embrace the speed, and get back to doing what you love – without the buffering, the dropped calls, or the endless loading screens. Now, go forth and conquer the digital world, one speedy Wi-Fi connection at a time!
Frequently Asked Questions (FAQs)
1. Why does the Airplane Mode trick work for my laptop Wi-Fi?
Turning Airplane Mode on and off acts as a mini-reboot for your Wi-Fi adapter. It clears out any temporary glitches or conflicts, allowing your laptop to reconnect to your Wi-Fi
WiFi Connected, But NO Internet? (Windows 7 EMERGENCY Fix!)Make Your Laptop's Wifi Signal Faster On Windows 1087 Tutorial

By MDTechVideos Make Your Laptop's Wifi Signal Faster On Windows 1087 Tutorial by MDTechVideos
Best Way To Improve Wi-Fi Connection On PCLaptop 2022
By EasyTechGeek Best Way To Improve Wi-Fi Connection On PCLaptop 2022 by EasyTechGeek
Unusual Low WiFi Signal Problem On HP Laptop Windows 10

By Laiju RK Unusual Low WiFi Signal Problem On HP Laptop Windows 10 by Laiju RK

Title: Make WiFi Range Extender antenna Mobile wifi antenna increase wifi signal
Channel: Smrity Computer
Make WiFi Range Extender antenna Mobile wifi antenna increase wifi signal by Smrity Computer
My Laptop Work
Here’s the article:
Laptop WiFi Nightmare? This ONE Trick Fixes EVERYTHING!
Is your laptop's WiFi a constant source of frustration? Does the promise of seamless internet connectivity dissolve into buffering videos, dropped connections, and agonizingly slow download speeds? You're not alone. Millions of laptop users grapple with WiFi woes daily. But what if we told you there’s a surprisingly simple solution that often eliminates these problems entirely? We’re not talking about complex network configurations or expensive hardware upgrades. We're talking about a fundamental shift in your approach to how your laptop interacts with your WiFi network. Prepare to bid farewell to WiFi-related headaches.
Understanding The Root of the Problem: Interference is King
Before revealing the “one trick,” we must first understand the enemy: interference. Your laptop's WiFi signal, like any radio frequency, operates within a specific band. This band, particularly the crowded 2.4 GHz band, is a digital battlefield. Numerous devices vie for dominance, including microwave ovens, Bluetooth devices, other WiFi networks, and even certain baby monitors. Each emits radio waves – often on the same frequencies as your laptop’s WiFi – and this electromagnetic "noise" disrupts your signal, leading to the problems you undoubtedly feel. This interference manifests as reduced signal strength, dropped packets, and, ultimately, a sluggish, unreliable internet connection. The more interference, the slower your connection. The more congested your airspace, the poorer your performance.
The One Trick: Optimizing Your WiFi Channel for Maximum Performance
The solution to this WiFi nightmare often lies, surprisingly, in tweaking your WiFi channel selection. Most WiFi routers operate on several channels within the 2.4 GHz and 5 GHz bands. Think of these channels like lanes on a highway. If your network is on the same channel as numerous other networks, or as devices that generate interference, you’re experiencing digital traffic jams. The “one trick” is to identify the least congested channel and switch your router to it. This seemingly simple adjustment can dramatically improve your WiFi performance. The rationale behind this is to seek those digital highways with the least traffic to ensure smooth and speedy data transfer.
Step-by-Step Guide to Channel Optimization: A Practical Approach
Let's walk through, step-by-step, how to implement this “one trick” and banish your WiFi woes.
Step 1: Identify Your Router's IP Address: To access your router's settings, you'll need its IP address. This is typically found on a sticker on the router itself, in your router’s manual, or, for Windows users, by typing "cmd" in the search bar, opening the Command Prompt, typing “ipconfig,” and looking for "Default Gateway." MacOS users can find it by going to System Preferences > Network > (Select your WiFi connection) > Advanced > TCP/IP and looking for "Router."
Step 2: Access Your Router's Administrator Panel: Open a web browser (Chrome, Firefox, Safari, etc.) and type your router's IP address into the address bar. You'll be prompted for your username and password. These are usually found on the router itself or in the manual. Common default usernames and passwords include "admin" / "password," or "admin" / (blank). Remember that if you cannot log in, you'll need to consult your router's manual, or contact your internet service provider to find the correct credentials for your specific router model.
Step 3: Navigate to Wireless Settings: Once logged in, look for a section labeled "Wireless," "WiFi," "Wireless Settings," or something similar. The exact wording and layout vary by router manufacturer.
Step 4: Select Your WiFi Band: In the wireless settings, you’ll typically see options for your 2.4 GHz and 5 GHz bands. The choice depends on your laptop and router capabilities. The 2.4 GHz band has a further reach, but is more prone to interference and congestion. The 5 GHz band has better speeds and less congestion, but a shorter range.
Step 5: Analyzing the Environment: Finding the Best Channel: The most important step! Before changing the channel, it's ideal to assess your environment. Some routers offer a built-in "site survey" or a similar feature that scans for other WiFi networks and identifies the channels they're using. If your router doesn't have this, you’ll need a third-party tool.
- For Windows: Download a free WiFi analyzer app like "WiFi Analyzer" from the Microsoft Store. Install the app, launch it, and it will display a visual representation of the WiFi channels in your area, along with data indicating the signal strength of each network. Look for the channels with the least activity; essentially, those with the fewest other networks broadcasting on them.
- For MacOS: Use the built-in "Wireless Diagnostics" tool. Hold down the Option key while clicking the WiFi icon in the menu bar, and then select "Open Wireless Diagnostics." Within the Wireless Diagnostics app, select "Scan." This will provide a list of nearby networks and their respective channels. Choose the channel with the least amount of overlap with other networks.
Step 6: Changing the Channel: Based on your analysis, choose the least congested channel for your 2.4 GHz or 5 GHz WiFi band. Return to your router's wireless settings and select the channel you identified as the least congested. Common channels within the 2.4 GHz band are channels 1, 6, and 11, as they have minimal overlap. When using 5GHz, the channel selection is a bit more complex, as different countries have different rules. Generally, channels between 36-48 and 149-165 are recommended, but consider that other networks will probably also use these channels. Therefore, try to identify those with the fewest overlapping networks.
Step 7: Save Your Settings and Reboot Router: After selecting your new channel, save your router settings. Your router will likely prompt you to reboot to apply the changes. Allow the router to restart completely.
Step 8: Test Your Connection: Once your router is back online, reconnect your laptop to your WiFi network. Test your internet speed using a speed test website to see if performance has improved. Sites like Speedtest.net or Fast.com are great resources.
Beyond Channel Selection: Additional WiFi-Boosting Strategies
While channel optimization is often the silver bullet, there are other strategies to further enhance your WiFi experience:
Router Placement: The physical location of your router significantly impacts signal strength and coverage. Place your router in a central, elevated location away from obstructions like walls, metal objects, and appliances that can interfere with radio waves. Experiment with different placements to find the optimal spot.
Router Firmware Updates: Router manufacturers regularly release firmware updates that can improve performance and fix security vulnerabilities. Check your router's administrative panel for options.
Upgrade Your Router: If you're still struggling with poor WiFi performance despite channel optimization and other measures, it might be time to upgrade your router. Newer routers, particularly those supporting the latest WiFi standards (like Wi-Fi 6 or Wi-Fi 6E), offer improved speeds, better range, and enhanced handling of multiple connected devices.
Consider a WiFi Extender or Mesh Network: In larger homes or areas with poor signal coverage, a WiFi extender or mesh network can help expand your WiFi range. Extenders repeat the WiFi signal, while mesh networks create a more seamless, interconnected network throughout your home.
Troubleshooting Common WiFi Problems: A Quick Guide
Even after implementing the "one trick," you might encounter occasional WiFi problems. Here's a quick guide to troubleshooting common issues:
Slow Speeds: Restart your router and modem. Make sure there are no bottlenecks on your internet connection. Run a speed test to confirm your connection speed. Optimize WiFi channels (as described above). Ensure your laptop's WiFi adapter drivers are up-to-date.
Dropped Connections: Check for physical obstructions near your router, or the laptop itself. If you’re using a 2.4 GHz network, consider switching to the 5 GHz band if your laptop and router support it. Reduce the number of devices connected to the WiFi network simultaneously.
Weak Signal Strength: Move your laptop closer to the router. Relocate the router to a more central, elevated location. Verify that your router antenna is properly positioned. Consider a WiFi extender or mesh network.
Interference: Ensure your router is away from other electronics (microwave ovens, Bluetooth devices). Choose a less congested WiFi channel.
The Final Word: Embrace the Power of Optimization
Your laptop's WiFi experience doesn't need to be a daily struggle. By focusing on channel optimization, you can significantly improve your connection's stability, speed, and overall reliability. Now go forth and conquer your WiFi woes!
