how to connect new laptop to wifi

Title: Windows laptop not connecting to Wi-Fi Method 1 shorts windows laptop wifi fix
Channel: Tuto2Info Videos
Windows laptop not connecting to Wi-Fi Method 1 shorts windows laptop wifi fix by Tuto2Info Videos
how to connect new laptop to wifi, how to connect new laptop to internet, how to connect laptop to wifi, how to connect laptop to wifi using qr code, how to connect laptop to wifi hotspot, how to connect laptop to wifi router, how to connect laptop to wifi without password, how to connect laptop to wifi without cable, how to connect laptop to wifi using wps windows 11, how to connect laptop to wifi windows 10
Laptop WiFi SOS! Connect Your New Laptop in 60 Seconds!
Laptop WiFi Woes? Conquer Connection Concerns in a Flash!
So, you've got a brand-new laptop. Congratulations! It's a gleaming testament to technological advancement. You eagerly anticipate seamless browsing, streaming, and connecting. Then, the dreaded prompt appears: "No internet connection." Panic sets in. Don’t despair! Connecting your laptop to Wi-Fi shouldn’t be a Herculean task. In fact, it is easily achievable. You can be online in under a minute.
Spotting the Signal: The Wi-Fi Beacon
First things first: locate your Wi-Fi icon. It typically resides in the lower-right corner of your screen. It usually resembles curved bars. If you see an "X" on the icon, you’re disconnected. Therefore, you need to address this immediately. A red "X" often indicates a problem. However, don’t fret. It is a simple fix. Click that icon! Windows (or your operating system) will scan for available networks. It automatically displays a list.
Unveiling the Network Landscape: Your Wi-Fi Options
A list of Wi-Fi networks will magically appear. You’ll see your network (hopefully with a strong signal). You’ll also likely see networks from neighbors. Perhaps even a few open, unsecured ones! Carefully choose your home network. Make sure you are selecting the correct name. Double-check the spelling! Mistakes are easily made. It can prevent connection.
The Password Perplexity: Entering the Gateway
Now for the crucial step: entering your Wi-Fi password. You'll need to know it. Otherwise, you won’t connect. This is your digital key to the internet. Your router's paperwork contains it. Your internet service provider (ISP) will also have it. Make sure the "Caps Lock" key isn't on! Passwords are case-sensitive. Typographical errors are common. So, proofread thoroughly!
The Encryption Enigma: Security Protocols
Your laptop will probably ask about security protocols. This is a less common prompt. However, it's important to understand. These protocols protect your connection. They encrypt data that’s sent and received. Generally, you won’t have to change anything here. Typically, the default setting is correct. It will usually be WPA2 or WPA3. You should be fine.
Troubleshooting Troubles: When Things Go Awry
What if you've typed the password correctly, but still no connection? Don't give up yet! First, double-check the password. Is there a typo? Next, consider restarting both your laptop and your router. This can often clear up a temporary glitch. Sometimes, a simple reboot does the trick. So, it is worth a try. Also, move closer to your router. Weak signals are a real connection killer.
Driver Dilemmas and Hardware Headaches
If the above steps fail, it’s time to investigate further. The reason for the persistent issue requires attention. Your Wi-Fi adapter might need a driver update. Drivers are like the translator. They convert data for your hardware. Go to your PC manufacturer’s website. Enter your laptop model. Then, download the latest Wi-Fi drivers. You could also have a hardware malfunction. In that case, professional help is usually needed.
The Airplane Mode Assassin: A Hidden Hazard
One often-overlooked culprit is Airplane Mode. This feature disables all wireless connections. Thus, it prevents Wi-Fi and Bluetooth. Make certain Airplane Mode is off. Check your taskbar or action center. It's a simple fix. So, you can resolve it swiftly.
Securing Your Digital Realm: Cybersecurity Considerations
Once you’re connected, think about security. Use a strong, unique password. Change it periodically. Consider using a VPN (Virtual Private Network). This increases your privacy. It encrypts your internet traffic. Also, keep your operating system and security software updated. This protects you from malware. This is a vital step.
The Reward of Connectivity: Surfing the Digital Waves
Congratulations! You're now connected to Wi-fi. You can now start browsing, streaming, conducting research, or simply enjoying the vast expanse of the internet. But before you dive in headfirst, take a moment to appreciate the power of connectivity. You can now access information, communicate with others, and explore the world at your fingertips. So, enjoy your new Wi-Fi enabled experience!
Laptop Freedom: Offline Power Unleashed!Laptop WiFi SOS! Connect Your New Laptop in 60 Seconds!
Ever felt that sinking feeling? You unbox your shiny new laptop, brimming with anticipation, only to be met with… nothing. No internet. No glorious welcome screen. Just the dreaded WiFi SOS. Trust me, we've all been there. It's the digital equivalent of being stranded on a desert island, except instead of palm trees, you’re surrounded by blinking cursors and error messages. But fear not, fellow digital explorers! This isn't a tech apocalypse; it's a minor speed bump on the road to wireless connectivity. Today, we're going to banish those WiFi woes and get your laptop online in, well, let's say around 60 seconds (depending on your router's cooperation, of course!).
1. The Initial Panic: Recognizing the WiFi Emergency
First things first: breathe. The fact that your laptop isn't connecting doesn't mean it's broken. More often than not, it’s a simple fix. Think of it like a faulty lightbulb – frustrating, but easily replaceable. The first sign of trouble? No internet. That little WiFi icon in the corner of your screen, usually a beacon of connectivity, will likely sport a red "X" or a sad little globe with a warning sign. This is your official WiFi SOS! Acknowledge it, accept it, and then, let's tackle it.
2. The Router's Role: Why Your Internet Might Be the Culprit
Before we start blaming the laptop (though sometimes, let's be honest, it deserves the blame), let's consider the unsung hero of our digital lives: the router. Think of your router as the gatekeeper to the internet kingdom. If the gatekeeper is grumpy (or, you know, malfunctioning), nobody gets in. Is everything else connected in your house? Phones? Tablets? Smart TVs? If they can't connect either, the problem likely lies with the router. Time for a reboot! Unplug it, wait 30 seconds (the recommended "reboot wait time"), and plug it back in. This simple reset can often solve the most stubborn issues. It's like the digital version of pressing the "reset" button on your life.
3. Checking the Obvious: Hardware Switches and Airplane Mode
Okay, so your router's fine. Now, let's double-check the basics. Is your laptop's WiFi switch turned on? This is usually a physical switch located on the side or front of your laptop, or a function key combination (like Fn + F2). It might seem silly, but it's amazing how often this gets overlooked! Then, let's investigate the dreaded Airplane Mode. It looks like an airplane on your screen and cleverly disables all wireless communication. Make sure it's off. It’s typically in your quick settings bar (the little notification area in the bottom right corner of your screen).
4. The Software Side: Ensuring the WiFi Driver Isn't Missing
This is where things get a little… techier, yet still manageable. Think of your WiFi driver as the translator that lets your laptop speak the language of the internet. If that translator is missing or corrupted, your laptop is mute. Don't worry; we can often get it speaking again. Here's how:
- Windows: Right-click the Start button and select "Device Manager." Look for "Network adapters." If you see a yellow triangle next to your WiFi adapter, you've got a driver issue. Right-click the adapter and select "Update driver." Windows might find and install the necessary driver automatically.
- Mac: Click the Apple menu in the top left and go to "System Preferences" (or "System Settings" on newer macOS versions). Then, click "Network." Check the list on the left for your WiFi connection. If it's missing, you might need to add it.
5. Finding the WiFi Network: The Art of Discovery
Assuming your driver is happy, let's hunt for your network. Click the WiFi icon in the corner of your screen. A list of available networks should pop up, much like a menu at your favorite restaurant. Look for your network name (SSID). Click it and enter your password. And boom! You're (hopefully) connected!
6. The Password Paradox: Dealing with Mismatched Keys
Ah, the password. The bane of our existence. Double-check that you're entering it correctly. Capitalization matters! Make sure "Caps Lock" isn't on. If you're still having trouble, try temporarily disabling password protection on your router (though this isn't recommended for long-term security - it's to test if the password itself is the issue). This is like trying a different key to see if it unlocks the door.
7. Troubleshooting Tips: When Things Get a Little Sticky
Sometimes, despite our best efforts, things get a bit… stubborn. Here are a few troubleshooting tips:
- Forget the Network: On both Windows and Mac, you can "forget" the network and reconnect from scratch. This can sometimes reset any lingering connection issues.
- Restart Your Laptop: The classic IT support trick. It works shockingly often.
- Move Closer to the Router: Walls and distance can weaken the WiFi signal. Move closer to your router to see if the signal strengthens. It’s like whispering into someone’s ear – the closer you are, the easier it is to hear.
8. The Hidden Network Hurdle: Dealing with Security Flaws
Some networks hide their names for added security. If you know your network is there but can't see it, you might need to manually add it. Go to your WiFi settings and look for an option to "Join a hidden network" or "Add a network." You'll need to enter your network name (SSID) and security type. Consult your router's documentation for the exact settings.
9. IP Address Investigation: Diving Deep into the Digital Waters
In some rare cases, there could be an issue with the IP address assigned to your laptop. This is a more technical topic, but you can try releasing and renewing your IP address. On Windows, open the Command Prompt (search for "cmd" in the start menu) and type ipconfig /release followed by ipconfig /renew. On a Mac, go to "System Preferences" > "Network," select your WiFi connection, and click "Advanced." Then go to the TCP/IP tab and click "Renew DHCP Lease".
10. The Ultimate Test: Speed Tests and Signal Strength
Once you're connected, how fast is it? Run a speed test (search "speed test" online) to check your download and upload speeds. Also, check the signal strength icon in the corner of your screen. It's a good indicator of signal quality. A weak signal might mean slow internet or frequent disconnections.
11. Laptop WiFi SOS: Advanced Solutions for Persistent Problems
If all else fails and you're still struggling, you might need to delve into more advanced solutions, like:
- Resetting Network Settings: On Windows, you can reset your network settings in the Network settings menu. This is like hitting the "factory reset" button for your WiFi configuration.
- Contacting Your Internet Provider: If the problem persists and other devices are also affected, it's time to call the experts. Your internet service provider (ISP) can help diagnose and fix problems with your internet connection. Think of them as the digital paramedics.
12. Avoiding Future WiFi Problems: The Proactive Approach
Prevention is key! Here are a few tips to keep your WiFi connection strong:
- Keep Your Router Updated: Router firmware updates often include security patches and performance improvements.
- Position Your Router Strategically: Place your router in a central location, away from walls and obstructions.
- Secure Your Network: Change your router's default password and use a strong password for your WiFi.
13. The Power of Ethernet: As a Backup Plan
If all else fails, consider using an Ethernet cable for a wired connection. It's the most reliable way to connect to the internet, especially for important tasks. It’s the digital equivalent of having a backup parachute.
14. When to Call for Help: Knowing When to Seek Assistance
Don't be afraid to ask for help! If you've tried everything and are still stumped, it's time to call in the reinforcements. A local computer repair shop or a tech-savvy friend can often diagnose and fix the problem quickly.
15. Celebrating Success: The Sweet Taste of Wireless Liberation
You did it! You conquered the WiFi SOS! You're now connected to the digital world, ready to browse, stream, and connect. Take a moment to celebrate your victory. You deserve it! You are now a WiFi wizard.
In Conclusion:
Connecting your new laptop to WiFi is a common hurdle, but with these steps, you can troubleshoot the issue and regain your digital freedom. The key is to stay calm, methodical, and persistent. Remember, most problems are easily solved, and a little troubleshooting goes a long way. The internet is your oyster. Go forth and explore!
FAQs:
1. My laptop connects to other networks but not mine. What's wrong?
The problem is likely with your home network settings. Check your router's password, the network's security settings
HP Pavilion WiFi Fix: Get Online NOW!How to connect your Laptop to Wifi
By Wanstor How to connect your Laptop to Wifi by Wanstor
SOLVED WiFi Not Showing in Settings On Windows 10 Missing WiFi Fix

By ITGuy360 SOLVED WiFi Not Showing in Settings On Windows 10 Missing WiFi Fix by ITGuy360
Fix WiFi Not Showing in Settings On Windows 10 Fix Missing WiFi 2025

By Sandeep Singh Fix WiFi Not Showing in Settings On Windows 10 Fix Missing WiFi 2025 by Sandeep Singh

Title: Fix HP Laptop Wi-Fi is Not Working Problem in Windows 1087
Channel: FIXsage
Fix HP Laptop Wi-Fi is Not Working Problem in Windows 1087 by FIXsage
Change Wifi Settings
Laptop WiFi SOS! Connect Your New Laptop in 60 Seconds!
The gleaming facade of a new laptop. The allure of instantaneous information. Yet, the initial thrill can quickly sour into frustration when the WiFi refuses to cooperate. We understand the urgency, the desperate need to connect. We’ve all been there, staring at a blinking connection icon, feeling adrift in a sea of potential. Fear not! We've crafted the ultimate, comprehensive guide to conquering the WiFi connection on your new laptop, ensuring you're online and maximizing your laptop’s potential in under a minute. Let’s banish those connection woes and get you connected, fast.
Step 1: The Initial Scan – Locating Your Wireless Network
The first, often overlooked, step is the simplest: the initial scan. Your laptop, armed with its internal WiFi adapter, actively searches for available wireless networks. Think of it as casting a net into the digital sea, hoping to snag a connection.
- Locating the WiFi Icon: Typically located in the system tray (bottom right corner of your screen, near the clock), the WiFi icon is a visual representation of your connection status. It often resembles a series of curved lines emanating from a central point, similar to a radio signal. A gray or white icon usually indicates that you are not connected. The lines filling up indicates stronger connection.
- Clicking the Icon: Click the WiFi icon. A window or flyout will appear, displaying a list of available wireless networks within range. This list also includes networks you have connected to in the past. This display is an instant snapshot of the wireless landscape around you.
- Identifying Your Network: Scroll through this list. Look for the name of your home wireless network. This name, often referred to as the Service Set Identifier (SSID), is the unique label your router uses to identify itself. Your network’s SSID may be custom, or it may be the default provided by your internet service provider.
- If You Can't See Your Network: Should your home network not appear, consider the following quick checks:
- Router Power: Ensure your router is powered on and functioning. A simple power cycle (unplugging it, waiting 30 seconds, and plugging it back in) can often resolve temporary glitches.
- Router Visibility: Some routers have a setting to hide their SSID. Check your router's configuration (usually accessed through your web browser by typing the router's IP address - see your router's manual for details) to ensure SSID broadcasting is enabled.
- Distance Matters: Proximity to the router significantly impacts signal strength. Move closer to it to see if your network appears in the scan.
- Interference: Wireless signals compete for space. Nearby devices such as microwaves, cordless phones, and even other WiFi routers can cause interference. Try moving your laptop to a different location.
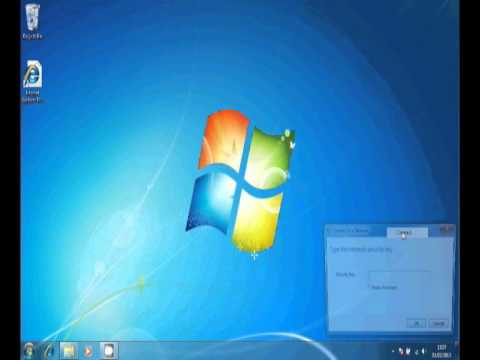
Step 2: Entering the Password – Your Digital Key
Having identified your network, the next step is to enter the password – your digital key to unlocking the internet. This is a critical security measure safeguarding your network.
- Selecting Your Network: Once you've located your network in the list, click on its name. This action initiates the connection process.
- Password Prompt: A prompt will appear, requiring you to enter the network security key. This password, also known as the "network security key" or "passphrase," is a string of characters that protects your network from unauthorized access.
- Locating Your Password: Where do you find this elusive key?
- Router Label: Most routers have the password printed on a sticker. Look on the bottom or side of your router. Sometimes, the password is the same as the router’s default username.
- Router Configuration: If you’ve customized the password, revisit your router's configuration (again, check your router manual for instructions). The wireless security settings will display your current password.
- Previous Device: If you've connected other devices to this network, such as your phone or tablet, the password may be saved in their settings. You can retrieve it from there.
- Entering the Password Carefully: Type the password accurately. Pay close attention to capitalization, numbers, and special characters. One wrong character will prevent you from connecting. Consider using the "show password" option (usually a checkbox) to verify you've entered the correct information.
- Password Incorrect Errors: If you receive an "incorrect password" error, double-check the password. Go back, confirm the characters, and try again. Case sensitivity is an extremely common error.
Step 3: The Connection Process – Establishing the Link
Having entered the correct password, your laptop will initiate the connection process. This is the exciting moment.
Initiating the Connection: After entering the password, click "Connect" or "OK." Your laptop's WiFi adapter will begin communicating with your router.
Waiting for Connection: A progress indicator, such as a rotating circle or a status message, will appear. This indicates that your laptop is attempting to establish a connection. The time this takes can vary depending on network conditions.
Successful Connection: If the process is successful, the WiFi icon in your system tray will change. The signal strength indicator will show filled bars, and you'll likely see a notification confirming the connection. A web browser, such as Chrome, Microsoft Edge, or Firefox, can immediately be launched to test if a connection has established.
Common Connection Errors and Troubleshooting: Encountering problems? Fear not!
- "Unable to Connect to Network": Try restarting your laptop and the wireless router. Then, repeat.
- "Limited Connectivity": This indicates your laptop can connect to the network, but not access the internet. Check your router's internet connection (does it have an internet light and is it on?).
- Driver Issues: Outdated or corrupted network adapter drivers can cause connection problems. Go to Device Manager (search in Windows search bar) to update the drivers (look for Network adapters).
- IP Address Conflicts: Rarely, your laptop's IP address might conflict with another device on the network. Restarting your router and laptop usually resolves this.
- Firewall Interference: Your laptop's firewall might be blocking the connection. Temporarily disable your firewall (with caution) to test.
Step 4: Advanced Troubleshooting – Beyond the Basics
If you’ve followed the steps above and are still struggling to connect, more advanced troubleshooting techniques may be required.
- Network Adapter Reset: Your laptop’s network adapter is a piece of hardware that can sometimes act up. Resetting it can resolve many connection problems.
- Windows: Go to Settings > Network & Internet > Status. Click "Network reset." This process restarts your network settings to their defaults.
- Mac: Open System Preferences and click Network. Select your Wi-Fi connection and click "Advanced." In the TCP/IP tab, click "Renew DHCP Lease."
- Check for Wireless Interference: As mentioned earlier, wireless signals can be easily disrupted by other devices operating on the same frequency. Test the connection by using a different device or by temporarily disabling other devices with WiFi.
- Changing Wireless Channel: Your router broadcasts on a specific wireless channel. Sometimes, a congested channel can lead to connection issues. Access your router's configuration settings (through your web browser) and try changing the wireless channel to a less crowded one.
- Factory Reset: As a last resort, you can factory reset your router. This eliminates custom settings and returns the router to its default configuration, which can sometimes fix underlying issues. Consult your router's manual for factory reset instructions. Be aware that you will need to reconfigure your router settings afterwards.
- Contacting Your ISP (Internet Service Provider): If all else fails, contact your ISP. They can provide advanced diagnostics and often identify and resolve service-related problems.
Step 5: Maximizing Your WiFi Experience – Performance Enhancements
Getting connected is just the first step. Let’s dive into some tips to make your WiFi experience smooth and optimized.
- Signal Strength is Key: A strong WiFi signal means faster speeds and fewer dropouts.
- Placement Matters: Position your router in a central location in your home, away from walls and obstructions.
- Antenna Positioning: If your router has external antennas, experiment with their positioning. Vertical antennas provide better coverage for devices on the same floor, while angled antennas help with multi-floor coverage.
- Update Your Router Firmware: Router manufacturers frequently release firmware updates that improve performance, fix bugs, and enhance security. Check your router's configuration to see if an update is available.
- Use a Strong Password: Protect your network with a strong password, using a combination of upper and lowercase letters, numbers, and symbols.
- Identify and Eliminate Wireless Interference: Remove any sources of interference, or position your devices to minimize interference.
- Upgrade Your Hardware: If you frequently experience slow speeds or frequent dropouts, consider upgrading your router to a newer model that supports the latest WiFi standards (like Wi-Fi 6 or Wi-Fi 6E).
- Monitor Your Bandwidth Usage: Streaming videos and online gaming activities consume significant bandwidth. To ensure smooth performance, consider monitoring your network usage or setting data limits to prevent your connection from being oversaturated.
Conclusion: Connecting with Confidence
Connecting your new laptop to WiFi should be a fast
