cách mở wifi trên laptop dell

Title: Dell Latitude E 5470 Series Laptop Wifi Ethernet Not Working Problemmacniteshkeyboardtricks2024
Channel: Mac Nitesh
Dell Latitude E 5470 Series Laptop Wifi Ethernet Not Working Problemmacniteshkeyboardtricks2024 by Mac Nitesh
Unlock Your Dell Laptop's WiFi: The Secret Trick Nobody Tells You!
Unveiling the Hidden WiFi Powerhouse: Your Dell Laptop's Secret
Alright, let's dive in! Dell laptops, they're everywhere. They're reliable workhorses. Yet, sometimes, WiFi can feel like a cryptic puzzle. You've likely encountered weak signals. Maybe connections drop at the worst times. However, there's a hidden trick lurking within your Dell. It's a game-changer nobody seems to talk about. Are you ready to discover it?
The Silent Struggle: Common WiFi Woes
We've all been there. You're in a crucial video call. Or you're downloading a vital file. Suddenly, the dreaded WiFi symbol disappears. The connection vanishes. This frustrating scenario is more common than you think. Consequently, many users blame their internet provider. They might even point fingers at their router. But, often, the issue lies within the laptop itself. The truth? Dell laptops can sometimes underperform. This is especially true in the WiFi department. The factory settings, however, aren't always optimal.
Unmasking the Culprit: Hidden WiFi Settings
So, what's the secret? It’s a bit technical. Thankfully, it's also incredibly simple to implement. The solution resides in your Dell laptop's network adapter settings. These settings often hide specific tweaks. They can dramatically improve your WiFi performance. Also, these settings are usually overlooked. Most users never venture into this territory. As a result, they miss out on major WiFi improvements. You're about to change that. Prepare to unlock your laptop's true potential.
Step-by-Step: The WiFi Enhancement Guide
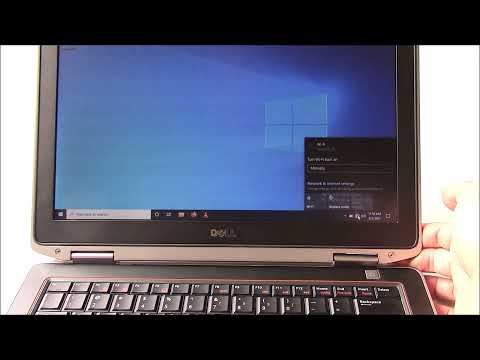
First things first, locate your network adapter. You need to access your device manager. You can do this in a few ways. You can search for "Device Manager" in the Windows search bar. Alternatively, right-click the Windows start button. Then select "Device Manager" from the menu. Once the Device Manager opens, expand the "Network adapters" section. You will find your WiFi adapter listed here.
Next, right-click on your WiFi adapter. Choose "Properties" from the context menu. A new window will open. Click on the "Advanced" tab. Then you'll see a list of settings. This is where the magic happens. Now, let's adjust some key configurations.
Optimizing Your Dell's WiFi: Key Settings to Adjust
Here’s where we go granular. You might see different options depending on your adapter. But, the key settings are typically available.
- 802.11n/ac/ax Wireless Mode: This setting controls the WiFi standard. Choose the highest standard your router supports. For most modern routers, select "802.11ac" or "802.11ax". This ensures maximum speed and range.
- Band Preference: If your router supports both 2.4 GHz and 5 GHz bands, choose "Prefer 5 GHz". The 5 GHz band offers faster speeds. It also experiences less interference.
- Transmit Power: Set this to the "Highest" or "5. Highest" setting. This boosts your laptop's signal strength. Therefore, range and performance will increase.
- Wireless Mode (or similar): Select "Auto" or a mode that supports both "802.11ac" or "802.11ax". This allows the adapter to pick the best connection.
- Roaming Aggressiveness: Experiment with this setting. Increase the aggressiveness if you move around a lot. This will help your laptop stay connected.
The Fine-Tuning Phase: Testing and Iteration
After making these changes, click "OK." Close the Device Manager. Now, it's time to test! Connect to your WiFi network. Then, browse the internet. Download a file. Run a speed test. Observe the performance. Is it better? If so, great! However, if you don't see improvements, don't worry.
You can always return to the settings. Try different values. Experiment. Sometimes, tweaking these settings takes a bit of trial and error. For example, try lowering transmit power. This can potentially improve stability. Also, consider the environment. Walls, distance, and interference all play a role. So, adjust the settings accordingly to your surroundings.
Beyond the Basics: Additional WiFi Troubleshooting Tips
Furthermore, there are other factors besides settings. They can affect your WiFi performance.
- Update Drivers: Ensure your WiFi adapter drivers are up-to-date. Outdated drivers can cause problems. Visit the Dell support website. Download and install the latest drivers for your laptop model.
- Router Placement: Your router's location matters. Place it in a central, open area. Avoid obstacles like walls and metal objects. These items can interfere with the signal.
- Router Reboot: A simple reboot can often solve WiFi issues. Unplug your router for 30 seconds. Then, plug it back in. Restart your Dell laptop as well.
- Check for Interference: Other electronic devices can interfere with WiFi. Microwaves, cordless phones, and Bluetooth devices can cause issues. Try to minimize interference.
Reaping the Rewards: Unleashing WiFi Freedom
By utilizing these steps, you are now equipped. You can transform your Dell laptop's WiFi. Say goodbye to frustrating drops. Embrace blazing-fast speeds. You will experience more reliable connectivity. This hidden trick really works. It's a simple yet powerful solution.
As a matter of fact, you can get more done. Streaming will become smoother. Downloads will be faster. Then, the only thing left is to enjoy your improved WiFi. Finally. Don't keep this secret to yourself! You can share this guide with friends. They will thank you.
ASUS Laptop WiFi Connection: The SHOCKINGLY Easy Fix!Unlock Your Dell Laptop's WiFi: The Secret Trick Nobody Tells You!
Hey there, fellow tech adventurers! Ever found yourself staring at your Dell laptop, yearning for the sweet embrace of the internet, only to be met with the dreaded "No internet connection" message, or worse, a mysteriously absent WiFi signal? We've all been there, right? I remember countless times, especially right before a big deadline or a crucial online meeting. You're frantically clicking, restarting, muttering under your breath… and still, nothing. Well, buckle up, because we're about to dive deep into the rabbit hole and discover the secret weapon that can unlock your Dell laptop's WiFi and banish those frustrating connectivity woes for good. This isn't just about fixing your WiFi; it's about reclaiming your digital life and your precious time!
1. The WiFi Woes: A Common Dell Laptop Conundrum.
Let's face it; Dell laptops are fantastic machines, but even the best technology can have its quirks. One of the most common headaches, and trust me, I've experienced it firsthand, is the intermittent or absent WiFi connection. This can be due to a multitude of reasons: outdated drivers, a finicky network card, hidden software conflicts, or even a simple, easily overlooked hardware switch. We'll get into all of these, but the good news is, fixing it is often easier than you think. It’s like finding that missing puzzle piece – once you have it, everything clicks into place.
2. Before We Begin: Troubleshooting 101. (The Obvious Checklist)
Before we unleash the secret trick, let's quickly run through some basic troubleshooting steps. Think of it like checking the fuel before a long road trip.
- Check the Physical Switch: Some Dell laptops have a physical switch on the side or front that disables the WiFi. Silly as it sounds, it's caught me out more than once! Make sure it's toggled on.
- Airplane Mode: Ensure Airplane mode is off. It’s the modern-day equivalent of the "Do Not Disturb" sign for your internet.
- Restart Your Laptop AND Router: The classic "turn it off and on again" routine. It really does work wonders sometimes, like a digital reset button.
- Check Your WiFi Password: Make sure you're entering the correct password. Typos happen to the best of us!
3. The Hidden Hardware Button! (The Secret Nobody Tells You!)
Alright, here’s the juicy part. Did you know that many – and I mean many – Dell laptops have a "hidden" hardware button combination that can instantly enable or disable the WiFi? Think of it as a secret handshake for your wireless connection. This often gets overlooked, but it’s surprisingly effective. It involves pressing the Fn key (usually located near the left Ctrl key) and a specific function key (F2, F3, or sometimes another key with a WiFi symbol on it). It often looks like an antenna icon. Experiment! Try different combinations. This action directly toggles the wireless adapter's power, forcing it to search for and connect to available networks. It is the digital version of shaking your laptop awake.
4. Digging Deeper: Driver Dysfunction and Deception.
If the secret handshake doesn’t work, let’s delve into the world of drivers. Drivers act as the translator between your laptop’s hardware (the WiFi card) and its software (the operating system). Corrupted, outdated, or simply wrong drivers can cripple your precious WiFi connection.
- Updating Drivers: The most straightforward approach. Go to Device Manager (search for it in the Windows search bar). Expand "Network adapters," right-click on your WiFi adapter, and select "Update driver." Let Windows search online for the latest versions.
- Manually Downloading Drivers: If Windows fails, head to Dell’s support website. Enter your service tag (usually found on the bottom of your laptop) to download the correct drivers specifically for your model. Think of it as the perfect personalized recipe for your laptop.
- Driver Rollback: If the problem started after a driver update, try rolling back to a previous version. Right-click on the driver in Device Manager, select "Properties," then go to the "Driver" tab and choose "Roll Back Driver."
5. Beyond Drivers: Antivirus and Firewall Interference.
Sometimes, the culprit isn't your WiFi card itself, but aggressive security software. Antivirus programs and firewalls can, on occasion, block your laptop from connecting to the internet, seeing the network as a potential threat.
- Temporarily Disable Your Antivirus: Disable your antivirus for a few minutes and see if your WiFi starts working. If it does, you’ll need to adjust the settings of your antivirus to allow unrestricted access to your network.
- Check Your Firewall Settings: Ensure your firewall isn't blocking the WiFi adapter. Allow your laptop to communicate on your private network.
6. Network Adapter Troubleshoot (The Built-In Fixer)
Windows has a built-in network troubleshooter. It’s like having a digital IT department just a click away. To run it, right-click the WiFi icon in the system tray (the little icons at the bottom right of your screen) and select "Troubleshoot problems." Let it diagnose and attempt to fix any issues.
7. The Power of Power Management (Don't Let Your Laptop Sleep!)
Sometimes, the issue isn't necessarily a driver problem, but your laptop's power management settings. These settings control how the WiFi adapter behaves when the laptop is idle or on battery power.
- Disable Power Saving: Go to Device Manager, expand "Network adapters," right-click on your WiFi adapter, select "Properties," and go to the "Power Management" tab. Uncheck the box that says, "Allow the computer to turn off this device to save power."
- Balanced Power Plan: Make sure your laptop is using the "Balanced" power plan. Access this by searching for "power plan" in the Windows search bar.
8. Network Reset: A Fresh Start For Your Connection.
If all else fails, a network reset is like hitting the reset button on your WiFi settings. This will reset your network adapters and settings to their default configurations.
- Go to Settings > Network & Internet > Advanced network settings > Network reset
- Click "Reset now." Your laptop will restart, and your network settings will be restored. You'll need to re-enter your WiFi password afterward.
9. Hardware Check: Is Your WiFi Card Alive?
Sometimes, the problem is physical. Although rare, the WiFi card in your laptop can malfunction. If you've tried everything and still have no WiFi, it may be time to consider getting the card checked. You might be looking at a replacement, but before panicking, consider getting a second opinion from a professional.
10. Router Rumble: Checking Your Gateway to the Internet.
Your internet connection isn't just about your laptop; your router plays a critical role. Before you get too wrapped up in your laptop, ensure your router is working correctly. Check if other devices can connect to the internet. If not, the problem lies with your router, not your Dell laptop. Try restarting your router (again!), and contact your internet service provider if the problem persists.
11. WiFi Network Configuration: The Hidden Settings.
Sometimes your laptop simply is not configured to receive the signal. You can configure the network settings to search for available signals.
- Network and Sharing Center: Open the control panel. Click on ‘Network and Sharing Center’. Under ‘View your active networks’, note the configuration and make adjustments.
- Search For Networks: Search for available networks and connect.
12. Dell's Support Assist: Your Built-In Helper.
Dell laptops often come with Dell Support Assist software. This handy tool can diagnose and fix common problems, and can often solve WiFi issues. It’s worth a shot! You can find it pre-installed on your laptop.
13. The Importance of Security (Your Personal Digital Fortress)
Make sure your WiFi network is secure. This is good advice any time, but if you are doing something in particular, keep your connection safe. Check the encryption setting of your WiFi network. Use WPA2 or WPA3 encryption. Choose a strong password, and update it regularly. Avoid using public WiFi networks for sensitive activities.
14. When to Call for Professional Help.
If you've tried all these steps, and you’re still staring at a blank WiFi symbol, it might be time to call in the professionals. A qualified technician can diagnose the problem and suggest a more permanent solution to keep your WiFi functioning.
15. The Final Flourish: Maintain, Monitor, and Maximize Your WiFi.
Once you've cracked the code and unlocked your Dell laptop's WiFi, it's essential to maintain your connection. Regularly update your drivers and keep your software updated. Monitor your connection speed and troubleshoot any issues as soon as they arise. Think of it like caring for a prized possession: a little love and attention will go a long way!
Conclusion: WiFi Victory!
And there you have it! We've navigated the rocky terrain of Dell laptop WiFi woes and emerged victorious! You now possess the secret weapon, the insider knowledge, the tricks of the trade, to conquer those frustrating connectivity problems. Remember, fixing your WiFi isn't
Laptop's WiFi Not Working? This Trick Connects You INSTANTLY!Solucion Wi-Fi De Mi Dell PC No Funciona 2025

By TechFixIT Solucion Wi-Fi De Mi Dell PC No Funciona 2025 by TechFixIT
Cara Memperbaiki Dan Menghidupkan Tidak Ada WiFi Di Komputer Laptop Dell Latitude
By DIY University Cara Memperbaiki Dan Menghidupkan Tidak Ada WiFi Di Komputer Laptop Dell Latitude by DIY University
CARA MENGHIDUPKAN WIFI DI LAPTOP DELL LATITUDE D630

By muhammad lutpi CARA MENGHIDUPKAN WIFI DI LAPTOP DELL LATITUDE D630 by muhammad lutpi

Title: Cara Menghubungkan Laptop DELL ke WIFI
Channel: WebPro Education
Cara Menghubungkan Laptop DELL ke WIFI by WebPro Education
My Laptop Work
Unlock Your Dell Laptop's WiFi: The Secret Trick Nobody Tells You!
Navigating the Digital Frontier: Ensuring Seamless WiFi on Your Dell Laptop
In today's interconnected world, a stable and reliable WiFi connection is no longer a luxury but a necessity. Whether you are a student attending virtual lectures, a professional conducting video conferences, or simply browsing the web, a functional WiFi connection is crucial. Dell laptops, renowned for their performance and versatility, are often the workhorses of modern computing. However, like any technological device, they can occasionally encounter WiFi connectivity issues. We understand the frustration of experiencing intermittent or non-existent WiFi, particularly when deadlines loom or critical information needs to be accessed. This guide is crafted to help you navigate through the often-complex world of WiFi troubleshooting, equipping you with the knowledge and tools to ensure a consistently strong wireless connection on your Dell laptop. We'll move beyond the typical surface-level solutions, delving into the more nuanced aspects of WiFi configuration and problem-solving, providing you with a toolkit that goes beyond the basics.
Understanding the Foundation: Verifying Your WiFi Hardware & Software
Before diving into advanced troubleshooting techniques, it's imperative to establish a solid foundation. This begins with verifying the fundamental components that facilitate WiFi connectivity on your Dell laptop: the wireless network adapter and its associated drivers. Your Dell laptop houses a dedicated wireless network adapter, the physical hardware responsible for transmitting and receiving WiFi signals. To ensure this hardware functions correctly, it’s essential to confirm its presence and its status within your operating system.
Hardware Assessment: Begin by visually inspecting the physical function of your WiFi. Does your laptop have a dedicated hardware switch for enabling or disabling the WiFi? If so, ensure that this switch is in the 'on' position. Often, a small LED indicator provides visual confirmation of the WiFi's status. Additionally, delve into your laptop's documentation or, if you know the specific model, research the specifications online to identify the exact model of your wireless network adapter. This information will prove vital later when you might need to troubleshoot driver-related issues.
Software Verification: Driver Inspection: The wireless network adapter functions through specific software known as drivers. These drivers act as the intermediary, enabling communication between your laptop’s operating system and the WiFi hardware. Outdated, corrupted, or improperly installed drivers represent a frequent source of WiFi connectivity problems. The diagnostic process takes place within the Device Manager. To access this essential utility, type "Device Manager" into the Windows search bar and select the corresponding result. Within the Device Manager interface, locate the "Network adapters" section. Expand this category to unveil the list of network adapters installed on your system, including your wireless adapter.
- Driver Status: Look for the name of your wireless adapter (e.g., Intel Wireless-AC 9260, Dell Wireless 1820A) in the list. Check for any warning icons, such as a yellow exclamation mark or a red cross, which indicate driver conflicts or malfunctions. If you see such an icon, right-click on the adapter and choose "Properties".
- Driver Details: In the properties window, navigate to the "Driver" tab. Here, you can view the current driver version, the date it was released, and the driver provider (e.g., Intel, Broadcom, Dell). Outdated drivers are a common cause of WiFi issues.
The Driver Update & Rollback Strategy: A Crucial Step in WiFi Resilience
Once you've assessed the current state of your wireless adapter drivers, the next step involves implementing strategic updates and, if necessary, rollbacks to pinpoint and resolve connectivity problems.
Driver Update Process: Return to the "Driver" tab within the properties window of your wireless adapter in Device Manager. Click on the "Update Driver" button. Windows will present two options: "Search automatically for drivers" and "Browse my computer for drivers". Selecting "Search automatically for drivers" allows Windows to search online for the latest compatible drivers. However, in certain situations, this method may not yield the newest or the optimal driver version.
- Dell's Website for Drivers: For the most up-to-date drivers, navigate to the Dell support website. Enter your laptop's service tag or model number to access the specific drivers tailored for your system. Download the driver package for your wireless adapter and save it to your computer. In the "Update Driver" window, choose "Browse my computer for drivers" and direct the system to the location where you saved the downloaded driver. This method guarantees that you are installing the most recent, system-optimized driver.
Driver Rollback for Stability: Sometimes, a driver update that appears successful can, in fact, introduce instability or compatibility issues. If you experience WiFi problems after updating your drivers, the "Roll Back Driver" option is a vital troubleshooting tool. Within the "Driver" tab of your adapter's properties, you can utilize this rollback feature to revert to the previously installed driver version. This process can quickly resolve issues caused by problematic driver updates. Note that if the "Roll Back Driver" option is greyed out, it signifies that there is no previous driver version to revert to.
Network Configuration: Unveiling Hidden WiFi Settings
Once you've addressed the foundation hardware and software components, the next logical step is to examine the network configuration settings on your Dell laptop. Often, seemingly minor adjustments can lead to significant improvements in WiFi performance and stability. Begin your examination within the Windows network settings.
Accessing Advanced WiFi Settings: Access the "Network and Internet" settings through the Windows Settings menu (accessible via the Start menu). Click on "WiFi" and choose "Change adapter options". This will open the "Network Connections" window, containing a list of your network adapters. Right-click on your wireless network adapter and select "Properties". This action unveils the settings related specifically to your wireless network connection.
TCP/IP Protocol Configuration: Within the properties window, locate "Internet Protocol Version 4 (TCP/IPv4)" and select it. Then, click on the "Properties" button. Within the TCP/IPv4 properties window, ensure the "Obtain an IP address automatically" and "Obtain DNS server address automatically" options are selected. These settings allow your computer to automatically receive IP addresses and DNS server addresses from your router, ensuring seamless network connectivity.
- Manual DNS Consideration: In certain scenarios, particularly when you suspect DNS-related issues, you might consider manually configuring DNS servers. Consider setting the Preferred DNS server to 8.8.8.8 (Google's public DNS) and the Alternate DNS server to 8.8.4.4 (another Google DNS server). This can sometimes improve website loading times and resolve domain name resolution errors.
Wireless Adapter Configuration (Advanced): Go back to the properties of your wireless adapter by repeating the process in the first section of this heading to access the properties. Click on "Configure" and then select the "Advanced" tab. This area unveils advanced settings specific to your wireless adapter, allowing you to fine-tune its behavior. It is important to note that changes to these settings may not immediately resolve the issue.
- 802.11 Mode Selection: Explore the "802.11 Mode" setting. This determines the wireless standard your adapter uses. If your router supports it, select the highest standard (e.g., 802.11ax, 802.11ac) for optimal performance. Ensure that your router also supports this standard.
- Transmit Power: The "Transmit Power" setting controls the strength of the WiFi signal your laptop transmits. Adjust this setting based on your needs and environment, though the default is usually fine.
- Roaming Aggressiveness: Experimenting with the "Roaming Aggressiveness" settings can sometimes help improve connectivity, especially in environments with multiple WiFi networks. This determines how aggressively your laptop searches for stronger WiFi signals.
Router Optimization: Aligning Your Dell Laptop with Wireless Excellence
While focusing on your Dell laptop's settings is crucial, optimizing your router is equally important. The router acts as the central hub of your home network, and its configuration directly influences your laptop's WiFi experience.
Router Firmware Upgrades: Router manufacturers regularly release firmware updates that address security vulnerabilities, improve performance, and enhance compatibility. Ensure that your router’s firmware is up-to-date. Access your router’s administration page by entering its IP address (usually 192.168.1.1 or 192.168.0.1) in your web browser. Locate the firmware update section and follow the on-screen instructions to update your router’s software.
Channel Selection: The WiFi spectrum is divided into different channels. When multiple WiFi networks operate in the same area, they can interfere with each other, leading to reduced performance. Your router typically automatically selects a channel. However, consider manually selecting a less congested channel. Use a WiFi analyzer app on your smartphone or another device to identify the least-used channels in your area and configure your router accordingly.
Router Placement: Physical placement of your router can dramatically affect the signal strength and coverage. Position your router in a central location within your home, away from obstructions such as walls, metal objects, and appliances that can interfere with the WiFi signal. Elevating the router can also help improve signal propagation by reducing signal interference.
Advanced Troubleshooting: Diving Deeper into Dell Laptop WiFi Issues
If the above solutions haven't resolved your WiFi problems, consider these more advanced troubleshooting steps.
- Network Reset: Windows offers a network reset function that essentially restores all network-related settings
