compaq laptop 620 wifi drivers for windows 7

Title: HOW TO INSTALL WINDOWS 7 WIRELESS DRIVER - COMPAQ Presario CQ57
Channel: FEMITECH
HOW TO INSTALL WINDOWS 7 WIRELESS DRIVER - COMPAQ Presario CQ57 by FEMITECH
Download Compaq 620 WiFi Drivers for Windows 7 NOW! (Easy Fix!)
Get Your Compaq 620 WiFi Working on Windows 7: A Simple Guide!
Do you find yourself staring at a blank screen, wishing for a stable internet connection? Have you recently upgraded to Windows 7 and your Compaq 620 refuses to cooperate with your Wi-Fi network? Don't worry; you're not alone. Many users experience this frustrating issue. Fortunately, getting your wireless connection up and running is absolutely achievable. This guide provides simple, straightforward instructions to get your Compaq 620’s Wi-Fi working flawlessly.
Understanding the Root of the Problem
The primary problem stems from driver compatibility. Usually, Windows 7 does not always automatically recognize older hardware components. Consequently, your Compaq 620’s built-in Wi-Fi adapter might remain inactive. Moreover, this situation demands a manual installation for the appropriate drivers. Understanding this is the first vital step toward a solution. But there is no need to fret. Let us start the process.
Hunting Down the Right Drivers
Finding the correct driver is essential. Firstly, you can try the official HP website. HP is the parent company of Compaq. Therefore, it’s your best possible starting point. Carefully navigate to the support section. Search for your specific Compaq 620 model. Afterward, look for the drivers section. Then, filter by operating system. Specifically, select Windows 7. Download the Wi-Fi driver. Ensure you pick the right one for your specific wireless adapter. This is typically a Broadcom or Intel adapter in the Compaq 620.
Alternative Driver Sources and Considerations
Sometimes, you might encounter difficulties on the HP site. Therefore, consider other legitimate sources. Driver support websites offer an alternative. However, exercise extreme caution. Download from trusted sites only. Be extremely wary of suspicious files. Always scan drivers with your antivirus software before installation. You may also explore the device manager within Windows. It can often offer a solution.
Installation: The Easy Steps
Okay, you’ve downloaded the driver. Now comes the installation. Double-click the downloaded driver file. Follow the on-screen prompts. The installation process is usually simple and intuitive. In most cases, you only need to click "next" a few times. But, be certain to accept the license agreement. Wait for the installation to complete. Do not interrupt the installation process.
Troubleshooting Common Installation Issues
Every now and then, an installation encounters a snag. Firstly, if the installation fails, reboot your computer. Then, try again. Secondly, ensure you have administrator privileges. Right-click the driver file. Select "Run as administrator." Thirdly, check your Windows 7 updates. They can sometimes resolve compatibility issues. Finally, temporarily disable your antivirus software. This can sometimes interfere with the installation.
Verifying the Wi-Fi Connection
Once the driver installation concludes, restart your computer. Subsequently, check for a Wi-Fi connection. Look in the system tray. In the lower right corner. Specifically, you should see a Wi-Fi icon. Click on this icon. Select your Wi-Fi network. Then, enter your network password. Afterward, test your internet connection.
Beyond Drivers: Additional Tips for Success
Beyond driver installation, consider a few additional tips. Check your physical Wi-Fi switch. Some laptops have a physical switch. Make certain, it’s turned on. Ensure that your router is working correctly. Sometimes, a simple router reset can fix connection problems. Also, make certain, your computer is within range of your wireless router.
What if the Problem Persists?
Sometimes, the issue is more complex. If, after all, the installation fails, seek professional help. Contact reputable computer repair services. Describe the problem. They can diagnose and troubleshoot the problem. Replacing the wireless adapter might be another possible option. However, consider this only as a last resort.
Conclusion: Back Online with Ease!
Getting your Compaq 620’s Wi-Fi working on Windows 7 does not need to be a daunting task. By following these straightforward steps, you can get connected. Moreover, the whole process could be completed in a few minutes. So, download the correct drivers. Install them carefully. You will have internet access in no time. Now, browse the web. Stream videos. Stay connected. Get back to enjoying your Compaq 620.
Galaxy S8 to Laptop: WiFi-Free File Transfer SHOCKER!Download Compaq 620 WiFi Drivers for Windows 7 NOW! (Easy Fix!)
Hey everyone, tech troubles got you tangled up in wires? Trust me, we’ve all been there. Today, we're diving headfirst into a common, yet often frustrating predicament: getting your Compaq 620 laptop’s Wi-Fi working smoothly on Windows 7. It can feel like navigating a tangled jungle, but don't worry, we've got the machete (and the driver!) ready to clear the way. This isn’t some dry, technical manual – we're talking easy fixes, real-world scenarios, and a whole lot of “been there, done that” experience. So, pour yourself a coffee (or your beverage of choice), and let's get your internet humming!
1. The Frustration of No Wi-Fi: A Familiar Feeling
Remember that moment? You fire up your trusty Compaq 620, excited to browse the web, only to be greeted by a blinking red light or a sad little "no internet connection" icon. Ugh, the agony! It’s like being stranded on a desert island only to realize you forgot your compass (and your Wi-Fi drivers!). This is often the first sign that your Wi-Fi drivers are missing or outdated. Don’t panic, though! We're going to get you back online in no time.
2. Why Your Compaq 620 Might be Missing its Wi-Fi Mojo
Let's face it: technology can be fickle. There are several reasons why your Compaq 620 running Windows 7 might be struggling to connect to the internet:
- Driver Corruption: Your current Wi-Fi drivers might be damaged, corrupted, or simply gone missing. It's like the little elves who run your computer's internal factory went on strike!
- Outdated Drivers: Drivers, like everything else, get old. Newer updates might not be compatible with your system.
- Operating System Mismatch: Sometimes, drivers designed for other operating systems or just those not tailored to Windows 7 are trying to sneak their way in.
- Hardware Issues (Less Common): In rare cases, the physical Wi-Fi card itself might be the culprit. We’ll address the software stuff first, though!
3. Identifying Your Compaq 620 Model – Knowledge is Power!
Before we dive in, it's crucial to identify the exact model of your Compaq 620. This is because various models might need slightly different drivers. Here’s how to find it:
- Check the Label: Usually located on the bottom of your laptop or inside the battery compartment, there should be a sticker with the model number. Look for something like "Compaq 620 (model number)."
- System Information: Click the "Start" button, type "System Information" in the search box, and press Enter. The model number should be listed under "System Model."
Armed with this information, you’re ready to rock and roll.
4. The Golden Rule: Downloading the Right Drivers
This is the most crucial step. You want the correct drivers for your specific Compaq 620 model and Windows 7. Incorrect drivers can cause even more problems.
- HP Support Website: The best and safest place to download drivers is the official HP support website. Head over there, punch in your model number, and look for the “Drivers and Software” section.
- Search for Wi-Fi Drivers: Navigate to the "Network" or "Wireless" section. Look for drivers specifically labeled as "Wireless LAN" or "Wi-Fi."
- Windows 7 Compatibility: Double-check that the driver is compatible with Windows 7. If it’s meant for Windows 10 or later, it won't work.
5. Downloading and Installing the Drivers: Our Step-by-Step Guide
Okay, you’ve found the driver! Now, let's get it installed. Follow these steps carefully:
- Download the Driver: Click the download button next to the appropriate driver.
- Run the Installer: Once the download is complete, double-click the downloaded file. This usually launches an installation wizard.
- Follow the Wizard: The wizard will guide you through the installation process. Accept the terms and conditions and agree to any prompts.
- Restart Your Laptop: Once the installation is complete, you'll likely be prompted to restart your laptop. Do it!
6. Troubleshooting: When Things Still Aren’t Working (Don't Worry!)
Sometimes, the installation process isn't a walk in the park. If you're still struggling, don't throw your laptop out the window (tempting, I know!). Here's what to try:
- Reinstall the Driver: Sometimes, a second time's the charm. Try uninstalling the driver through the Device Manager, then reinstalling it.
- Check Device Manager: Open Device Manager (search for it in the Start menu). Look for any devices with a yellow exclamation mark or a red cross. This usually indicates a driver problem.
- Update Drivers Manually: Within Device Manager, right-click on the Wi-Fi adapter and select "Update driver software." Choose to search for the updated driver online.
- Compatibility Mode: If the driver refuses to install, try right-clicking the installer file, select "Properties," go to the "Compatibility" tab, and try running the installer in Compatibility mode for Windows 7.
7. Device Manager: Your Tech Detective
The Device Manager is like the control panel of your hardware. It tells you what’s working, what isn't, and helps you manage all the devices connected to your computer. You can update, uninstall, and troubleshoot devices here.
8. What If I Already Know My WiFi Card Model?
If you know your WiFi card's model number, you might be able to find drivers directly from the manufacturer (e.g., Intel, Broadcom). This is a more advanced method, but it can sometimes lead to more up-to-date drivers. However, be diligent and always ensure compatibility with Windows 7.
9. Avoiding Common Pitfalls (And Keeping Your Sanity!)
Here are a few things to keep in mind to prevent headaches:
- Avoid Third-Party Driver Download Sites: Stick to the HP website. These sites aren't always trustworthy.
- Backup Your System: Before making major changes, consider backing up your system.
- Read the Instructions: Pay attention to prompts and instructions during the download and installation process.
10. Connecting to Your Network: The Final Frontier
Once you've successfully installed the drivers (hopefully!), it's time to connect to your Wi-Fi network.
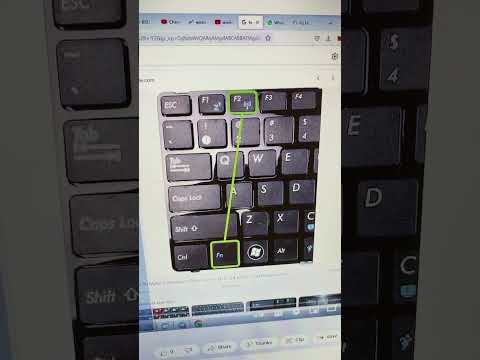
- Enable Wireless: Make sure your Wi-Fi is enabled. There's often a physical switch on your laptop to enable/disable Wi-Fi, sometimes just on the side. Look if there is an indicator light.
- Search for Networks: Click on the Wi-Fi icon in your system tray (usually in the bottom right corner). Select your network from the list.
- Enter Your Password: Enter your network's security password and click "Connect."
11. Testing Your Connection: The Moment of Truth!
Open your web browser and try to browse the internet. Boom! You’re online! If not, go back to the troubleshooting steps.
12. Updating Your Drivers Regularly: Your Tech-Savvy Habit
Once you get things working, it’s important to keep your drivers updated regularly. This helps prevent future problems and ensures your Wi-Fi continues to perform optimally.
13. The Importance of a Stable Internet Connection
A stable internet connection is very crucial for all our daily needs. Whether it is for entertainment or for work, it is very important.
14. What if all Else Fails? Seeking Professional Help
If nothing seems to work, don't get discouraged! Sometimes, the issue might be more complex. Consider seeking professional help from a local computer repair shop. They can diagnose and fix the problem efficiently.
15. Keeping Your Compaq 620 Running Smoothly: Beyond Wi-Fi
Remember, keeping your laptop running smoothly involves more than just Wi-Fi drivers. Regular system maintenance, like cleaning up junk files and running antivirus software, is crucial for a healthy laptop.
Closing Segment
And there you have it! We’ve navigated the sometimes-treacherous waters of Compaq 620 Wi-Fi drivers on Windows 7. We hope this guide has helped you conquer the connectivity chaos and get back to enjoying the digital world. Remember, technology shouldn't be a source of frustration; it should be a tool that empowers and connects us. So go forth, connect, and enjoy the freedom of wireless internet! We’re rooting for you!
FAQs
1. Where can I find the drivers for my Compaq 620 laptop?
The best place to find drivers is the official HP support website. Simply search for your specific model number (e.g., "Compaq 620 [model number]") and look for the "Drivers and Software" section. Make sure the driver is compatible with Windows 7.
**2. Why isn't my Wi-Fi working after installing the
Steal Your Laptop's WiFi: The Secret Phone Trick!How To Download & Update Compaq Drivers in Minutes

By UpdateYourDrivers How To Download & Update Compaq Drivers in Minutes by UpdateYourDrivers
Network adapters missing windows 7

By Being Selftech Network adapters missing windows 7 by Being Selftech
driver problem solution driver installation problam solution search auto from computer or laptop

By Dumb Knowledge driver problem solution driver installation problam solution search auto from computer or laptop by Dumb Knowledge
Title: How to fix wireless capability is turned off windows 7
Channel: Juri Fab
How to fix wireless capability is turned off windows 7 by Juri Fab
Wifi Not Found
I am ready to commence. Please provide the article title. Okay, here's the title: The Ultimate Guide to Baking the Perfect Sourdough Loaf at Home
The Ultimate Guide to Baking the Perfect Sourdough Loaf at Home
We often hear the words "perfect sourdough" whispered with a certain reverence. It's a bread that evokes images of rustic kitchens, tangy aromas, and a crust that crackles with the promise of a truly satisfying experience. But the reality of achieving that loaf, the one that lives up to the hype, can feel daunting. We're here to demystify the process, break down the essential elements, and provide a comprehensive roadmap to baking sourdough that will impress even the most discerning bread aficionado. This isn't just a recipe; it's a journey. Let’s begin.
Understanding Your Sourdough Starter: The Heart of the Matter
Before we even consider flour and water, we must address the most crucial element: the sourdough starter, affectionately known as the "mother." This living culture, a symbiotic community of wild yeasts and bacteria, is what gives sourdough its distinctive flavor, texture, and rise. Maintaining a healthy and vigorous starter is paramount to success.
Feeding Your Starter: A Ritual of Nurturing
The feeding schedule is critical. We recommend feeding your starter at least once a day, ideally twice, in a warm environment (around 75-80°F / 24-27°C). The frequency and timing will also depend on your starter's age, the ambient temperature, and the type of flour you're using. In cooler environments, you might need to feed it more often to encourage activity. A general guideline is to discard a portion of your starter (usually half) and replace it with equal parts of flour and water. We advocate using unchlorinated water for this. Chlorinated water can sometimes inhibit the yeasts' activity. Measuring the starter is equally essential. We usually measure by using weight rather than volume. This is an important practice to follow for consistent results.
Spotting a Healthy Starter: Signs of Life
A healthy starter will more than double in size within a few hours after feeding, exhibiting a bubbly, airy texture. It should smell pleasantly yeasty, perhaps with a hint of tanginess. A rancid smell, a lack of rise, or discoloration indicates a problem. A tell-tale sign of a thriving starter is the presence of bubbles throughout the culture after feeding. When the bubbles form in the starter, it has a good chance of making a great bread. Other signs include a visible increase in size and a relatively rapid rise, indicative of vigorous yeast activity.
The Recipe: Crafting the Dough
With a healthy starter in hand, we're ready to embark on the dough-making process. Our approach emphasizes simplicity and precision.
Ingredients: The Essential Elements
- Active Starter: This is, undoubtedly, the star of the show. Use a mature starter, which has been fed and bubbly.
- High-Quality Bread Flour: Bread flour, with its higher protein content, provides the gluten structure necessary for a good rise.
- Water: Filtered water is best. The temperature of the water plays a role. We typically use slightly warm water (around 75-80°F / 24-27°C) to encourage fermentation.
- Salt: Salt not only enhances flavor but also controls fermentation and strengthens the gluten network. Use fine sea salt for even distribution in the dough.
The Autolyse: A Crucial First Step
The autolyse, a period of rest after mixing the flour and water, is critical. This step allows the flour to fully hydrate, beginning to develop gluten before the addition of the starter and salt. This results in a better rise and a more open crumb structure. We usually autolyse for 30-60 minutes, covered, at room temperature.
Mixing and Folding: Building Strength and Flavor
After the autolyse, we incorporate the starter and salt. Mix the ingredients until just combined, then begin the series of folds. We perform sets of folds every 30-60 minutes for the first 2-3 hours of bulk fermentation. Each fold strengthens the dough, developing gluten and redistributing the gas produced by the yeast.
Bulk Fermentation: The Rise to Flavor
Bulk fermentation, the period between mixing and shaping, is where the magic happens. Factors like temperature, humidity, and the strength of your starter significantly impact the bulk fermentation time. Watch the dough closely: we're looking for a rise of about 20-50%, and a slightly bubbly appearance. A good rule of thumb is to gently transfer the dough into a lightly oiled bowl, cover it, and let it rise at room temperature. The overall length will depend on the temperature.
Shaping and Proofing: Preparing for the Oven
The shaping process transforms the bulk fermented dough into a beautiful loaf.
Shaping Techniques: Building Structure
Several shaping techniques yield excellent results. We favor a pre-shape (a gentle tightening of the dough into a round or oval) followed by a final shape, typically a batard (oval) or boule (round). We want to create surface tension to allow for proper oven spring. Properly shaped dough is key to producing a beautiful loaf.
Proofing: The Final Rest
After shaping, the loaf undergoes a final proofing stage. This can occur at room temperature for a shorter period, or in the refrigerator for a longer, slower fermentation. We typically prefer a cold proof in the refrigerator (12-24 hours). Cold proofing develops more complex flavors and makes scoring the loaf easier.
Baking: Unleashing the Potential
The baking process is where all the effort comes to fruition.
Preparing the Oven: Heat and Steam
Preheat your oven to a high temperature (around 450-500°F / 232-260°C) with your Dutch oven or baking stone inside. The high heat and trapped steam create the environment necessary for optimal oven spring and crust development. The goal is to subject the dough's surface to intense heat.
Scoring: The Art of the Cut
Scoring the loaf is more than just an aesthetic choice; it allows the loaf to expand predictably in the oven. Experiment with different scoring patterns to achieve unique designs. Sharp scoring tools are a must.
Baking with Steam: Essential for Crust
Baking with steam is essential for developing a perfect crust. The steam keeps the surface of the dough moist, allowing the loaf to expand fully before the crust sets. We bake our loaves in a Dutch oven for the first portion of baking (typically 20-25 minutes) with the lid on, then remove the lid to allow the crust to brown.
Cooling: Patience is a Virtue
Resist the urge to cut into your freshly baked sourdough immediately. Cooling the loaf completely (ideally on a wire rack) allows the internal structure to set, preventing a gummy texture.
Troubleshooting Common Issues: Navigating the Challenges
Even with the best intentions, challenges can arise. Here are some common problems and their solutions:
- Flat Loaf: This often indicates under-proofing or a weak starter. Ensure your starter is active and the dough has proofed sufficiently.
- Dense Crumb: Under-proofing, lack of gluten development, or insufficient fermentation can lead to a dense crumb. Experiment with different folding times and proofing durations.
- Uneven Crumb: Inconsistent temperatures during proofing, poor shaping, or uneven scoring can contribute to an uneven crumb. Maintain a consistent temperature and carefully shape the dough.
- Sour Taste: Some sourness is expected, but excessive sourness might indicate over-fermentation or a starter that needs a refresh. Adjust your bulk fermentation time and feed your starter more frequently.
- No Oven Spring: Insufficient oven spring is usually a sign of under-proofing, a weak starter, or a lack of steam. Ensure your oven is hot, your starter is active, and your proofing is on schedule.
Beyond the Basics: Elevating Your Sourdough Game
Once you master the basics, consider exploring variations and advanced techniques. Experiment with different flours, add-ins, and fermentation methods.
Flour: Exploring Variety
Different flours impart unique flavors and characteristics. Experiment with whole wheat, rye, and other grains to discover your preferred flavor profiles.
Add-ins: Customizing Your Creation
Nuts, seeds, dried fruits, and herbs can transform your sourdough into a culinary masterpiece. Incorporate add-ins during the shaping process.
Fermentation Techniques: Savoring the Slow Rise
Experiment with retarding your dough in the refrigerator for extended flavor development. This slow fermentation technique enhances the complexity of the flavor.
By following these detailed guidelines, you'll be well-equipped to bake exceptional sourdough. Remember that baking is a journey, not a destination. Each loaf is a learning opportunity. Embrace the process, celebrate the successes, and learn from the challenges. With practice and patience, you’ll master the art and enjoy the reward of truly outstanding sourdough.
