laptop wifi adaptor not working

Title: Cara Mengatasi Adapter Wifi Yang Hilang di Windows 10 Pc atau laptop
Channel: WINTECH id
Cara Mengatasi Adapter Wifi Yang Hilang di Windows 10 Pc atau laptop by WINTECH id
laptop wifi adapter not working, laptop wifi adapter not working windows 11, laptop wireless adaptor not working, laptop internet adapter not working, laptop wifi adapter stopped working, laptop wifi adapter not showing, laptop wifi adapter not showing up, laptop wifi adapter not detected, hp laptop wifi adapter not working, dell laptop wifi adapter not working
Laptop WiFi Adapter DEAD?! (Fix This NOW!)
My Laptop's WiFi is Gone! What Do I Do?!
Have you ever felt that sinking feeling? You power up your laptop, ready to dive into the digital world, but horror – no internet. Your WiFi icon is stubbornly refusing to cooperate. It's a digital emergency! Don't panic, though. We're going to get you back online. We will explore several possible solutions. We need to understand how to troubleshoot your laptop's WiFi issues.
First Things First: A Quick Reality Check
Before we start dismantling your device, double-check the obvious. Is your WiFi switch actually on? Many laptops have a physical switch. It might be on the side or the front. Often, this switch has a light. Make sure the light indicates that WiFi is enabled. Then, look at your laptop's screen. Does the WiFi icon show any signal bars at all? If it has an "X" mark, that means trouble. Conversely, if there's no icon at all, we have a bigger problem. Also, verify your router is working correctly. Test another device to make sure the internet is functional. Since you confirm that everything is working, we can proceed with our troubleshooting steps.
The Software Side: A Digital Dance
Problems often reside in the software realm. Let's address these areas. Firstly, we will start with a restart. Restarting your computer is a classic troubleshooting step for many tech issues. Sometimes, a simple reboot can work wonders. Moreover, this refreshes the system and fixes minor glitches.
Next, check your network settings. Your computer might be struggling to connect. Go to your network settings in your operating system. Make sure WiFi is enabled. Also, check your preferred network. Make sure your laptop is connecting to the correct network.
Let's move on to drivers. Outdated or corrupted network drivers can cause WiFi chaos. You need to update your network adapter drivers. Visit your laptop manufacturer's website. Locate the drivers specifically for your laptop model. Download and install the latest WiFi driver version.
Digging Deeper: Hardware Hurdles
If software checks don't fix the problem, it might be hardware-related. One common issue is the wireless adapter itself. It is part of the wireless network card. This adapter could be faulty. Also, the adapter may be malfunctioning.
Check your laptop's physical connection. On some laptops, the WiFi adapter isn't directly integrated. It's a separate card that plugs into a slot. Make sure the connection isn't loose. Open up your laptop (carefully, of course). Locate the WiFi adapter. Gently reseat it.
Consider internal antenna issues. Many laptops have internal antenna wires. These wires are connected to the WiFi card. Sometimes, these wires can become disconnected. Open up your laptop and inspect these wires. Make sure they are connected securely.
Advanced Troubleshooting: When Things Get Tricky
If you've tried the standard fixes, let's get a bit more technical. Consider checking your BIOS settings. In your computer's BIOS, you usually manage hardware settings. Look for a setting about your wireless adapter. Ensure that it is enabled. Sometimes, you may need to reset your BIOS to its default settings.
Also, run a network troubleshooter. Modern operating systems have built-in tools. These tools are designed to diagnose network issues. Run the built-in troubleshooter. Follow the on-screen prompts.
The Ultimate Resort: Seeking Professional Help
If all else fails, don’t despair. You've likely exhausted all do-it-yourself options. It is time to seek expert help. Consider contacting your laptop manufacturer's support team. They are equipped to diagnose and assist you further. Alternatively, take your laptop to a professional repair shop. A technician can pinpoint the exact source of the problem. They can also make the necessary repairs.
Preventative Measures: Staying Connected
Having your WiFi fail is frustrating. It's better to avoid these issues. Regularly update your drivers. Keep your operating system updated. Ensure your laptop is protected from malware. This protects your system. By practicing these preventative steps, you minimize the chance WiFi failure.
Wrapping Up: Staying Connected
Losing your WiFi connection can be stressful, but it doesn't need to be permanent. You can fix your laptop's WiFi. By following these steps, you can regain your connection. With a little bit of troubleshooting, you'll be back online in no time! So, go ahead, face the problem head-on. You've got this!
HP Laptop WiFi Button Turned RED? (Emergency Fix!)Laptop WiFi Adapter DEAD?! (Fix This NOW!)
Hey everyone! Ever stare at that Wi-Fi icon, the one that usually dances with joyful little bars, and find it… lifeless? Blank? A sad, grey void where connection should be? Yeah, we’ve all been there. It's like your digital life support has flatlined. Suddenly, you're cut off from the world, stranded in internet purgatory. But before you chuck your laptop out the window (tempting, I know!), let's take a deep breath. We're going to resurrect that Wi-Fi adapter and get you back online. Trust me, we've got this.
1. The Dreaded No-Connection Situation: A Digital Crisis
So, what exactly is happening when your laptop’s Wi-Fi gives up the ghost? The symptoms can be as diverse as the different models of laptops out there. You could see a simple "No internet" message, a Wi-Fi signal icon with a red X, or perhaps nothing at all – a completely absent Wi-Fi option in your settings. It’s like your laptop has developed amnesia and forgotten it even has a Wi-Fi adapter. This can happen at the worst possible times, of course – right before a Zoom meeting, during a crucial deadline, or when you're desperately trying to stream your favorite show. It’s a digital crisis, a modern-day emergency!
2. Is It Really Dead? Assessing the Situation
Before we start tearing things apart, let's make sure the Wi-Fi adapter is truly the culprit. It's like diagnosing a medical issue: We need to rule out some other potential ailments first. Think of your Wi-Fi as a network of connections. The adapter is just one link in that chain.
- Check the Obvious: Is your Wi-Fi router working? Are other devices connected? Power cycle your router: Unplug it, wait 30 seconds, and plug it back in. This sometimes fixes everything!
- Location, Location, Location: Are you too far from the router? Walls, especially thick ones, can weaken the signal. Move closer for a better connection.
- Airplane Mode: This is the most common culprit! Is Airplane Mode on? That innocent little setting can cut off all wireless connections. Make sure this setting is off and you should be good to go in the Windows settings.
3. The Grand Restart: Your Laptop’s First Aid
Sometimes, the simplest solution is the most effective. A good old-fashioned restart can work miracles. It's like hitting the reset button on your whole system, clearing out temporary glitches that might be causing the issue.
- Restart Your Laptop: A full restart clears the cache and often resolves temporary software issues. This is your digital equivalent of "have you tried turning it off and on again?"
- Check for Updates: Sometimes, your laptop's drivers might be the problem. Make sure your operating system and drivers (especially network drivers) are up-to-date. Outdated drivers are like having a worn-out tire – they can create all sorts of problems.
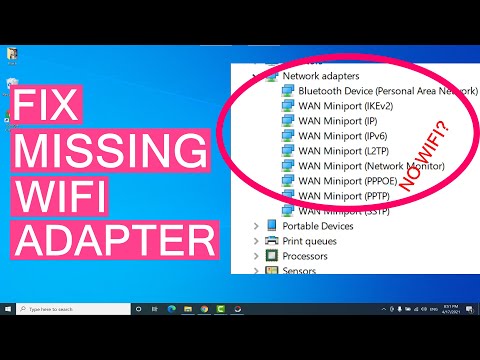
4. Diving into Device Manager: The Diagnostic Center
If a simple restart doesn’t do the trick, it's time to delve a little deeper. Device Manager is your laptop's internal diagnostic center. Think of it as the command center for all your hardware.
- Access Device Manager: Search for "Device Manager" in your Windows search bar and open it.
- Network Adapters: Expand the "Network adapters" section. Here, you should see your Wi-Fi adapter listed (it usually has "Wireless" or "Wi-Fi" in the name).
- Look for Errors: Does it have a yellow exclamation mark or a red X? These indicate a problem.
- Right-Click and Troubleshoot: Right-click on your Wi-Fi adapter and select "Troubleshoot problems." Windows will attempt to diagnose and fix any issues automatically.
5. Driver Dilemmas: The Software Saboteurs
Drivers are the vital link between your operating system and your hardware. If your Wi-Fi adapter's driver is corrupted, outdated, or missing, you’re going to have problems. It's like trying to drive a car without a steering wheel – you're not going anywhere.
- Update Drivers: Back in Device Manager, right-click on your Wi-Fi adapter again and choose "Update driver." Select "Search automatically for drivers." Windows will search for the latest drivers online and install them.
- Roll Back Drivers: If a recent driver update caused the problem, you can roll back to a previous version. Right-click your Wi-Fi adapter and choose "Properties." Go to the "Driver" tab and click "Roll Back Driver."
- Reinstall Drivers: If updating or rolling back doesn’t work, try uninstalling and reinstalling the driver. Right-click your Wi-Fi adapter, select "Uninstall device," and then restart your laptop. Windows should automatically reinstall the driver upon restart.
6. WiFi Adapter Gone Missing? Hardware Hunting
Sometimes, your Wi-Fi adapter might simply be disabled in your BIOS/UEFI settings. This is where the deeper "under the hood" settings of your laptop live. Going to this level is like a surgery, so be extra careful.
- Accessing BIOS/UEFI: Restart your laptop and repeatedly press the key specified to access the BIOS/UEFI (usually Del, F2, F12, or Esc – check your laptop's manual).
- Checking Wireless Settings: Navigate through the BIOS/UEFI menus (it’s different for every laptop). Look for "Wireless," "Wi-Fi," or "Network Adapter" settings. Ensure it's enabled.
- Save and Exit: Save your changes and exit the BIOS/UEFI. Your laptop will restart.
7. The Physical Examination: Hardware Hiccups Persist
If all else fails, it's time to consider a hardware issue. This is like saying, "Okay, the engine is dead, let's tear it apart." This only becomes relevant when software fixes fail. The Wi-Fi adapter itself could be faulty. This will likely involve opening your laptop. (Proceed with caution, warranty considerations, and carefulness.)
- Internal Hardware: If you're comfortable opening your laptop (and know how to do so safely!), check the internal Wi-Fi card (usually a small card near the battery). Make sure it's securely connected. Sometimes, a loose connection can cause problems.
- External USB Adapters: As a temporary workaround, or if your internal adapter is beyond repair, you can purchase a USB Wi-Fi adapter. They're relatively inexpensive and plug into a USB port.
8. Interference Intrigue: The Wireless Wilderness
Your Wi-Fi signal can be easily disrupted by other electronic devices that emit radio waves such as microwaves.
- Channel Congestion: Your router broadcasts on a specific channel. Try changing your router's Wi-Fi channel to a less congested one. Apps like Wi-Fi Analyzer can help you find less crowded channels.
- Interference Giants: Metal objects, and other electronic gadgets can interfere your network. Make sure your laptop and router are not surrounded by such materials. Move your laptop and, at a minimum, router to rule out interference.
9. Resetting Network Settings: A Clean Slate
Sometimes, your network settings might be corrupted. Resetting them is like giving your network a fresh start. Here's how to do it in Windows:
- Network Reset: In Windows Settings, go to "Network & Internet" then "Status". Scroll down and click on "Network reset".
- Confirm Reset: Confirm the network reset. Your laptop will restart and you'll need to reconnect to your Wi-Fi network.
10. Diagnosing with the Command Prompt: Advanced Forensics
If you're a techie, you can use the Command Prompt to diagnose network issues. It's like using a special microscope to examine the inner workings.
- Open Command Prompt: Search for "Command Prompt" and open it as an administrator.
- Useful Commands:
ipconfig /all(Displays detailed network configuration)ping 8.8.8.8(Tests your internet connection)netsh winsock reset(Resets Winsock settings)netsh int ip reset(Resets TCP/IP)
- Interpret the Results: The output of these commands can give you clues about the problem.
11. The Wireless Troubleshooter: Windows' Built-in Detective
Windows has a built-in troubleshooter that can automatically diagnose and fix common Wi-Fi problems. It's like having a digital detective on your side.
- Run the Troubleshooter: In Windows Settings, go to "System" then "Troubleshoot." Under "Other troubleshooters," run the "Network Adapter" troubleshooter.
12. Check Router Firmware: The Router's Own Updates
The router is like the Wi-Fi adapter of your Wi-Fi. Routers, too, need updates!
- Access Router Settings: Log in to your router's admin panel (usually by typing your router's IP address into a web browser).
- Check for Firmware Updates: Look for a "
How To Fix Wireless Adapter Missing In Windows 10 Get WiFi Adapter Back
By Sandeep Singh How To Fix Wireless Adapter Missing In Windows 10 Get WiFi Adapter Back by Sandeep Singh
Adaptor wifi USB tidak berfungsi windows 10 Desktop dan Laptop

By IT Magics Adaptor wifi USB tidak berfungsi windows 10 Desktop dan Laptop by IT Magics
Tips Mengatasi WIFI Adapter Tidak Muncul di Device Manager Windows 11

By Habibi Edukasi Teknologi Tips Mengatasi WIFI Adapter Tidak Muncul di Device Manager Windows 11 by Habibi Edukasi Teknologi

Title: Cara Memperbaiki Adaptor WiFi USB yang Tidak Berfungsi di Windows - Panduan Lengkap
Channel: GuideRealm
Cara Memperbaiki Adaptor WiFi USB yang Tidak Berfungsi di Windows - Panduan Lengkap by GuideRealm
Wifi On Laptop
Your Ultimate Guide to Mastering the Art of Sourdough Bread Baking at Home
Sourdough bread. The very words evoke images of rustic charm, a symphony of textures, and a flavor profile that dances on the palate. But the journey to crafting that perfect loaf, with its crackling crust and airy interior, can seem daunting. Fear not, aspiring bakers! We're here to guide you, step by step, through the captivating world of sourdough, equipping you with the knowledge and techniques to transform your kitchen into a haven of aromatic delights. Consider this your comprehensive companion, a treasure trove of insights designed to elevate your sourdough game from novice to notable.
Demystifying the Sourdough Starter: The Heart of It All
The cornerstone of any exceptional sourdough bread is, undeniably, the starter. This living culture, a symbiotic community of wild yeasts and beneficial bacteria, is the engine that drives the entire process. Creating a robust and vibrant starter is the first, crucial step.
The Genesis of Your Starter: Crafting a Flourishing Colony
Our journey begins with the humble act of combining equal parts of unbleached, all-purpose flour and non-chlorinated water. In a clean, glass jar – a quart-sized mason jar is ideal – combine, say, 50 grams of flour and 50 grams of water. Mix thoroughly, ensuring no dry flour remains. This mixture, your nascent starter, will be your daily responsibility for the next week or so.
The Daily Rhythm: Feeding and Observation
Each day, discard half of your starter. Then, add equal parts of flour and water – again, 50 grams of each, if you're maintaining a consistent scale. Mix diligently and observe. The first few days may show little activity. Don’t be discouraged! The wild yeasts are subtly taking root. Over the subsequent days, you’ll notice signs of life: bubbles forming, the volume increasing, and perhaps, a subtle, tangy aroma emerging. This is the magic of fermentation at work.
Decoding the Signals: Recognizing a Ripe Starter
As your starter matures, it will become increasingly active. The peak of its activity, the moment of its readiness for baking, is crucial. A ripe starter will ideally double (or even triple) in size within a few hours after feeding. It will exhibit a bubbly, airy texture, and its aroma will shift from a simple floury scent to a pleasant, slightly acidic fragrance, reminiscent of yogurt or ripe fruit. It is at this peak that your starter is at its optimal leavening power.
Sustaining the Legacy: Long-Term Starter Care
Once your starter is established, maintaining its vitality is straightforward. If you bake frequently, you can feed it daily, maintaining a consistent schedule. If you bake less often, a weekly feeding schedule is perfectly reasonable. You can also store your starter in the refrigerator. This slows down its activity, meaning you’ll need to feed it less frequently. Before baking after refrigeration, reactivate your starter by feeding it twice, several hours apart, at room temperature, until it reaches its peak of activity.
Crafting the Dough: Assembling the Ingredients and Mastering the Fundamentals
With our starter thriving, we’re ready to delve into the creation of the bread itself. The beauty of sourdough lies in its simplicity: flour, water, salt, and starter. But within this simplicity lies a wealth of nuance.
Ingredient Selection: The Building Blocks of Flavor
The quality of your ingredients will directly impact the final product. Opt for high-quality flour. Bread flour, with its higher protein content, is a reliable choice. You can experiment with different types of flour – whole wheat, rye, spelt – to add complexity to the loaf’s flavor and texture. Use filtered water, as chlorine can inhibit the yeast activity. And, of course, use sea salt or a good quality table salt. The Autolyse: Unlocking Gluten Potential
Before adding the salt and starter, perform an autolyse. This involves mixing the flour and water and allowing the mixture to rest, covered, for 30-60 minutes. This process hydrates the flour, allowing the gluten to begin to develop. This pre-fermentation stage significantly improves the dough's extensibility and overall structure.
Incorporating the Starter and Salt: Orchestrating the Flavors
After the autolyse, it’s time to introduce your active starter. Mix the starter into the dough until it is evenly distributed. Then, add the salt. Salt not only enhances the flavor but also controls the fermentation, slowing the yeast activity.
The Bulk Fermentation: A Symphony of Rising
Once the starter and salt are integrated, the bulk fermentation begins. This is where the dough truly comes to life. Place the dough in a lightly oiled bowl, cover it, and let it rise at room temperature. However, this stage demands several crucial steps.
The Art of Folding: Strengthening Gluten Structure
During the bulk fermentation, perform a series of folds. Every 30-60 minutes, gently stretch and fold the dough. This strengthens the gluten network, creating a structure that will support the rising dough and prevent the final loaf from collapsing. To fold the dough, wet your hands. Gently grab a portion of the dough and stretch it upwards, and fold it over itself. Rotate the bowl and repeat this process until you've folded all around. This process continues for approximately 2-4 hours. The duration of the bulk fermentation will depend on the ambient temperature.
Recognizing the Perfectly Fermented Dough: Observation is Key
Throughout bulk fermentation, keep a close eye on your dough. It should increase in volume, becoming light and airy. The surface will develop small bubbles. However, over-proofing can lead to a flat loaf. The dough should ideally increase in volume by approximately 30-50% during bulk fermentation. Gentle handling and a mindful observation will help determine the proper proofing.
Shaping and Proofing: Transforming Dough into Art
With the bulk fermentation complete, it’s time to shape the dough and prepare it for the final proof.
Gentle Handling: Preserving the Air
Turn the dough out onto a lightly floured surface. Gently shape it into your desired form: a round boule, an oblong batard, or whatever shape you choose. Avoid degassing the dough, which is the art of preserving the air.
The Final Proof: A Time of Rest
Once shaped, place the dough in a banneton basket (a specially designed basket that helps the dough maintain its shape) or a bowl lined with a floured cloth. Cover, and refrigerate for 12-24 hours. The cold proofing slows down the fermentation, allowing complex flavors to develop and the gluten structure to strengthen.
Baking to Perfection: The Moment of Truth
The culmination of your efforts is the baking process. This is where the magic happens, where the dough transforms into a crusty, aromatic loaf.
Preheating the Oven: Setting the Stage
Preheat your oven to 450-500°F (232-260°C), with a Dutch oven inside. The Dutch oven creates a steamy environment, which is essential for achieving a beautiful crust.
Scoring the Dough: Unleashing the Inner Beauty
Carefully remove the hot Dutch oven from the oven. Gently place the proofed dough inside. Use a sharp knife or a lame to score the surface of the dough. The scoring controls the expansion of the loaf during baking, creating those beautiful, dramatic slashes.
Baking in Steam: Achieving the Perfect Crust
Cover the Dutch oven and bake for 20-25 minutes. Then, remove the lid and bake for another 20-25 minutes, or until the crust is deeply golden brown and the internal temperature of the loaf reaches 200-210°F (93-99°C).
Cooling and Savoring: The Grand Finale
Let the baked loaf cool completely on a wire rack before slicing. This allows the crumb to set and the flavors to fully develop. Resist the temptation to cut into it too soon!
Troubleshooting Common Sourdough Challenges
Even experienced bakers encounter challenges. Here’s a guide to address some common issues.
My Starter Isn’t Rising: Reviving a Dormant Culture
If your starter isn’t rising, it may need a few days of consistent feeding to regain its vitality. Ensure you are using fresh flour and room-temperature water. Monitor the activity closely.
The Crumb is Too Dense: Optimizing Fermentation and Proofing
A dense crumb often indicates under-proofing. Ensure you are allowing sufficient time for bulk fermentation and the final proof.
The Crust is Too Pale: Adjusting Oven Temperature and Baking Time
If the crust is pale, increase the baking temperature slightly or extend the baking time. Consider experimenting with different oven settings.
Embrace the Sourdough Journey: Cultivating Patience and Persistence
Baking sourdough is a journey, not just a destination. It's a dance between the baker and the wild yeasts, a patient collaboration that requires observation, experimentation, and a willingness to learn from each loaf – successes and, yes, even the occasional less-than-perfect results. Each step is a learning experience. Embrace the process. Refine your techniques. Relish the aroma that fills your kitchen and the taste of that perfect crust, that airy interior, the symphony of flavors that only sourdough can offer.
