how to setup a wifi router with a laptop

Title: Use Your Computer As WiFi Router Without Any Software
Channel: A2MTech
Use Your Computer As WiFi Router Without Any Software by A2MTech
how to connect a wifi router to a laptop, how to make a wifi hotspot with laptop, how to connect a wireless router to a laptop, can i use my laptop as a wifi router, how do i connect my wifi router to my laptop
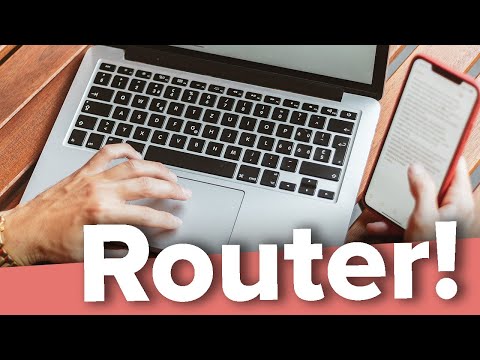
WiFi Router Setup: Laptop Guide (Lightning-Fast Internet!)
## Unleash the Velocity: Your Laptop's Speedy WiFi Setup
So, you crave internet that's faster than your last online shopping spree? You've come to the right place. Setting up your WiFi router with your laptop doesn't have to feel like navigating a labyrinth. We'll demystify the process. You'll soon be enjoying lightning-fast internet speeds. This guide is your easy pathway to digital nirvana.
## Unboxing Your New Wireless Wonder: The Prep Phase
First things first: unpack your router! You'll find the router itself, power adapter, and usually an Ethernet cable. Do a quick inventory. Ensure everything is present and accounted for. Examine the router's physical connections. Most modern routers have a WAN (Wide Area Network) port, to connect to your modem as you'll see later. They also have several LAN (Local Area Network) ports for wired connections.
## Connecting the Dots: Hooking Up Your Hardware
Now, let's get physical. Begin by connecting your modem to your router. Employ the Ethernet cable that came with your router. Plug one end into the WAN port on the router. The other end of that cable should snuggly fits into your modem's Ethernet port. Next, take the power adapter. Plug the adapter into the router and then into a power outlet. Allow the router to power up. Often, the indicator lights will blink, showing it’s coming to life.
## Logging In: Accessing the Router's Settings
Every router has a web-based interface. You’ll access it via your laptop's web browser. You'll need the router's IP address. This information will be in the router's manual. It’s usually something like 192.168.1.1 or 192.168.0.1. Type the IP address into your browser's address bar. Then, hit Enter.
## Unlocking the Gateway: Router Credentials
You’ll see a login screen. Enter the username and password required to access the router settings. Again, this information is usually in the manual. Default usernames and passwords are standard but often are set to 'admin'. If you can't find your login credentials, try searching for "default router username and password" online. Be mindful of the website's source before clicking on it.
## The WiFi Setup: Securing Your Wireless Network
This is a critical moment! Go to the "Wireless" or "WiFi" settings section. Take these actions:
Name Your Network (SSID): Give your network a unique, memorable name. Something you can easily identify.
Choose Your Security: Select WPA2 or WPA3. These are the most secure options. Avoid WEP. It's outdated and vulnerable.
Create a Strong Password: Use a strong, unique password. This is essentially your digital security key. Make it tough to crack. A mix of uppercase and lowercase letters, numbers, and symbols will help.
## Navigating the User Interface: Configuring Router Settings
The settings menu can seem overwhelming at times. Nonetheless, don't panic. The goal is to set up your network for optimal performance and security. You'll likely have options for:
Channel Selection: The router automatically selects the best channel. But, if you experience interference, experiment with different channels.
Guest Network: Consider setting up a guest network. This way, visitors can use your internet without accessing your primary network.
Firewall: Enable your router's firewall for enhanced security.
## Laptop Connection: Joining Your New Network
Now it's time to connect your laptop to your new network! Go to your laptop's WiFi settings. Usually, you'll find this in the system tray in the bottom right. Or browse your control panel. Find the WiFi icon and trigger the available networks. Locate your network's name (SSID) that you created earlier. Enter your WiFi password when requested. You should now be successfully connected!
## Testing the Waters: Verifying Your Internet Connection
Once connected, verify your internet speed. Open your web browser and go to a speed test website. I recommend using speedtest.net. Run the test. Check your download and upload speeds. If the speeds are as expected, congratulations! You did it!
## Troubleshooting Tips: When Things Don't Go Smoothly
Sometimes, things don’t work flawlessly. If you face issues, here are some troubleshooting steps:
Restart Everything: Unplug your modem, router, and even your laptop. Wait a minute, and plug them back in. This often solves unexpected issues.
Check Connections: Ensure all cables are securely connected. Loose connections can cause issues.
Factory Reset: If all else fails, try resetting your router to its factory settings. Consult your router's manual for instructions.
Contact Support: If troubleshooting fails, don’t hesitate to contact your internet service provider or router manufacturer. Their support teams can provide specialized assistance.
## Fine-Tuning Your Connection: Advanced Settings
Once your network is up and running, you can fine-tune it further. Explore advanced settings. Learn about things such as:
Quality of Service (QoS): Prioritize certain types of network traffic. For example, you might prioritize video streaming for smoother playback.
Network Address Translation (NAT): Understand how NAT works to provide internet connectivity to multiple devices.
Port Forwarding: If you play online games or use specific applications, you might need to set up port forwarding.
## The Finish Line: Embracing Your Speedy WiFi
There you have it! You’ve successfully set up your WiFi router and connected your laptop. You are now ready to enjoy lightning-fast internet speeds. Relish the increased productivity. Savor the seamless streaming experiences. Now go forth, and enjoy the magic of your freshly optimized WiFi network. Time to stream, download, and browse with confidence!
WiFi Nightmare on Dell + Windows 11? FIX IT NOW!WiFi Router Setup: Laptop Guide (Lightning-Fast Internet!)
Hey there, fellow internet enthusiasts! Ever felt like your internet connection is moving at the speed of a snail stuck in molasses? We’ve all been there, staring at that buffering wheel of doom. But fear not! Setting up your WiFi router on your laptop doesn't have to be a Herculean task. Today, we’re diving deep into the world of router setup, transforming your laptop from a slowpoke to a speed demon. I’m talking lightning-fast internet, folks – the kind that lets you stream, game, and work without a single hiccup.
1. Unboxing Your New Best Friend: The Router Unveiled
First things first, let’s get the party started! You’ve got that shiny new router, fresh out of the box. Think of it as your internet's conductor – the one responsible for orchestrating the flow of data. Before we even think about plugging it in, take a look at what’s included. You'll usually find the router (the main event!), a power adapter (its lifeblood!), an Ethernet cable (for connecting your router to your modem), and a quick start guide (your initial cheat sheet). Don't be intimidated – we'll guide you through every step. I, personally, always get a bit giddy when I unbox new tech. It’s like Christmas morning!
2. The Crucial Connection: Router to Modem – The First Date
Alright, time to make some connections! Here's where the rubber meets the road. Your modem is the device that receives the internet signal from your internet service provider (ISP). The router then takes that signal and distributes it wirelessly.
- Step 1: Locate the Ethernet Port on Your Modem: It usually looks like a little square hole.
- Step 2: Connect the Ethernet Cable: Plug one end of the Ethernet cable into the modem's Ethernet port.
- Step 3: Connect the Other End: Plug the other end of the Ethernet cable into the "WAN" or "Internet" port on your router. It's usually a different color, often yellow or blue, and clearly labeled.
Think of this as the first date: the modem and router are connecting.
3. Power Up! Giving Your Router Life
Now that those two lovebirds are connected, it's time to bring the magic. Plug the power adapter into your router and then into a wall outlet. A good rule of thumb is to let it sit for at least a minute or two to boot up. During this time, you might notice the lights blinking – this is perfectly normal. It's like the router's version of yawning before getting ready to perform.
4. Laptop's Role: The Command Center
Now, onto your trusty laptop. This is where you'll manage your router's settings.
- Option 1: Ethernet Connection (Recommended): If your laptop has an Ethernet port, connect it directly to the router using another Ethernet cable. This is generally the most stable and reliable way for the initial setup.
- Option 2: Wireless Connection (Alternative): If you don’t have an Ethernet port or prefer wireless setup, locate the default WiFi network name (SSID) and password printed on the router's sticker. Connect to it. Sometimes, it's as simple as "Linksys-XXXX" or "NETGEAR-XXXX" and the password will also be on the router.
5. Accessing Your Router's Control Panel: The Brains of the Operation
Every router has a control panel (also known as the web interface or admin page) where you can tweak settings. How do you get there? You'll need your laptop to access it.
- Finding the IP Address: Your router has a unique IP address, like its home address on the internet. This address is often printed on the router itself (e.g., 192.168.1.1 or 192.168.0.1). If you can't find it, check your router's manual or search online for your router model and "default IP address."
- Entering the IP Address in Your Browser: Open your favorite web browser (Chrome, Firefox, Safari, etc.) and type the IP address into the address bar.
- Logging In: You'll be prompted for a username and password. These are usually printed on the router or in the manual. Common default credentials are "admin" for both username and password, or sometimes it’s blank for username and "admin" for password.
- If you forgot your credentials: There is usually a reset button on the router. Press it, and it will reset to its factory settings.
6. Setting Up Your WiFi Network: Naming and Securing Your Wireless Home
This is where the fun begins! Once you're in the control panel, you'll be looking for the "Wireless" or "WiFi" settings.
- Changing the Network Name (SSID): Rename the WiFi network to something memorable and unique. Avoid using personal information.
- Setting a Strong Password (WEP/WPA/WPA2/WPA3): This is crucial for security! Don't use the default password. Choose a strong password (at least 12 characters) with a mix of uppercase and lowercase letters, numbers, and symbols. WPA2 is generally a good standard, but WPA3 is the most secure if your devices support it. Avoid using your pet’s name or your birthday!
7. Choosing the Right Wireless Channel: Avoiding Network Congestion
Think of wireless channels as lanes on a highway. If too many devices are using the same lane, things get slow. Your router usually has the option to choose the WiFi Channel.
- Auto Channel Setting: Most routers have an "Auto" setting that will automatically choose the least congested channel. This is usually a good starting point.
- Manual Channel Selection: If you're experiencing interference, try selecting channels 1, 6, or 11, as they are typically the least congested. There are apps (like WiFi Analyzer for Android) that can help you visualize the WiFi channels used by your neighbours.
8. Optimizing Your Router's Position: Placement Matters
Where you place your router can make or break your WiFi speeds.
- Central Location: Place your router in a central location in your home to ensure good coverage throughout.
- Avoid Obstacles: Keep the router away from walls, metal objects, and appliances that can interfere with the signal (microwaves and cordless phones are notorious for this).
- Elevated Position: Raising your router off the floor improves signal propagation.
9. Troubleshooting Common WiFi Problems: The Detective Work Begins!
Even with the best setup, things can go wrong. Let's troubleshoot some common issues:
- Slow Speeds: * Check your internet speed: Run a speed test (search "speed test" on Google) to see if you're getting the speeds you pay for. * Restart your router and modem: This often fixes temporary glitches. * Check for interference: Move your router away from potential sources of interference. * Update your router's firmware: The latest firmware can improve performance and security.
- Connectivity Issues: * Check your cables: Make sure all cables are securely plugged in. * Restart devices: Restart your laptop and other devices connected to the WiFi.
- Password Issues: * Double-check your password: Make sure you're entering the correct password. * Reset your router's password: If you've forgotten the password, you'll need to reset the router to its factory settings.
10. Understanding Router Firmware Updates: Keeping Your Router Current
Router firmware is like the brain software of your router. It improves performance and fixes security flaws.
- Checking for Updates: Log into your router's control panel and look for a "Firmware" or "Update" section.
- Following the Instructions: The update process is usually straightforward, but it's essential to follow the instructions carefully.
11. The Importance of Security: Protecting Your Digital Life
Your router is the gateway to your home network. Securing it is essential to protect your data.
- Enable a strong password: We’ve already covered this, but it bears repeating!
- Enable WPA3 security: WPA3 is the latest and most secure WiFi encryption method.
- Disable WPS (WiFi Protected Setup): WPS is a convenient feature that's also a security risk.
- Change the default login credentials: Don't use the default username and password for your router's admin panel.
12. Understanding the Different WiFi Standards: 802.11a/b/g/n/ac/ax (and What They Mean)
WiFi standards determine the speed and range of your WiFi network.
- 802.11ac (Wi-Fi 5): A common and fast standard.
- **802.11ax (Wi
How to connect laptop to router with ethernet cable

By IT Magics How to connect laptop to router with ethernet cable by IT Magics
Connect computer to router with ethernet cable

By IT Magics Connect computer to router with ethernet cable by IT Magics
How to Add Wireless Wifi Network Manually in Windows 10 PC or Laptop

By Discover You How to Add Wireless Wifi Network Manually in Windows 10 PC or Laptop by Discover You
Title: Use Your PC or Laptop as a Wireless Router
Channel: Guiding Tech
Use Your PC or Laptop as a Wireless Router by Guiding Tech
Wifi On Laptop
WiFi Router Setup: Laptop Guide (Lightning-Fast Internet!)
Welcome! Let's embark on a journey to unlock the full potential of your internet connection. We'll transform your laptop into a gateway to blazing-fast speeds with a meticulously configured WiFi router. This straightforward guide will help you bypass the hassles of sluggish buffering, lag, and frustrated downloads. Get ready to experience the internet as it should be – seamless, efficient, and utterly enjoyable.
Pre-Setup Preparations: Assembling Your Arsenal
Before we dive into the configuration process, let's ensure you have everything you need at your fingertips. Remember, a smooth setup stems from meticulous preparation.
- The Router: Of course, you'll need a WiFi router. Unbox it, and make sure you have all the essential components: the router itself, the power adapter, and the Ethernet cable (usually included). Different router models have different shapes and features. Familiarize yourself briefly with the ports and buttons.
- Your Laptop: This is your command center. Ensure your laptop is fully charged or connected to a power source. You’ll interact with the router's settings through your laptop's web browser.
- Internet Service Provider (ISP) Information: Gather the login credentials provided by your ISP. This will include your username, password, and potentially other specifics, such as connection type (e.g., PPPoE) crucial for authentication. Have this information readily available.
- Ethernet Cable: This is the bridge that connects your router to your modem (which may be built into your router). A reliable Ethernet cable ensures a solid connection during the initial setup.
- Time: Allocate a specific window of time to dedicate to this process. While the basic setup can be completed quickly, configuring optimal settings might require a bit more time.
Connecting the Hardware: The Physical Foundation
Now, let's get physical. The physical connections are the bedrock of your internet setup.
- Power Up: Plug the router’s power adapter into an electrical outlet and connect it to your router. Turn the router on.
- Modem Connection: Locate your modem (this might be a separate device provided by your ISP, or it may be integrated into your router). Connect your modem to your router using an Ethernet cable. Plug one end into the "WAN" (Wide Area Network), or "Internet" port on the router, and the other end into the Ethernet port on your modem.
- Laptop Connection: Connect your laptop to the router using an Ethernet cable. Plug one end into one of the available Ethernet ports on the router (typically labeled 1, 2, 3, or 4) and the other end into your laptop's Ethernet port. This will allow you to access the router’s configuration interface. This direct wired connection is critical for the initial setup, providing a stable connection.
Accessing the Router's Configuration Interface: Your Digital Control Panel
Once your physical connections are established, you'll need to access the router's settings.
- Open a Web Browser: Launch your preferred web browser on your laptop.
- Enter the Router's IP Address: In the address bar (where you usually type a website address), enter the router's IP address. This address is usually found on a sticker on the router itself or in the router's documentation. Common default addresses are 192.168.1.1 or 192.168.0.1. If your router doesn’t have a sticker, try these addresses. Most routers use this scheme by default.
- Login with Credentials: You'll be prompted to enter a username and password. Again, this information is usually printed on the router or in the accompanying documentation. Common default credentials are "admin" for both the username and password, or "admin" for the username and a blank password.
- Navigate the Interface: Once logged in, you'll be presented with the router's configuration interface. This interface will vary depending on the router's make and model, but all will have similar functionalities.
Configuring Your Internet Connection: Bringing the Internet to Life
Now comes the critical step of connecting your router to the internet. This process differs slightly depending on your ISP and the type of connection you have.
- Internet Connection Type: Locate the "Internet," "WAN," or "Connection" settings within the router's interface.
- Connection Details: Select the appropriate connection type based on the information provided by your ISP, typically:
- Dynamic IP (DHCP): This is the most common type. Your ISP automatically assigns your router an IP address. Select this option.
- Static IP: If your ISP has provided you with a specific IP address, subnet mask, gateway, and DNS servers, you should select this option and enter the information.
- PPPoE: If your ISP requires PPPoE (often used with DSL connections), you'll need to enter your username and password provided by your ISP.
- Save Settings: After entering the necessary information, save your settings. The router will then use the information to connect to your ISP and establish an internet connection.
Setting Up Your Wireless Network: Creating Your WiFi Zone
With your internet connection configured, it's time to create your wireless network, the magic behind your WiFi connectivity.
- Wireless Settings: Navigate to the "Wireless," "WiFi," or "WLAN" settings within the router's interface.
- Network Name (SSID): Choose a unique and memorable name for your WiFi network (SSID). This is what your laptop and other devices will see when they scan for available networks. Avoid using personal information in your network name.
- Security Type: Select a secure security protocol. WPA2-PSK (AES) or WPA3-Personal are recommended. Never choose WEP, as it's easily crackable.
- Password: Create a strong, unique password for your WiFi network. Use a combination of uppercase letters, lowercase letters, numbers, and symbols. Make it at least 12 characters long.
- Channel Selection (Optional): If you experience interference, you may need to change the WiFi channel. Most routers automatically select the best channel, but you can manually choose a channel (1, 6, or 11 are generally recommended for 2.4 GHz networks).
- Save Settings: Save your wireless network settings.
Connecting Your Laptop to Your New WiFi Network: The Final Link
Now, let's connect your laptop to the newly created WiFi network.
- Enable WiFi on Your Laptop: Ensure your laptop's WiFi adapter is enabled. There's usually a physical switch on the side or front of the laptop or a function key combination (e.g., Fn + a key with a WiFi symbol).
- Scan for Networks: Click the WiFi icon in your system tray (usually a series of bars, a WiFi symbol, or a globe) to scan for available WiFi networks.
- Select Your Network: Select the network name (SSID) you created earlier.
- Enter Your Password: Enter the WiFi password you set up.
- Connect and Test: Your laptop should now connect to the WiFi network. Test your internet connection by browsing the web or streaming a video.
Advanced Configurations: Fine-Tuning for Optimal Performance
Once the basic setup is complete, consider these advanced configurations for enhanced performance.
- Guest Network: Set up a guest network for visitors, separating them from your main network. This provides a layer of security.
- Quality of Service (QoS): Configure QoS settings to prioritize specific types of traffic (e.g., online gaming or video streaming).
- Firewall Settings: Ensure your router's firewall is enabled to protect your network from unauthorized access.
- Firmware Updates: Check periodically for firmware updates for your router. These updates often include security patches and performance improvements.
- Channel Width: If your router supports channel width settings (for 2.4 GHz or 5 GHz), experimenting with different values can impact speed and performance. Consider trying 20MHz for 2.4 GHz and 80MHz for 5 GHz, but results may vary.
- Wireless Mode: Ensure your wireless mode is set to the newest standard supported by all your devices.
- MAC Address Filtering: For added security, consider enabling MAC address filtering to allow only specific devices to connect to your network. However, this is an advanced step that can be difficult to manage.
Troubleshooting Common Issues: Conquering the Connectivity Challenges
Sometimes, things don't go smoothly. Here's how to address some common issues:
- No Internet Connection: Double-check all physical connections, ensure the router is connected to the modem, and verify your internet connection type and credentials. Restart your modem and router.
- Slow Internet Speed: Check your internet speed using an online speed test (e.g., Speedtest.net). Restart your modem and router. Move your router to a central location, away from obstructions and other electronic devices.
- Weak WiFi Signal: Move the router to a central location, free of obstructions like thick walls. If necessary, consider a WiFi range extender.
- Can’t Access Router's Interface: Make sure you are connected to the router, and
