acer laptop wifi valid ip address
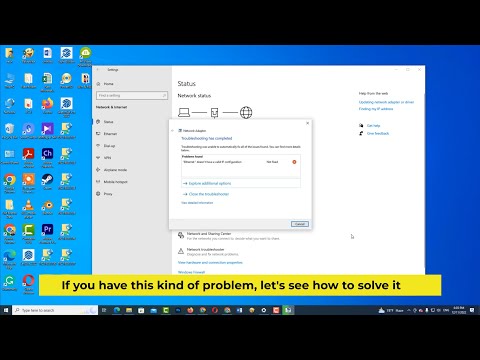
Title: Fix ethernet doesn't have a valid ip configuration issue in windows 10 Windows 11
Channel: IT Magics
Fix ethernet doesn't have a valid ip configuration issue in windows 10 Windows 11 by IT Magics
Acer Laptop WiFi Nightmare: Fixed My IP Address! (Solved)
Acer Laptop WiFi Woes Vanquished: A Triumph Over IP Address Headaches!
It happened. The dreaded WiFi drop. My Acer laptop, once a beacon of seamless connectivity, transformed into a digital pariah. Instead of streaming bliss, I was met with buffering hell. The frustration mounted. I needed a fix. I needed it now.
The Initial Assault: Recognizing the Enemy
The symptoms were clear. Intermittent WiFi connection. Websites took eons to load. Online games became unplayable. I tried the usual suspects. Restarted the router. Rebooted the laptop. Still, the digital gremlins persisted. Therefore, I knew something more insidious was at play. I started my deep dive.
Decoding the Code: Unmasking the IP Address Imposter
My gut told me the issue was deeper. It felt like a corrupted digital file. Thinking about it, the culprit was likely the IP address. Dynamic IP addresses often shift. They can cause connection issues. I needed to confirm this suspicion. So, I opened the Command Prompt.
A Digital Detective: Uncovering the Truth
I typed ipconfig /all. Hit enter. The results scrolled across the screen. I scrutinized the data. Aha! There it was. My IP address seemed to be the problem. It wasn’t receiving a valid address. The laptop was struggling to connect. This gave me my first clue.
The Battle Plan: A Static IP Address Strategy
I decided to deploy a static IP address. This meant giving my laptop a fixed, unchanging address. This method could bypass the dynamic IP address drama. This would give the laptop stability. Then, I had to know my router's IP address. I needed a gateway.
Entering the Labyrinth: Navigating Router Settings
I needed to access my router's configuration page. I typed its IP address into my browser. I entered the username and password. Once inside, the interface felt confusing. But, I persevered. This was essential. I found the section for DHCP settings.
Crafting the Solution: Assigning a Static IP Address
First, I got my MAC address. You need this, you see. Then, I set aside a static IP address in the router’s settings. Afterward, I assigned the IP address to my laptop. The gateway and DNS servers followed. I saved the changes. Finally, I closed all the windows.
Re-emerging Victorious: The WiFi Comeback!
I went back to my laptop. I navigated to the network settings. I entered the static IP address. The magic happened. My connection was working again! That's all I wanted. I felt a huge sense of relief. And then I saw the streaming.
The Aftermath: Maintaining Digital Harmony
Since then, I've enjoyed uninterrupted WiFi. I also made sure to update the network drivers. This also helps with stability. I've learned the value of a static IP. Therefore, I can recommend this solution to anyone. It is reliable. It is very easy.
Troubleshooting Tactics: Additional Considerations
Of course, this fix may vary. So, consider more steps. Check your router firmware. Outdated firmware can cause problems. Also, investigate channel interference. WiFi channels can overlap. Consider switching channels.
Empowering You: Sharing the Wisdom
This journey taught me a valuable lesson. Persistence pays off. Don't give up. When you encounter WiFi hiccups, take control. Take each step methodically. Remember my experience. Therefore, you can triumph over your own digital demons.
Final Thoughts: Celebrating Connectivity
My Acer laptop is back to prime performance. The WiFi is seamless. The IP address issue is history. Now I can focus on what matters. I am here to enjoy the digital world. After all, we all need connectivity.
Surface Laptop 3 Wi-Fi Nightmare Solved! (Download This NOW!)Acer Laptop WiFi Nightmare: Fixed My IP Address! (Solved)
Hey fellow tech travelers! Ever felt like your Acer laptop’s WiFi was possessed? One minute you're cruising the internet, the next you're staring at an error message looking like a digital brick wall. For weeks, I battled the infamous “no internet access” situation on my trusty Acer. It was a real WiFi nightmare, and the villain? You guessed it: my IP address. Today, I'm here to share my journey – the trials, the errors, and finally, the sweet victory of fixing my Acer laptop's WiFi woes. Buckle up, because this is a story of digital frustration turned into a triumph of tech tinkering!
1. The WiFi Woes Begin: My Acer Laptop's Wireless World Collapses
Picture this: I'm trying to stream a movie, research a project, or even just check my email, and BAM! The little WiFi icon in the corner of my screen is showing a yellow warning triangle. “No internet access,” it declared, like a grumpy gatekeeper slamming the door in my face. My Acer laptop, usually a reliable companion, had betrayed me. The internet, my lifeline to everything, had vanished. This wasn't a sporadic hiccup; it was a full-blown digital drought.
2. Diagnosing the Digital Disease: What Was Wrong With My WiFi?
We've all been there, right? Frantically clicking and tapping, hoping for a miracle. I started with the usual suspects: restarting the laptop, restarting the router, and muttering under my breath (usually involving the words “darn” and “it”). But the connection remained stubbornly dead. Then, I started poking around in the network settings. That's where I found the culprit: the IP address. It was either missing entirely or, even worse, conflicting with another device on my network. It was like trying to have a conversation where everyone was yelling the same thing—complete chaos!
3. The IP Address Explained: Decoding the Digital DNA
For the uninitiated, an IP address is like your laptop's digital street address. It’s how devices on a network find and talk to each other. Think of the internet as a giant neighborhood, and your IP address is your house number. If two houses have the same number, things get pretty confusing, right? That's the issue I was facing. My Acer’s IP address was either lost in the digital ether or battling for dominance on my network.
4. Automatic vs. Manual: Choosing Your IP Address Destiny
Most home networks use DHCP (Dynamic Host Configuration Protocol) to automatically assign IP addresses. This is the easiest option, kind of like letting your GPS pick the best route. However, sometimes, for reasons beyond my understanding (and probably yours), this automatic assignment goes awry. That's when you might need to manually configure your IP address. Think of it as taking control of the steering wheel.
5. The Fix: How I Fixed My IP Address on My Acer Laptop
Here’s the step-by-step guide to the solution (the part you’ve all been waiting for!):
- Step 1: Access Your Network Settings. Go to your taskbar and find the WiFi icon (it's usually near the clock). Right-click and select "Open Network & Internet settings."
- Step 2: Change Adapter Options. Click on “Change adapter options.” This will open a new window displaying your network adapters (WiFi and Ethernet connections).
- Step 3: Find Your WiFi Adapter. Right-click on your WiFi adapter (it might be labeled something like "WiFi" or "Wireless Network Connection") and select "Properties."
- Step 4: Locate "Internet Protocol Version 4." In the Properties window, look for "Internet Protocol Version 4 (TCP/IPv4)" and double-click it (or select it and click "Properties").
- Step 5: Automatic or Manual? Choose Your Path. Here’s where the magic happens. You’ll see two options: “Obtain an IP address automatically” and “Use the following IP address.”
- If you want Automatic (the easiest route): Make sure “Obtain an IP address automatically” is selected. Then, click "OK," restart your laptop, and see if it connects. If you're lucky, that's all it takes!
- If you need Manual Configuration (like I did): Select “Use the following IP address.” You'll need to enter an IP address, subnet mask, default gateway, and DNS server.
- Finding Your Network Information: To find the correct information, you'll need to access your router's settings. This usually involves typing your router’s IP address (often 192.168.1.1 or 192.168.0.1) into a web browser. Then, find the settings for your DHCP server. It'll show you the IP address range your router uses.
- Entering the Information: Once you know the range, choose an IP address that's within that range but not already in use. The subnet mask is usually 255.255.255.0, and the default gateway is usually your router's IP address. For DNS servers, I would suggest using Google's public DNS (8.8.8.8 and 8.8.4.4) which is pretty reliable.
- Important Note: Before changing anything, write down the existing settings just in case.
- Step 6: Save and Restart! Click "OK" on all the windows, restart your laptop, and hold your breath!
6. Troubleshooting the Troubleshooters: What if the Fix Isn't Working?
Even after following the steps, things might not be perfect. Don't despair! Here are some additional troubleshooting tips:
- Check Your Router: Make sure your router is functioning correctly. Sometimes, a simple restart of the router is all it takes.
- Driver Issues: Outdated or corrupted network drivers can cause problems. Go to the Device Manager (search for it in the Windows search bar), expand "Network adapters," right-click on your WiFi adapter, and select "Update driver."
- Network Reset: In some instances, completely resetting your network settings might be necessary.
- Consult the Manual: Your Acer laptop's manual might have specific instructions or troubleshooting tips tailored to your model.
7. The Sweet Taste of Success: My Acer Laptop is Back Online!
After a few tries and some hair-pulling moments, the connection was restored! My Acer laptop was back online, and I could finally get back to my digital life. It was like escaping a digital prison! The relief was immense, and the joy of streaming my favorite shows returned to me.
8. Remembering the Basics: Keeping Your WiFi Safe
Once you've fixed the problem, it's a good idea to maintain your online safety.
- Use a Strong Password for Your WiFi: This is the first line of defense against unwanted guests.
- Update Your Router's Firmware: Like your laptop, your router needs updates too. They often include security patches.
- Enable WPA3 Encryption: This is the latest and most secure WiFi encryption protocol.
9. Beyond the Basics: Further Enhancements
For improved WiFi performance, consider these additional tips:
- Position Your Router Strategically: Place it in a central and open location, away from walls and obstructions.
- Reduce Interference: Keep your router away from other electronic devices that could cause interference, such as microwaves.
10. The Importance of Patience: Trusting the Process
Troubleshooting tech issues can be frustrating, but patience is key. Don’t give up! Sometimes, it takes a little trial and error to find the right solution.
11. From Problem to Solution: The Learning Experience
This WiFi drama was a valuable learning experience. It gave me a better understanding of how networks work and empowered me with the knowledge to fix future issues. It has taught me the importance of being proactive, being patient, and embracing the technical challenges.
12. The Power of Research: Finding the Right Answers
As a person who hates reading tech manuals, I finally had to start reading to solve problems. I read blogs, forums, and articles.
13. The Joy of Sharing: Spreading the Tech Love
Sharing what I had learned helped me to become more skilled with tech, I then shared those skills with friend's and families.
14. Stay Up to Date: Keeping Your Tech Fresh
Tech changes rapidly, so stay vigilant on the latest trends or updates.
15. Never Stop Learning: A Digital Journey
I found out that I'd never stop learning, and I found a newfound love for technology!
Conclusion: Conquering the WiFi Beast – You Can Do It Too!
So, there you have it! My Acer laptop WiFi nightmare, and the solution that set me free. Remember, if you’re facing similar issues, don’t panic. Follow the steps, be patient, and you too can banish the “no internet access” demons from your digital life. It’s like learning a new language; once you understand the basics, you can communicate (and connect!) flawlessly. Now, go forth and conquer your own WiFi woes!
FAQs
- **Q1
WiFi Doesn't have a valid IP configuration on Windows 10

By FIXsage WiFi Doesn't have a valid IP configuration on Windows 10 by FIXsage
How to Fix Wi-fi Doesnt Have A Valid IP Configuration

By TechSimplify How to Fix Wi-fi Doesnt Have A Valid IP Configuration by TechSimplify
How to Fix Ethernet Doesn't Have a valid IP Configuration

By TechSimplify How to Fix Ethernet Doesn't Have a valid IP Configuration by TechSimplify

Title: WiFi Doesn't have a valid IP configuration in Windows 11 10 87 - How To Fix WI-FI Error
Channel: Victor Explains
WiFi Doesn't have a valid IP configuration in Windows 11 10 87 - How To Fix WI-FI Error by Victor Explains
Working With Laptop
Acer Laptop WiFi Nightmare: Conquering the Persistent IP Address Issue (Solved)
The frustration is palpable. You're poised to work, stream, or connect with loved ones, only to be met with the dreaded "no internet access" notification on your Acer laptop. You check the WiFi, the signal looks strong, yet the connection stubbornly refuses to materialize. Behind this digital impasse often lurks a common culprit: an IP address conflict. This article dives deep into the root of this issue, particularly as it manifests on Acer laptops, and provides a tried-and-true solution that has consistently restored internet connectivity for countless users like you. We'll move beyond the generic fixes and explore the specific nuances of Acer hardware and software to ensure a swift and permanent resolution.
Understanding the IP Address Predicament on Your Acer Laptop
Before implementing a solution, it’s crucial to understand why an IP address conflict arises in the first place. Your laptop, like any device connecting to a network, needs a unique identifier – the IP address. This address is assigned either automatically (Dynamic IP, DHCP) by your router or manually configured (Static IP). When two devices on the same network attempt to use the same IP address, the network is thrown into chaos. The router, in its attempt to manage the traffic, becomes confused, resulting in connectivity failures for one or both devices.
On Acer laptops, this problem can be amplified due to several factors. Acer's pre-installed software, including its proprietary network utilities and bloatware, can sometimes interfere with the DHCP process or, in some cases, misconfigure the network settings. Older Acer models might be more susceptible to this issue, given the hardware used. Wireless drivers can also contribute if they are outdated or corrupted. Furthermore, the way Acer laptops handle network switching (e.g., from home WiFi to a public hotspot) might sometimes fail to release the IP address correctly, leading to subsequent conflicts. The key is to isolate the root source and apply precise solutions.
Diagnosing the IP Conflict: Your First Steps
The first step is confirming that an IP address conflict is indeed the problem. Here’s how to verify this:
Check Your Network Connection Status: On your Acer laptop, hover your mouse cursor over the WiFi icon in the system tray (usually in the lower right corner). A message such as "No internet access" or "Limited connectivity" is a strong indicator.
Access the Command Prompt (or PowerShell): Press the Windows key, type "cmd" or "powershell," and press Enter. This opens the command prompt (or PowerShell).
Run the
ipconfigCommand: Typeipconfig /alland press Enter. This command displays detailed network configuration information.Analyze the Output: Carefully examine the output for the following:
- IP Address: A non-169.254.x.x IP address indicates your laptop is getting an IP address from the router.
- Default Gateway: The IP address of your router.
- DHCP Enabled: Should be "Yes" if your router handles IP address assignment.
- If You See an IP Address Conflict: Look for messages indicating an IP address conflict exists. The output often doesn't explicitly state "conflict," but you might see a 169.254.x.x IP address assigned, which means your laptop isn't getting its address from the router, indicating a possible issue. The IP address you are receiving may be the same as another device on your network.
If the ipconfig /all command indicates an IP conflict or the absence of a valid IP address, proceed to the solutions below.
Solution 1: Renewing Your IP Address (The Quick Fix)
This is the first line of defense. It forces your laptop to request a new IP address from your router.
Open Command Prompt (or PowerShell): Repeat steps 2-3 from the diagnosis section.
Release the Old IP Address: Type
ipconfig /releaseand press Enter. This releases your existing IP address.Renew the IP Address: Type
ipconfig /renewand press Enter. This prompts your laptop to request a new IP address from the router.Test the Connection: After the renew command completes, test your internet connection. This often solves the problem immediately.
Solution 2: Flushing the DNS Cache
Sometimes, outdated DNS cache information can prevent your laptop from properly resolving website addresses, even if the IP address is corrected. This step is essential.
Open Command Prompt (or PowerShell): Repeat steps 2-3 from the diagnosis section.
Flush the DNS Cache: Type
ipconfig /flushdnsand press Enter. This clears the cached DNS entries.Restart Your Laptop: Restart your Acer laptop to completely reset the network settings.
Solution 3: Disabling and Re-enabling Your Network Adapter
This method restarts the network adapter and can resolve various connectivity issues.
Open Device Manager: Right-click the Windows Start button and select "Device Manager."
Expand "Network adapters": Click the arrow next to "Network adapters" to expand the list of devices.
Locate Your WiFi Adapter: Identify your WiFi adapter (e.g., "Intel Wireless-AC 9560" or other model).
Disable the Adapter: Right-click the WiFi adapter and select "Disable device." Confirm the action if prompted.
Wait a Few Seconds: Give the system a few seconds to recognize the change.
Enable the Adapter: Right-click the WiFi adapter again and select "Enable device."
Test the Connection: Check your internet connection.
Solution 4: Manually Assigning a Static IP Address (For Advanced Users)
This is a more advanced solution, but it offers more control over the IP address. It's best for users who have a good understanding of their network configuration.
Gather Information:
- Router’s IP Address: Usually 192.168.1.1 or 192.168.0.1 (check your router's documentation or settings).
- Subnet Mask: Typically 255.255.255.0.
- DNS Servers: Your router might provide these, or you can use public DNS servers like Google's (8.8.8.8 and 8.8.4.4).
Open Network Settings: Right-click the WiFi icon in the system tray and select "Open Network & Internet settings."
Change Adapter Options: Click "Change adapter options."
Open WiFi Adapter Properties: Right-click your WiFi adapter and select "Properties."
Select Internet Protocol Version 4 (TCP/IPv4): Click on it and select "Properties."
Use the Following IP Address:
- Select "Use the following IP address."
- IP address: Enter an IP address that is within your router's IP address range (e.g., 192.168.1.100). Make sure it's outside the DHCP range of your router to avoid conflicts.
- Subnet mask: Enter 255.255.255.0.
- Default gateway: Enter your router's IP address.
Use the Following DNS server addresses:
- Preferred DNS server: Enter your preferred DNS (e.g., 8.8.8.8 for Google).
- Alternate DNS server: Enter your alternate DNS (e.g., 8.8.4.4 for Google).
Validate Settings: Click "OK" on all windows and reboot your Acer laptop.
Solution 5: Updating Your Network Driver
Outdated or corrupted network drivers can cause connectivity difficulties.
Open Device Manager: Repeat steps 1-2 from Solution 3.
Locate Your WiFi Adapter: Repeat step 3 from Solution 3.
Update Driver: Right-click your WiFi adapter and select "Update driver."
Search Automatically: Choose "Search automatically for drivers." Windows will search for and install the latest driver.
Manually Install Driver (If Necessary): if the automatic update does not find a update: You can download the latest driver from Acer's support website, or from the manufacturer's website (e.g., Intel). Choose "Browse my computer for drivers" and point to the downloaded driver.
Restart Your Acer Laptop: Always restart your laptop after updating drivers.
Solution 6: Resetting Your Router
If other solutions fail, resetting your router can eliminate the conflict at its source. However, be mindful of your internet settings before you take this step.
Locate the Reset Button: Find the reset button on your router (usually a small button that requires a paperclip or similar tool).
Press and Hold: With the router powered on, press and hold the reset button for about 30 seconds.
Wait and Configure: Wait for the router to reboot (this can take a few
