can you mirror iphone to laptop without wifi

Title: How to Mirror iPhone to Windows PC without WiFi via USB
Channel: Jigxor Tutorials
How to Mirror iPhone to Windows PC without WiFi via USB by Jigxor Tutorials
can you mirror iphone to laptop without wifi, how to mirror iphone to laptop without internet, can you screen mirror to laptop without wifi, how to mirror iphone to laptop without wifi, how to mirror iphone to windows laptop without wifi
Mirror Your iPhone to Laptop (No Wi-Fi Needed!)
Effortlessly Mirror Your iPhone to Your Laptop: No Wi-Fi Required!
Imagine this: You're eager to showcase photos, videos, or even a live presentation directly from your iPhone. However, a pesky lack of Wi-Fi threatens to derail your plans. Fear not! There's a secret weapon: mirroring your iPhone to your laptop without relying on a Wi-Fi connection. It's simple, quick, and surprisingly effective.
Unveiling the Magic: Why Mirroring Matters
Before jumping into the how-to, consider why mirroring is so valuable. Often, you need to share content that resides on your iPhone's screen. Perhaps you have a client presentation, need to preview a new video edit, or simply want to share family photos. Mirroring bridges the gap between your small screen and a larger display. Doing so immediately increases the impact and shareability of your content. Moreover, it amplifies your ability to connect with your audience.
Method 1: Harnessing the Power of USB
This method is your steadfast friend. It provides a reliable connection, especially when Wi-Fi is unavailable. It's a wired solution, but don't let that deter you. It's straightforward and efficient.
Gather Your Essentials. You'll need your iPhone, your laptop, and a compatible Lightning to USB cable. Double-check that this cable delivers both data and power.
Software is Key. You'll require third-party software. Several excellent applications facilitate this mirroring process. Many are user-friendly and offer extensive features. Popular options include iMyFone MirrorTo, ApowerMirror, and others. Research and select an app that aligns with your needs.
Installation and Setup. Install your chosen mirroring application on your laptop. Follow the on-screen prompts to complete the installation process.
Connecting the Dots. Physically connect your iPhone and laptop using the USB cable. Launch the mirroring application on your laptop. Grant the necessary permissions on your iPhone, if prompted. You'll likely need to trust the computer.
Mirroring Begins. The application should automatically detect your iPhone. Follow the on-screen instructions to initiate the mirroring process. Soon, your iPhone screen will appear mirrored on your laptop!
Method 2: Embracing the Tethering Route
This method taps into your iPhone's cellular data connection. It provides a wireless alternative, albeit one that consumes some data. This is ideal if you don’t have Wi-Fi.
Enable Personal Hotspot. On your iPhone, navigate to Settings > Personal Hotspot. Toggle the switch to 'on.' You'll need to create a password. Make it secure.
Laptop Connection. On your laptop, locate the Wi-Fi settings. Look for your iPhone's hotspot name (it's usually your iPhone's name). Enter the password you created.
Software is Still Important. The mirroring software you used previously still works here. These programs operate regardless of a Wi-Fi connection.
Mirroring Time. Launch the mirroring application on your laptop. Connect your iPhone within the app, following instructions. Your iPhone screen should now mirror onto your laptop.
Method 3: Exploring the Advanced Wireless Options
This option may require some additional setup. However, it can be very convenient. Consider it when you value a wireless experience.
Researching the Possibilities. Certain laptops include built-in screen mirroring capabilities. Check Windows settings to determine if you can "Project to this PC." If not, you may need specialized software.
Software Again! Consider applications like Reflector or AirServer. These convert your laptop into a receiver for your iPhone's AirPlay functionality.
Initial Setup is Crucial. Install your chosen application. Configure its settings for mirroring.
Activating AirPlay. On your iPhone, access the Control Center. Tap the "Screen Mirroring" option. Select your laptop from the list of available devices.
Mirror Magic. Your iPhone screen should appear on your laptop.
Troubleshooting Common Mirroring Glitches
Sometimes, things don't go as planned. Don't fret; troubleshooting is part of the process.
- Connection Issues: Double-check your USB cable. Try a different cable or USB port. Verify your iPhone's Personal Hotspot is active.
- Software Glitches: Reboot your devices. Reinstall the mirroring application. Ensure both devices have the latest operating system updates.
- Sound Problems: Confirm your audio settings are configured correctly in your mirroring application. Check the volume levels on both your iPhone and laptop.
- Performance Issues: If mirroring is laggy or slow, close unnecessary applications on both devices. Consider upgrading your Wi-Fi router.
Elevate Your Presentation Game
Mirroring your iPhone to your laptop opens up exciting opportunities. You are now equipped to effortlessly share content. Employ this technology to captivate your audience. Also, boost your productivity. Embrace these methods, and you will become a mirroring master. Go out there and get started today!
Is Your Laptop's Wi-Fi Card a SLOWPOKE? (Find Out NOW!)Mirror Your iPhone to Laptop (No Wi-Fi Needed!)
Hey tech enthusiasts! Ever wished you could share your iPhone's screen on your laptop, showcasing photos, playing games, or even giving presentations – without relying on the fickle friend that is Wi-Fi? We've all been there, staring at that buffering icon at the most inopportune moment. Fear not! This guide is your trusty map to mirroring your iPhone to your laptop, bypassing Wi-Fi woes and giving you complete control. Think of it as opening a portal to your digital world, directly from your pocket. We’re diving deep, so buckle up!
1. The Wi-Fi-Free Reality: Why Mirroring Matters
Let's face it, Wi-Fi can be as reliable as a toddler with a sugar rush. Dropouts, slow speeds, and the dreaded "no internet connection" messages are the bane of our digital lives. But what if you could bypass all that and still seamlessly share your iPhone's screen on your laptop? That’s the beauty of mirroring without Wi-Fi. Imagine giving a PowerPoint presentation on a projector without the dreaded Wi-Fi lag, or sharing family videos during a road trip. This isn't just about convenience; it's about unlocking opportunities. It’s like having your own personal movie theater, right at your fingertips, ready to go whenever AND wherever you are.
2. Understanding the Basics: What You'll Need
Before we get our hands dirty, let's gather our tools. Think of this as your digital toolbox. Here's what you'll need:
- Your iPhone: Obviously! (iPhone 6 or later is generally recommended for smoother performance.)
- Your Laptop: Windows or Mac, doesn't matter, we'll cover both!
- A Lightning Cable: A reliable one is crucial. This is your direct connection, the lifeline of your mirroring endeavors.
- Software (More on this shortly!): We’ll outline several options, each with its unique strengths.
3. For Mac Mavericks: Mirroring with QuickTime Player (It's Magic!)
Mac users, rejoice! You have a built-in secret weapon: QuickTime Player. This is the simplest and most direct method. Think of it as a magic trick; you have all the necessary components right there, ready to wow.
- Step 1: Connect Your iPhone: Plug your iPhone into your Mac using your Lightning cable.
- Step 2: Open QuickTime Player: Find it in your Applications folder.
- Step 3: Start a New Movie Recording: Go to File > New Movie Recording.
- Step 4: Select Your iPhone as the Camera: Click the little arrow next to the record button and choose your iPhone under "Camera." Also, select your iPhone under "Microphone" (optional, if you want audio).
- Step 5: Mirror and Record (Optional): Your iPhone screen should now be mirrored! You can hit the record button to capture your screen activity.
There you have it – instant mirroring, no extra software required. Isn't it wonderful how effortless it can be?
4. Windows Wonders: Exploring Software Options
Windows users, don't feel left out! We have a plethora of software options to get your iPhone mirroring game strong. Here are a few of the most popular:
- 3uTools: A fantastic free option. It's often considered a one-stop-shop for iPhone management, but its screen mirroring capabilities are surprisingly robust.
- iMazing: This is a paid option, but it offers a powerful feature set, including advanced mirroring capabilities and data transfer. Think of it as the premium experience.
- Reflector: A well-regarded software, known for its stability and ease of use.
- LetsView: Another Free software, it is a free screen mirroring tool for mirroring iPhone/iPad screen to Windows PC and Mac.
The choice depends on your needs, and what's most important, the quality of the mirroring. Try a few out and see which one fits your workflow the best!
5. Setting Up 3uTools: A Step-by-Step Guide for Windows
Since 3uTools is free and fairly straightforward, let's walk through a quick setup guide:
- Step 1: Download and Install: Head over to the 3uTools website and download the software. Install it on your PC.
- Step 2: Connect Your iPhone: Plug your iPhone into your PC using your Lightning cable.
- Step 3: Open 3uTools: Launch the software. It should detect your iPhone.
- Step 4: Find the "Mirror" Feature: Look for the "Real-time Screen" or "Mirror" option. It might be located in the toolbar or under a dedicated menu.
- Step 5: Start Mirroring: Click the appropriate button, and your iPhone screen should start mirroring on your PC!
Easy peasy lemon squeezy!
6. Troubleshooting Common Mirroring Problems
Sometimes, things don’t go according to plan. Don't panic! Here's a quick troubleshooting guide:
- Connection Issues: Make sure your Lightning cable is working correctly and is securely plugged in on both ends. Try a different cable.
- Software Glitches: Restart your iPhone and your computer. Sometimes, a simple reset can work wonders.
- Driver Problems: Ensure that your computer has the necessary drivers installed for your iPhone. (Usually, the software will handle this automatically.)
- Compatibility Issues: Double-check that your iPhone and laptop meet the minimum system requirements of the mirroring software.
7. Why Go Wi-Fi-Free? Presentation Power!
Consider this scenario: You're giving a crucial presentation, but the Wi-Fi at the venue is about as reliable as a politician's promise. With Wi-Fi-free mirroring, you're in control. Your presentation, your videos, your everything – displayed flawlessly, without a single lag. It's a game-changer for professionals.
8. Gaming on the Big Screen: Level Up Your Mobile Experience
Mobile gaming is fantastic, but the small screen can sometimes be a limitation. Mirroring gives you the chance to play your favorite games on your laptop, enhancing the experience and providing a bigger, more immersive view. It's like trading your mobile screen for a high-definition cinema experience!
9. Sharing Family Memories Without the Wait
Imagine a family gathering, and you want to quickly show photos or videos. Instead of huddling around a tiny phone screen, simply mirror your iPhone to your laptop. It's instant sharing, immediate enjoyment, and avoids the dreaded Wi-Fi buffer.
10. Recording Your Screen Activity
Many mirroring apps, like 3uTools, include recording features. This opens up a world of possibilities: creating tutorial videos, recording gameplay, or documenting any on-screen activity.
11. The Importance of a Reliable Cable: Your Digital Lifeline
I cannot stress this enough: a quality Lightning cable is paramount. It’s the umbilical cord connecting your iPhone and your laptop. A loose connection or a frayed cable can disrupt everything. Invest in a good one!
12. Choosing the Right Software: A Personal Approach
The ideal software depends on your specific needs. Do you need basic mirroring or advanced features? Are you willing to pay for a premium experience? Experiment with different software and find the one that fits your personal workflow and budget.
13. Exploring Advanced Features (Optional)
Some mirroring apps offer bonus features such as:
- Screen Recording: Capture everything that’s happening on your screen.
- Wireless Mirroring: Some software offers wireless mirroring, which still avoids the need for Wi-Fi!
- Customization Options: Adjust the resolution, frame rate, and other settings for optimal display.
14. Beyond the Basics: Creative Applications
The possibilities extend beyond standard mirroring. Think about using your laptop as a second screen for your iPhone, or as a digital canvas for art or design projects.
15. The Future of Mirroring: What's Next?
The technology continues to evolve. Expect even more seamless integration, improved performance, and additional features in the not-so-distant future. It's an exciting time to be exploring screen mirroring!
Conclusion: Unleash Your iPhone's Potential!
There you have it! A comprehensive guide to mirroring your iPhone to your laptop without relying on Wi-Fi. We hope this guide unlocked the door to a more connected and seamless digital experience. From presentations to gaming to simply sharing memories, mastering this technique opens a realm of possibilities. Go forth and conquer the world of Wi-Fi-free mirroring! Now get out there, and make the most of your devices!
FAQs: Your Burning Questions Answered!
1. Is it safe to mirror my iPhone to my laptop?
Yes, as long as you use reputable software, it's generally safe. Ensure you download software from trusted sources.
2. Does mirroring drain my iPhone's battery?
Yes, mirroring does consume battery power. Keep an eye on your battery life, especially if you mirror for extended periods.
3. Can I mirror my iPhone to my laptop wirelessly?
Some software offers wireless mirroring options that don't even need Wi-Fi. Explore the features of your chosen software.
**4. What if the audio isn
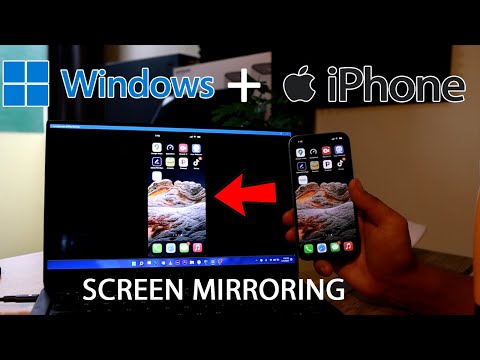
Dell WiFi: The ONE Trick to Instantly Connect!Connecting iPhone to Windows PC Easily

By Syinite Talks Connecting iPhone to Windows PC Easily by Syinite Talks
How to Connect MacBook Screen to TV or Monitor Wirelessly, Free, No WIFI, No Apple TV 2023

By rizisuper How to Connect MacBook Screen to TV or Monitor Wirelessly, Free, No WIFI, No Apple TV 2023 by rizisuper
How to Mirror Android to PC without WiFi Cast Android Phone
By AirDroidOfficial How to Mirror Android to PC without WiFi Cast Android Phone by AirDroidOfficial
Title: How to screen mirror your iPhone to a Windows PC
Channel: Torogi Pro
How to screen mirror your iPhone to a Windows PC by Torogi Pro
Laptop Wifi Connect
Mirror Your iPhone to Laptop (No Wi-Fi Needed!)
Have you ever wished to seamlessly project your iPhone's screen onto your laptop, instantly sharing photos, videos, presentations, or even playing games on a larger display? The desire is common, and the solution is simpler than you might imagine. We explore the most effective methods for mirroring your iPhone to your laptop – even when devoid of a Wi-Fi connection. Forget complex configurations and technical jargon; we will provide practical, user-friendly instructions.
Understanding the Need: Why Mirroring Matters
The advantages of mirroring your iPhone to your laptop are numerous. It transcends mere convenience. Think about the enhanced clarity when presenting a slide deck, the immersive experience of playing mobile games on a bigger screen, or the ease of sharing family videos with colleagues. Mirroring allows for a richer, more interactive user experience. Furthermore, the ability to project your iPhone's screen without Wi-Fi is a game-changer, opening up possibilities in areas with unreliable or nonexistent internet connectivity.
Method 1: Utilizing Cables and Connections – The Reliable Approach
The most reliable method, in our view, rests on the time-tested cable connection. While wireless solutions offer convenience, a wired connection eradicates potential lag, provides superior stability, and bypasses the need for a Wi-Fi network. The essential requirement is a Lightning to USB cable, the standard charging cable for iPhones.
The process is straightforward:
Connect your iPhone: Plug the Lightning end of the cable into your iPhone's charging port.
Connect to your laptop: Insert the USB end of the cable into an available USB port on your laptop.
Trust the computer (iPhone): On your iPhone, you might be prompted to "Trust This Computer." Tap "Trust." This grants your laptop permission to access your iPhone's data.
Software Selection: Next, you must utilize a software solution for screen mirroring. Several options exist. We suggest using QuickTime Player (pre-installed on all Macs) as the easiest and most well-integrated, because it comes ready-made. For Windows users, we’ll offer a simple tool later.
- For Mac Users (QuickTime Player): Open QuickTime Player (located in Applications). Navigate to "File" and select "New Movie Recording." A window will appear, likely showing your Mac's built-in webcam. Click the small downward-pointing arrow next to the record button. In the options, select your iPhone as the camera and the microphone. Your iPhone's screen will now be displayed on your laptop.
- For Windows Users (MirrorTo): Download and install a mirroring application, such as MirrorTo. Some are free, while others offer a trial. Launch the application and then connect your iPhone via the Lightning cable. Follow the on-screen instructions. The mirroring application should detect your iPhone. Choose the iPhone from the list of devices.
Enjoy the Display: Your iPhone's screen should now be mirrored onto your laptop. From this point, interact with your iPhone as usual, and the actions are replicated on your laptop's screen.
Method 2: Leveraging Wireless Mirroring – For On-The-Go Convenience
While wired connections offer the best stability, circumstances will sometimes dictate the necessity of a wireless solution. The key player in this arena is AirPlay, Apple's proprietary wireless technology. However, note that this approach requires a stable Wi-Fi network, not always available.
Here's how to mirror your iPhone to your laptop using AirPlay, assuming a shared Wi-Fi network:
Ensure Compatibility: Verify your laptop supports AirPlay. Most recent Apple laptops (MacBooks introduced from 2011 onwards) have it built-in. Windows laptops require third-party applications.
Wi-Fi Connection: Confirm that both your iPhone and your laptop are connected to the same Wi-Fi network. This is non-negotiable for AirPlay to function correctly.
Mirroring (iPhone): Open the Control Center on your iPhone by swiping down from the top-right corner (iPhone X and later) or swiping up from the bottom (older iPhones).
Screen Mirroring: Tap the "Screen Mirroring" icon (it looks like two overlapping rectangles). A list of available devices will appear.
Select Your Laptop: Choose your laptop from the list. If prompted, enter the AirPlay passcode that appears on your laptop screen.
Mirroring Commences: Your iPhone's screen will now be displayed on your laptop.
- Windows Alternative: If you have a Windows laptop, you'll need an AirPlay receiver application. Several free and paid options are available. Popular choices include 5KPlayer, or the less user-friendly but more common ShareOn Win. Download and install the application, then follow the on-screen instructions. This generally involves starting the service and then selecting your laptop from the AirPlay list on your iPhone.
Method 3: Exploring Miraculous Mobile Hotspot Capabilities
What if Wi-Fi is entirely inaccessible? The answer lies in using your iPhone's Personal Hotspot feature. This allows your iPhone to act as a Wi-Fi router, creating a network that your laptop can connect to. This doesn't guarantee perfect mirroring, especially if you have a slow data connection. It requires careful configuration and an understanding of mobile data limitations.
Here's how to set up your iPhone as a hotspot and mirror to your laptop:
Enable Personal Hotspot: On your iPhone, go to "Settings" > "Personal Hotspot." Toggle the "Allow Others to Join" switch to the "on" position.
Laptop Connection: On your laptop, go to the Wi-Fi settings and find your iPhone's hotspot (named after your iPhone). Connect to it. You'll likely be prompted to enter a password, which is displayed on your iPhone's hotspot settings screen.
AirPlay or Third-Party Application: Once connected, you can use either AirPlay (if your laptop supports it) or a third-party screen mirroring application (Windows users) following the instructions provided above.
- Considerations: Be mindful of your mobile data plan. Screen mirroring consumes significant data, especially when streaming videos or playing games. Monitor your data usage to avoid unexpected charges. The speed and stability of your connection will be dependent on your mobile data signal strength.
Method 4: Delving into Third-Party Applications: An Expanded Arsenal
Beyond the methods we've outlined, several third-party applications provide screen mirroring capabilities. These apps offer additional features, such as recording, remote control, and advanced streaming options. This can streamline the entire process.
Here are some of the best-regarded apps to consider:
- ApowerMirror: A versatile application compatible with both Windows and macOS. It delivers a functional mirroring experience, with options for screen recording and control.
- LetsView: Free and straightforward, LetsView is appreciated for its simplicity and easy setup. It supports multiple platforms and offers wireless screen mirroring.
- LonelyScreen: A popular AirPlay receiver for Windows users. It does not provide advanced features, but it gets the base mirroring job done.
Always choose an application from a reputable developer that is tested and trusted.
Troubleshooting Tips: Addressing the Common Issues
Mirroring isn't always a flawless experience. To ensure a smooth process, be prepared for these common issues:
- Connection Problems: If mirroring fails, double-check your cable connections and Wi-Fi network. Make sure both your iPhone and laptop are on the same Wi-Fi network.
- Lag and Latency: Wireless connections are prone to lag. A wired connection will alleviate the issue. The strength of your Wi-Fi signal can play a big factor, as well.
- Audio Issues: Check your audio settings on both your iPhone and laptop. Ensure the correct audio output device is selected. The third-party application may have its own audio settings.
- App Compatibility: Some applications may block screen mirroring for copyright reasons. Ensure that this is not your issue.
Conclusion: Mastering the Art of iPhone Mirroring
Mirroring your iPhone to your laptop is a valuable skill, offering unparalleled convenience and functionality. With this guide, you have the knowledge to choose the method that best suits your needs – whether it's the reliability of a wired connection, the freedom of wireless mirroring, or the ingenuity of using your iPhone's hotspot capabilities. By understanding the steps involved and familiarizing yourself with the various tools available, you'll be able to effortlessly project your iPhone's screen onto a larger display, enhancing your productivity and boosting your entertainment experience. Remember to experiment with the different solutions, and choose the one that proves best for you.
