cara bikin wifi di laptop windows 7

Title: CARA MENGAKTIFKAN WIFI DI WINDOWS 7
Channel: Rdn Channel
CARA MENGAKTIFKAN WIFI DI WINDOWS 7 by Rdn Channel
Unlock Your Laptop's Hidden WiFi Hotspot: Windows 7 Secret Revealed!
Unveiling the Wireless Wizardry: Turn Your Windows 7 Laptop into a Mobile Hotspot!
Remember those times when you yearned for internet access while simultaneously juggling a plethora of portable devices? Perhaps your smartphone was begging for a Wi-Fi connection, or maybe your tablet craved a stable online link. Well, the answer resides within the heart of your trusty Windows 7 laptop. It holds a secret. It's a hidden hotspot, ready to be unleashed!
The Untapped Potential: Your Laptop's Secret Weapon
For those times you're left scrambling for a connection, your Windows 7 machine will become your personal Wi-Fi superhero. Think of it as a portable router, broadcasting its wireless signal. However, this isn't merely a function. It's a carefully concealed feature, a hidden gem waiting to be discovered. It's a remarkable solution that is easily accessible.
Decoding the Wireless Network Setup (It's Easier than You Think!)
Now, preparing your laptop for this digital transformation begins with understanding the configuration process. Prepare yourself; it's not complicated. First, you'll need to access the "Network and Sharing Center." You can usually find it by clicking the Wi-Fi icon. From there, a world of possibilities unfolds.
Step-by-Step Guide: Conjuring Your Hotspot
Once you're in the Network and Sharing Center, breathe easy. Follow these steps, and you'll be online in no time.
- Initiate the Magic: Select "Set up a new connection or network."
- The Wireless Gateway: Choose "Set up a wireless ad hoc network." The ad hoc network is your key to creating your hotspot.
- Name Your Kingdom: Give your network a name, something memorable, and easy to recall. Think of a catchy name to ensure you can recognize the connection.
- Password Protection is Key: Next, select a strong password. This protects your wireless network from unwanted access. Always prioritize security.
- Sharing Your Internet: You can now choose which internet connection you want to share. This typically will be your existing Wi-Fi, ethernet, or mobile broadband connection.
- Activate the Connection: After reviewing your settings, click "Next". The laptop is working hard in the background. It is creating your hotspot.
- Connect with Ease: With your hotspot activated, other devices can connect. Search for your network name on those devices. Enter your password. Now, enjoy shared internet access!
Troubleshooting Common Hiccups:
Let's face it, everyone hits snags now and then. So, what happens if things don't go as planned?
- Connection Issues: Double-check the password. Verify your internet connection functions correctly on your laptop. Rebooting the laptop and the connecting device often helps.
- Slow Speeds: Performance is not always perfect. The speed of your hotspot depends on your primary internet connection. Position your devices close to your laptop. Keep in mind that distance reduces signal strength.
- Inability to Connect: Make sure your network name and password are correct. Check that network discovery is enabled on your Windows 7 laptop. Firewall settings can sometimes block connections.
Advanced Tweaks: Optimizing Your Hotspot Experience
Consider these further steps for an even smoother experience.
- Wireless Mode: Your laptop offers settings for the Wi-Fi standard. This influences the range and speed of the connection. Changing the settings can enhance the experience.
- Security Protocols: The encryption you select can profoundly affect your security. WPA2 offers better protection compared to older alternatives.
- Power Management: Your laptop's power settings affect hotspot functionality. Ensure that your Wi-Fi adapter doesn't shut down.
Embrace the Freedom: The Benefits of a Mobile Hotspot
Think about enjoying access to the internet whenever and wherever you wish. Here’s why setting up a Windows 7 hotspot creates a winning advantage.
- Anywhere, Anytime Access: Enjoy internet access even when Wi-Fi is unavailable. You are now equipped for your travels.
- Share with Ease: Share your connection with friends and family. Everyone can be online in an instant.
- Cost Savings: Avoid extra charges associated with separate internet plans. It can be a valuable financial decision!
- Convenience and Control: Manage your network and connection settings easily. You are in control of the experience.
Conclusion: Unleash Your Inner Connectivity Guru
With these steps, you're well on your way to unlocking your laptop's hidden potential. You can now create a fully-fledged Wi-Fi hotspot. So, go ahead, embrace this newfound power. Consequently, you can connect your devices and share the internet with others. Because of this, you'll change how you connect with the world. So enjoy your newfound wireless freedom and all the benefits it brings!
Laptop WiFi Nightmare? This SHOCKING Trick Fixes It INSTANTLY!Unlock Your Laptop's Hidden WiFi Hotspot: Windows 7 Secret Revealed!
Hey tech enthusiasts! Ever wished you could share your laptop's internet connection with other devices, but were stumped by the tech jargon and complicated settings? Well, you're in the right place! We're about to dive into a time-honored secret of Windows 7 – how to transform your laptop into a personal WiFi hotspot. Forget expensive mobile hotspots or struggling with complex configurations. We’re going to unlock a hidden feature that's been lurking in your operating system, patiently waiting for you to unleash its power. Get ready to become the internet hero of your home, office, or even that cozy coffee shop.
1. The Pre-Windows 7 Hotspot Desert
Before we get our hands digitally dirty, let's take a quick walk down memory lane (or, perhaps more accurately, down the lack-of-a-hotspot lane). Remember the days before ubiquitous WiFi? Connecting multiple devices to the internet through a single laptop was… a challenge, to put it mildly. We’d be juggling Ethernet cables, network bridges that felt more like black boxes of mystery, and often, sheer frustration. The simplicity of a dedicated hotspot was just a twinkle in the tech world's eye. Windows 7, in a way, started to bring this simplicity within grasp of every laptop user.
2. Why This Matters in Today’s Connected World
You might be thinking, "Why bother? My phone has a hotspot, and I have WiFi at home." That’s a valid point, but think bigger! Imagine:
- Saving Data: You're on a limited data plan, but your laptop has a wired connection. Boom! Share that connection with your phone, tablet, or even a friend, without eating into your precious data. Think of it like providing a buffet while your friend is on a restrictive diet!
- Boosting Signal: Your WiFi signal in that back bedroom is weak. The laptop, strategically placed, can act as a repeater, amplifying the signal and giving you a stronger, more reliable connection.
- Sharing the Love: Got a guest who needs internet access? Instead of sharing your primary WiFi password (risky business!), you can create a temporary hotspot just for them. It’s like handing someone the keys to your guest room, not the entire house.
- Troubleshooting: Facing internet connectivity issues? Your laptop can be a crucial aid to identify the problems.
3. Unveiling the Hidden Feature: Hosted Network
The magic behind turning your Windows 7 laptop into a hotspot lies within the “Hosted Network” feature. It’s a built-in capability, often overlooked, that allows your laptop's wireless adapter to act as an access point. Think of it as giving your laptop a secret identity – it’s a wireless router in disguise! This approach, unlike installing third-party software, is native to the operating system, providing a seamless and reliable solution.
4. Checking if You Possess the Power
Before we fully commit, let’s make sure your laptop is ready to handle all this newfound hotspot glory. Here’s what to do:
- Open Command Prompt: Click the Start button, type “cmd” in the search bar, and right-click on “Command Prompt” and select “Run as administrator.” This is crucial! Think of it like getting the special access key.
- Type the Command: In the Command Prompt window, type
netsh wlan show driversand press Enter. - Look for “Hosted network supported”: Scroll through the output (the text that appears on the screen) until you find this line. If it says “Yes,” you’re golden! If not, your wireless adapter might not support this feature, sadly. It's like finding out your car doesn't have the necessary engine to tow a trailer.
5. Activating the Hosted Network: The First Steps
Assuming you've got the “Yes” confirmation, it's time to activate the Hosted Network! Here’s how we do it, step by step:
- Back in Command Prompt: Again, make sure its open as an administrator.
- Type this Command: Type
netsh wlan set hostednetwork mode=allow ssid="YourHotspotName" key="YourPassword"and press Enter.- Replace
"YourHotspotName"with the name you want for your hotspot (e.g., "MyLaptopWiFi"). Keep it simple, friendly, and memorable! - Replace
"YourPassword"with a strong password (minimum 8 characters) to secure your network. Think of it as the password that protects the treasure.
- Replace
- The Activation Command: Once you have configured the above, it’s time for the final activation command. Type
netsh wlan start hostednetworkand press Enter.
6. Sharing Your Internet Connection: The Crucial Bridge
Creating the hotspot is only half the battle. The real magic happens when you share your existing internet connection. Here’s how to make it happen:
- Go to Network Connections: Navigate to the Control Panel -> Network and Internet -> Network and Sharing Center.
- Change Adapter Settings: In the left-hand pane, click “Change adapter settings.”
- Identify Your Internet Connection: Find the adapter you're using to connect to the internet (e.g., Ethernet or your primary wireless adapter).
- Open Properties: Right-click on your internet connection and select "Properties."
- Sharing Tab: Click the "Sharing" tab.
- Allow Sharing: Check the box that says “Allow other network users to connect through this computer’s Internet connection.”
- Select Your Hosted Network: In the “Home network connection” dropdown, select the name of your Hosted Network that you previously set up.
- Enjoy the Flow: Click "OK," and your laptop is now sharing its internet connection!
7. Troubleshooting Common Hiccups
Sometimes, things don't go perfectly the first time. Here are some common problems and their solutions:
- "The hosted network couldn't be started": Double-check your command prompt privileges and your password. Ensure your drivers are updated. Sometimes, a simple restart of the laptop helps.
- No Internet on Connected Devices: Make sure you've followed the "Sharing Your Internet Connection" steps correctly. Verify that your internet connection is working on your laptop.
- Slow Speeds: The hotspot might be competing with your primary internet use. Close unnecessary programs and consider upgrading your internet plan, to allow smoother streaming.
8. Security Considerations: Protecting Your Digital Fortress
Security is paramount. Here's how to keep your hotspot safe:
- Strong Password: Seriously, don’t use something simple. Think of a password as a lock protecting your precious belongings.
- Keep Your Windows 7 Updated: Security updates patch vulnerabilities.
- Monitor Connected Devices: Check which devices are connected to your hotspot. If you see an unfamiliar device, consider changing your password.
- Limited Use: Don't share your hotspot broadly. Share it with trusted devices that you recognize.
9. Managing Your Hotspot: Turning It On and Off
Learning to manage your hotspot is like learning how to control the volume on the stereo. You may want to start the hosted network and stop it, depending on your use. Here's how:
- Starting It: Open Command Prompt as administrator, and type
netsh wlan start hostednetworkand press Enter. - Stopping It: Open Command Prompt as administrator, and type
netsh wlan stop hostednetworkand press Enter. It is akin to hitting the pause button, but for your hotspot's access.
10. Hidden Secrets: Advanced Customization
You can dive deeper and customize your hosted network:
- Changing the SSID and Key: You can change your hotspot’s name and password using the same
netsh wlan set hostednetworkcommand we used previously. - Viewing Hotspot Details: To view your hotspot's status (e.g., the number of connected devices), type
netsh wlan show hostednetworkin Command Prompt.
11. The Windows 7 Legacy: A Timeless Solution
While Windows 7 is no longer actively supported by Microsoft with security updates, the functionality described remains. It is like a classic car, it may require a bit more TLC to maintain but it still does the job.
12. WiFi vs. Tethering: Understanding the Differences
Understanding WiFi, tethering and Hosted networks, is essential to making an informed decision.
- WiFi: Refers to the wireless technology used to connect devices to the internet.
- Tethering: Also referred to as mobile hotspot, is a way to share a mobile device’s internet connection with other devices.
- Hosted Network: The Windows 7 secret of creating a hotspot on a laptop.
13. Beyond the Basics: Expanding Your Hotspot Horizons
Once you’ve mastered the basics, consider these advanced tips:
- Range Extenders: Position your laptop strategically to extend the range of the hotspot.
- Channel Selection: Experimenting with different WiFi channels to avoid interference.
- Bandwidth Management: Consider using network monitoring tools to keep track of the bandwidth.
14. Real-World Applications: Where the Hotspot Shines
Where can you
HP Laptop WiFi Nightmare? This Adapter's the ONLY Fix!Cara Cepat Mengaktifkan Wifi di Windows 7

By HandleCustom Cara Cepat Mengaktifkan Wifi di Windows 7 by HandleCustom
Cara Atasi Wifi Mati, Wifi Tidak Mau Konek Not Connected Wifi Pada Windows 7
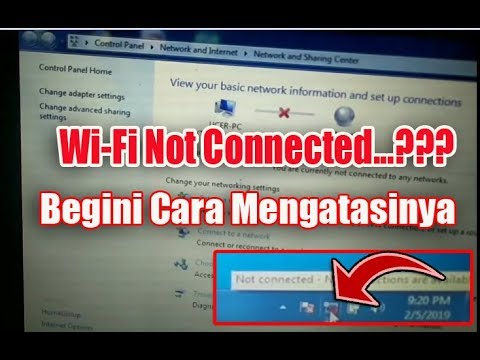
By asal ngelik Cara Atasi Wifi Mati, Wifi Tidak Mau Konek Not Connected Wifi Pada Windows 7 by asal ngelik
Cara Mengaktifkan Hotspot Wifi Laptop Windows 7

By LAPTOP TUTORIAL Cara Mengaktifkan Hotspot Wifi Laptop Windows 7 by LAPTOP TUTORIAL

Title: Cara Mengatasi Wifi Laptop silang Merah di Windows 789
Channel: TV UHF
Cara Mengatasi Wifi Laptop silang Merah di Windows 789 by TV UHF
Laptop Wifi Connect
Unlock Your Laptop's Hidden WiFi Hotspot: Windows 7 Secret Revealed!
We've all been there. You're stranded, data-less, and desperately in need of an internet connection. Maybe you're in a hotel with a ridiculously expensive Wi-Fi plan, or perhaps you’re at a friend's house where the Wi-Fi signal is notoriously weak. Then, you remember your trusty laptop. But can it become a lifeline? Absolutely. Your Windows 7 laptop likely holds a secret weapon: the ability to transform into a fully functional Wi-Fi hotspot. Forget clunky external devices and complicated setups. We are about to unveil a remarkably straightforward method to unlock this hidden capability, allowing you to share your existing internet connection—wired or wireless—with other devices.
Understanding the Power of a Virtual WiFi Hotspot
Before we dive in, let's clarify precisely what we're achieving. We are not magically conjuring an internet connection where none exists. Instead, we are taking an existing internet source – be it a wired Ethernet connection (like the one in your hotel room) or a pre-existing Wi-Fi connection (like your home network) – and sharing it, rebroadcasting it as a new Wi-Fi signal. This new signal will allow other devices, like your smartphone, tablet, or another laptop, to connect to the internet using your established connection. Think of it as a bridge, extending your existing internet access to a wider audience of your own devices. This is particularly valuable when you lack access to a traditional Wi-Fi network.
Step-by-Step Guide: Creating Your Windows 7 Hotspot
The process has a core principle, which we will explore in detail: we leverage the command prompt, a powerful tool in Windows 7 that allows us to interact directly with the operating system’s core functions. Don’t worry; it's simpler than it sounds. We will provide you with the precise command, so you do not have to understand the complex underlying mechanics.
1. Opening the Command Prompt as Administrator
This is your first step. Accessing the functionality of the Command Prompt requires administrative privileges. This ensures that we can make changes to network configuration settings.
- Click on the Start button, that classic logo in the bottom-left corner of your screen.
- In the search bar (or the text field that appears when you click the Start button), type "cmd."
- You’ll see "cmd.exe" in the search results. Right-click on it.
- From the menu that appears, select "Run as administrator." A window will likely pop up asking if you want to make changes to your computer; confirm by clicking "Yes." The Command Prompt window should now appear. It will likely display the path C:\Windows\system32 or something similar at the prompt.
2. Entering the Crucial Command: Setting Up the Virtual Network
Prepare to type the command needed to create the virtual Wi-Fi hotspot. Ensure you type it accurately. A single typo can disrupt the process. We've broken it down.
Inside the Command Prompt, carefully type the following command, replacing the placeholder with your preferred network name and password:
netsh wlan set hostednetwork mode=allow ssid="YourNetworkName" key="YourPassword"Replace "YourNetworkName" with the precise name you want your Wi-Fi hotspot to have. This is what other devices will see when they scan for available Wi-Fi networks. Choose something memorable and unique. Then, replace "YourPassword" with a secure password to protect your network. Choose a password that is easy for you to remember but difficult for others to guess – a combination of upper and lower-case letters, numbers, and symbols is ideal.
Once typed, carefully double-check the command for any errors. Then, press Enter. You should see the command execute successfully.
If everything goes well, you will see a message indicating that the hosted network mode has been set to allow, and the SSID (your network name) and the user key (your password) have been successfully set. This confirms that the fundamental groundwork has been laid.
3. Starting the Hosted Network
Now that you've created the virtual network, we must activate it. This is the point where your computer begins broadcasting the Wi-Fi signal.
In the Command Prompt, after the previous command has been executed, type and then press Enter:
netsh wlan start hostednetworkEnsure that the command is typed correctly. If successful, you should see a confirmation message.
4. Sharing Your Internet Connection
The final step is to configure the internet connection sharing. This allows the devices connected to your hotspot to access the internet over the shared connection.
- Open the "Network and Sharing Center." You can do this in several ways: by clicking the network icon in your system tray (usually in the bottom-right corner of your screen) and then clicking "Open Network and Sharing Center," by searching for it in the Start menu, or through the Control Panel.
- In the Network and Sharing Center, click "Change adapter settings." This will open a window displaying all your network adapters.
- Identify the network adapter that is currently connected to the internet. This is usually either your Ethernet connection (if you’re using a wired connection) or your Wi-Fi adapter (if you’re connected wirelessly). It will show status like "Connected" and "Internet access."
- Right-click on this active internet connection adapter and select "Properties."
- In the Properties window, click the "Sharing" tab.
- Check the box that says "Allow other network users to connect through this computer's Internet connection."
- In the "Home networking connection" dropdown menu, select the virtual Wi-Fi adapter that you created earlier. This is often labeled something like "Microsoft Hosted Network Virtual Adapter" or a similar name. If you have multiple virtual adapters, select the one that corresponds to the hosted network you set up.
- Click "OK" to save the changes.
Troubleshooting Common Issues and Refinements
Even with the most straightforward instructions, problems may occur. Let's cover a few common snags and how to resolve them.
1. Hosted Network Failed to Start
If the hosted network fails to start, the issue might stem from issues with the wireless adapter’s drivers or configuration.
- Ensure your wireless adapter drivers are up-to-date. Visit the manufacturer's website for your laptop model and download the newest drivers.
- If you have installed any network management software (for instance, a software suite from your wireless adapter manufacturer), try disabling it temporarily to see if it interferes with the hotspot creation.
- Sometimes, restarting your computer can resolve minor software conflicts that prevent hotspot activation.
2. No Internet Access on Connected Devices
If devices connect to your hotspot but cannot access the internet, the problem is often related to the sharing settings.
- Double-check all the steps to ensure the internet connection is being shared correctly.
- Confirm that the "Home networking connection" in the sharing properties is set to the correct virtual adapter.
- Temporarily disable any firewalls on your laptop to see whether they are blocking the connection. Be sure to re-enable your firewall after testing.
- If using a wired connection, verify that the Ethernet cable is securely connected and that the internet connection is active.
- Sometimes, rebooting the laptop and the connecting devices can resolve network conflicts.
3. Finding Your Network Name and Password
If you forget the settings you created, you can quickly check them using the Command Prompt.
Open the Command Prompt as administrator (as described initially).
Type the following command and press Enter:
netsh wlan show hostednetworkThis command displays information about your hosted network, including the SSID (network name), the authentication type, and the user key (password).
4. Disabling the Hotspot
When you're finished using the hotspot, you can disable it easily.
Open the Command Prompt as administrator.
Type the following command and press Enter:
netsh wlan stop hostednetworkThis will stop the Wi-Fi signal from being broadcast. To disable the Wi-Fi completely, you can disable the virtual adapter in the "Network Connections" window (the same one where you enabled sharing). Right-click the virtual adapter and select "Disable."
Advanced Customization and Optimization
Although the steps above offer the core functionality, you might want to fine-tune the settings for better performance or security.
1. Changing the Channel
By default, Windows 7 usually selects the Wi-Fi channel automatically. Sometimes, however, you might experience interference from nearby networks. You can manually specify a channel.
Open the Command Prompt as administrator.
Use the following command, replacing YourChannelNumber with the channel number you want to use (typically between 1 and 11 in North America):
netsh wlan set hostednetwork channel=YourChannelNumberAfter making this change, restart the hosted network using the
netsh wlan start hostednetworkcommand.
2. Enhancing Security
While we recommend using a strong WPA2-PSK (Wi-Fi Protected Access 2 – Pre-Shared Key) security, you can enhance security further by regularly changing your password.
- To change your password, you must disable the hosted network,
