fujitsu scansnap ix500 wifi scanner with my laptop steps
Title: Fujitsu ScanSnap ix500 Followup Wireless Scan to a Computer Via WiFi
Channel: Lon.TV
Fujitsu ScanSnap ix500 Followup Wireless Scan to a Computer Via WiFi by Lon.TV
ScanSnap iX500 WiFi Setup: Laptop Connection in 60 Seconds!
Blazing Fast: Connect Your ScanSnap iX500 to Your Laptop in a Flash!
The digital age demands seamless workflows. We often find ourselves buried under documents. A lightning-fast scanner is crucial today. Fortunately, the ScanSnap iX500 fits the bill. Setting it up wirelessly may seem tricky. However, connecting it to your laptop is surprisingly simple. Let's dive in and get you scanning quickly.
Unveiling the ScanSnap iX500: Your Gateway to Digital Efficiency
This scanner is more than a simple machine. It's a powerhouse of productivity. The iX500 digitizes documents at impressive speeds. Specifically, it offers both speed and portability. The convenience of Wi-Fi is also a major advantage. This feature eliminates the need for cumbersome cables. Moreover, it allows you to scan from virtually anywhere. You gain freedom and flexibility instantly. The setup process is usually straightforward.
Prepping for Takeoff: Essential Preparations Before Connecting
Before launching into the wireless setup, gather a few essentials. First, ensure your ScanSnap iX500 is turned on. Secondly, verify your laptop has a stable Wi-Fi connection. Now, if you haven't already, download and install the ScanSnap software. You can find this on the Fujitsu website. This is an important step. Subsequently, you'll need the Wi-Fi password for your home network. With these basics covered, you're ready. Let’s get started!
The 60-Second Symphony: Connecting Your Scanner to Your Laptop
Ready to connect? Here’s the fast track. First, open your ScanSnap software. Then, look for the Wi-Fi setup option. The specific location varies. However, it's usually in the settings or preferences. Once you locate it, click to initiate the setup process. The software will then guide you. Follow the on-screen instructions closely. These instructions are usually straightforward. You'll likely be prompted to select your wireless network. After you select your network, enter your Wi-Fi password. Therefore, double-check the details.
Subsequently, the scanner will attempt to connect. This process usually takes a few seconds. It's crucial to ensure both devices are in range. If the connection is successful, you’ll receive confirmation. The software may then ask you to name your scanner. This is useful for identifying it later. Now, it should be ready to scan.
Troubleshooting Tango: What to Do If Things Go Awry
Occasionally, the connection process hits a snag. Don’t worry. It’s often a minor issue. First, verify the basics, like the scanner's power. Next, confirm your Wi-Fi password is correct. Moreover, check your router’s signal strength. Make sure your laptop and scanner are close to the router. Otherwise, you could experience signal issues.
If the problem persists, try restarting both devices. Sometimes a simple reboot solves the issue. Also, review the ScanSnap software’s documentation. It offers helpful troubleshooting tips. You might need to update the scanner’s firmware. Finally, consider contacting Fujitsu support. They offer excellent customer service.
Beyond the Basics: Exploring Advanced Wi-Fi Features
Your ScanSnap iX500 offers more than just basic connectivity. For instance, it supports ad-hoc Wi-Fi. Consequently, you can connect directly to the scanner without a router. This is ideal for on-the-go scanning. Furthermore, it allows you to scan directly to cloud services. The software makes this simple. You can seamlessly upload documents to services like Dropbox or Evernote. Explore the various options in the software. Maximize your scanner’s full potential. Personalize your workflow.
Maintaining Peak Performance: Tips for Smooth Scanning
To keep your scanner running smoothly, maintenance is key. First, clean the scanner’s rollers regularly. Use the cleaning cloth provided. This prevents paper jams. Also, ensure the scanner is placed on a stable surface. Furthermore, avoid overloading the paper feeder. This prevents damage to the scanner. Finally, update the software regularly. This helps improve performance and security.
Conclusion: Embrace the Wireless Workflow
The ScanSnap iX500 exemplifies efficiency. Setting up the Wi-Fi connection is simple. It enhances your productivity. You can quickly transform documents into digital files. So, embrace the wireless freedom. Streamline your workflow. You now possess the knowledge to connect with ease. Enjoy your newly-digitized world!
Unlock Your Windows 8 WiFi: The Secret No One Tells You!ScanSnap iX500 WiFi Setup: Laptop Connection in 60 Seconds!
Alright, folks, let's be honest. We've all been there. You've got a mountain of paperwork staring you down, a deadline looming, and your trusty ScanSnap iX500 – that powerful little digitizing workhorse – isn't playing nice. It's refusing to connect to your laptop, and your precious time is slipping away faster than a greased pig at a county fair. But fear not! Because today, we’re going to demystify the ScanSnap iX500 WiFi setup and get you connected to your laptop in – drumroll please – about 60 seconds! (Okay, maybe a little longer, depending on your WiFi signal, but you get the idea).
Why WiFi? The Freedom Factor
Before we dive into the nitty-gritty, let's talk about why WiFi is your best friend when it comes to the iX500. Think about it: no more tangled USB cables cluttering your desk. You can place your scanner wherever it's convenient, not tethered to your laptop like a digital prisoner. Scanning from anywhere in your home or office? Yes, please! WiFi offers you the freedom to scan documents, receipts, and everything in between without the cable hassle. It's like upgrading from dial-up to fiber optic internet for your scanning needs.
Pre-flight Check: What You'll Need
Before we launch into the setup, let's make sure we have everything we need for a smooth flight. Here’s your checklist:
- Your ScanSnap iX500. (Duh!) Make sure it's powered on and ready to go.
- Your Laptop. Running Windows or macOS? No problem!
- Your WiFi Network. Make sure you know your network name (SSID) and password. Think of it like your WiFi's secret handshake.
- The ScanSnap Home Software. If you haven’t already, download and install the latest version of Fujitsu’s ScanSnap Home software on your laptop. This is the brains of the operation. You can snag it directly from Fujitsu's website – it's usually a quick and painless download.
- Patience. We're aiming for a 60-second setup, but hey, sometimes technology has a mind of its own. Breathe. You've got this!
Step-by-Step: Connecting to WiFi in a Flash
Alright, let's get this show on the road! Here's the step-by-step process for connecting your iX500 to your laptop via WiFi:
- Power On and Standby: Plug your ScanSnap ix500 to a power source and power on. Make sure the ScanSnap is in standby mode. The scanner has to be up and running for it to be found.
- Software Installation: If you haven't, install ScanSnap Home software. A good tip is to always install the newest version, from Fujitsu's website to ensure smooth functionality.
- Launch ScanSnap Home: Once installed, open the ScanSnap Home software on your laptop. It's usually found lurking in your applications folder or accessible through your taskbar/dock.
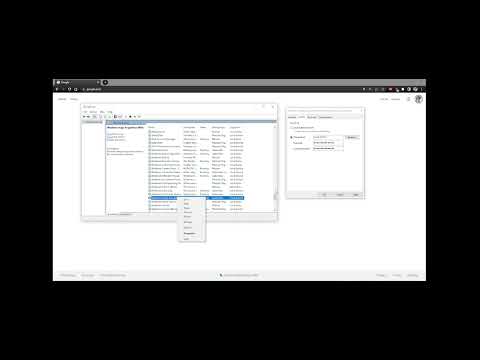
- Add Scanner: Inside ScanSnap Home, you will want to select "Add Scanner". Click on the "Add a scanner," button. The software will search for the scanner. If the ScanSnap is properly connected, it should be detected, the model type for the ScanSnap ix500 should appear.
- Select Your iX500: The software should display a list of detected scanners. Select your iX500 from the list. The software will now ask you to connect it to your Wi-Fi network.
- Network Configuration: The software will then present a screen allowing you to connect your scanner to your WiFi. Enter your network's SSID and Key or password. The scanning software will then detect your scanner.
- Test Connection: Once configured, test your connection by scanning a document. If all goes well, the document will appear in ScanSnap Home on your laptop – congratulations!
Troubleshooting: We've Got You Covered
Sometimes, things don't go exactly as planned. Don't worry, it happens! Here are some common hiccups and how to fix them:
- Scanner Not Detected: Double-check that your scanner is turned on and within range of your WiFi router. Ensure that the ScanSnap is in standby mode.
- Incorrect Password: Triple-check your WiFi password. It's easy to make a typo!
- Router Compatibility: Ensure your router supports the type of WiFi your iX500 uses (usually 802.11b/g/n). Older routers might not be compatible. Time for an upgrade?
- Software Glitches: Try restarting your ScanSnap, your laptop, and even your router. Sometimes, a simple reboot is all it takes.
- Firewall Issues: Your computer's firewall might be blocking the connection. Temporarily disable your firewall (for testing purposes only) and see if that resolves the issue.
Beyond the Basics: Optimizing Your Scan Experience
Now that you’re connected, let’s talk about maximizing your scanning game. Here are a few tips to make your document workflow as smooth as butter:
- Profile Settings: Customize your scan profiles in ScanSnap Home. You can create profiles for different document types (e.g., receipts, documents, photos) with specific settings like resolution, color mode, and destination folder.
- Automatic Document Feede: This will do a lot of the work for you. Load up a stack of paper and watch the scans roll in.
- Name and Organize: Once your documents are scanned, make sure to rename and organize them into folders for easy retrieval. Think of your digital filing system as a well-oiled machine.
- Cloud Integration: ScanSnap Home seamlessly integrates with popular cloud services like Dropbox, Google Drive, and Evernote. Send your scans directly to your cloud storage and access them from anywhere.
The Power of ScanSnap Home: More Than Just Scanning
The ScanSnap Home software is more than just a conduit for your scans; it's a powerful document management hub. Here's what it offers:
- Optical Character Recognition (OCR): ScanSnap Home uses OCR to convert your scanned documents into searchable and editable text. Boom! Instant text recognition.
- Automatic Image Optimization: The software automatically corrects skew, rotates images, and removes blank pages, ensuring your scans are always top-notch.
- Document Management: Organize, edit, and share your scanned documents directly within the software.
The "Almost" Secret Weapon
Here’s a little something many people overlook: regularly updating your ScanSnap Home software and your iX500’s firmware. Fujitsu frequently releases updates to improve performance, fix bugs, and add new features. Think of it like giving your scanner a digital tune-up! You can usually find these updates through the ScanSnap Home software itself or on Fujitsu's website.
Comparing to the Competition: Why the iX500 Still Reigns
While newer models like the iX1600 exist, the iX500 remains a fantastic scanner. It's reliable, fast, and produces high-quality scans. Here’s why it’s still a solid choice compared to newer models:
- Price: The iX500 is often available at a more attractive price point.
- Performance: The scanning speed is still incredibly fast.
- Reliability: The iX500 has a proven track record for reliability.
The Ultimate Productivity Hack: Unleash Your Inner Efficiency Ninja
By mastering the ScanSnap iX500 WiFi setup, you're not just connecting your scanner; you're unlocking a whole new level of productivity. Imagine this: no more paper clutter, effortless document organization, and the freedom to access your important files from anywhere. It's like having a personal assistant for your paperwork. Now you can be an efficiency ninja!
Keep the Faith! Embracing the Future
In a time when paper is being gradually reduced, a scanner is important. Keeping up with these technologies becomes important to the efficiency needed. Remember, technology can be fun sometimes, but sometimes frustrating. If you are patient and follow the steps, you will have a fully functioning scanner. Never forget that.
Closing Thoughts: Scan Away!
So there you have it! We’ve navigated the ScanSnap iX500 WiFi setup together, turning what might have seemed like a daunting task into a quick and easy win. Hopefully, you're now connected, scanning, and enjoying the freedom and productivity that WiFi brings. Now go forth and conquer that paper pile! Happy scanning!
ScanSnap iX500 WiFi Setup FAQs
Here are some frequently asked questions to help you get the most out of your ScanSnap iX500:
1. How do I reset the WiFi settings on my ScanSnap iX500?
You can reset the WiFi settings by pressing and holding the "WiFi" button on the scanner until the green light blinks. Then, follow the setup instructions again using the ScanSnap Home software.
**2. My ScanSnap iX500 isn't connecting to my laptop wirelessly. What should I do?
Forget Your Wi-Fi Password? This ONE Trick Will SHOCK You!Fujitsu ScanSnap iX500 set up and scan

By Alex Walsh Fujitsu ScanSnap iX500 set up and scan by Alex Walsh
ScanSnap iX500 not opening or connecting to scanner - super easy fix - how to
By Hello Everyone ScanSnap iX500 not opening or connecting to scanner - super easy fix - how to by Hello Everyone
ScanSnap Home Install Walkthrough

By Sean Dillman ScanSnap Home Install Walkthrough by Sean Dillman

Title: ScanSnap iX500 Desktop Scanner Everything you Need to Know
Channel: ScanSnap US
ScanSnap iX500 Desktop Scanner Everything you Need to Know by ScanSnap US
Laptop Wifi Connect
Here's the article:
ScanSnap iX500 WiFi Setup: Laptop Connection in 60 Seconds!
Are you ready to transform your document management process from a chaotic jumble of paper to a streamlined, digital workflow? The Fujitsu ScanSnap iX500 offers a powerful solution, and connecting it to your laptop via WiFi is the key unlock its full potential. Forget wrestling with cables; we're going to get you up and running wirelessly, quickly, and efficiently. Let's dive in.
Preparing Your ScanSnap iX500 for WiFi Connection
Before we even think about your laptop, we need to prepare the ScanSnap iX500 itself. This involves a few crucial steps that will ensure a smooth and successful WiFi setup.
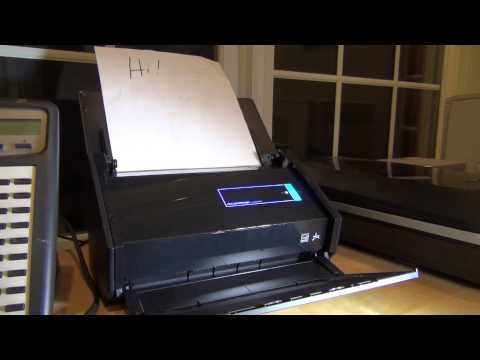
Power Up and Initial Boot: Plug the ScanSnap iX500 into a power outlet and switch it on. You'll see the power indicator light illuminating, signaling that the device is ready. Allow a moment for the scanner to complete its boot sequence.
Accessing the WiFi Setup Mode: Locate the Wi-Fi button, often denoted by a WiFi symbol, on the ScanSnap iX500. Press and hold this button for several seconds (typically around 3-5 seconds) until a blue light begins to flash. This flashing indicates that the scanner is now in WiFi setup mode, ready to connect to your network.
Understanding the ScanSnap iX500’s Status Lights: Pay close attention to the different light indicators as they guide the process. A solid blue light often means a successful connection. A flashing blue light usually indicates that the scanner is searching for a network. A red light could signal an error, requiring troubleshooting.
Ensuring Network Compatibility: The ScanSnap iX500 supports 802.11b/g/n networks. Please ensure your home or office WiFi network adheres to these standards to prevent connectivity issues.
Downloading and Installing the ScanSnap Software
Now, let's move onto your laptop. The next crucial step is downloading and installing the necessary software from Fujitsu. This software manages the scanner and allows you to configure its settings.
Navigate to the Fujitsu Website: Open your web browser and go to the official Fujitsu ScanSnap support website. Search for "ScanSnap iX500 software download" or navigate to the driver and software section on the Fujitsu website.
Select the Correct Operating System: Ensure you select the appropriate operating system for your laptop (e.g., Windows 10, macOS Monterey, etc.). Downloading the wrong software version can lead to compatibility problems.
Download the ScanSnap Manager and ScanSnap Organizer: You'll need to download two primary pieces of software: ScanSnap Manager and ScanSnap Organizer. The ScanSnap Manager is the core driver for the scanner, while the ScanSnap Organizer is a powerful tool for managing and organizing your scanned documents.
Run the Installation Files: Once the downloads are complete, locate the installation files (usually in your "Downloads" folder) and double-click them to begin the installation process. Follow the on-screen prompts.
Accept the License Agreement: During the installation, you will be prompted to accept the software license agreement. Carefully review the terms and conditions before agreeing.
Allow Any Necessary Permissions: If prompted by your operating system for permission to install system software or drivers, grant the necessary permissions to continue the installation.
Restart Your Laptop (If Required): After the installation is complete, you may be prompted to restart your laptop. This is generally recommended to ensure all changes take effect.
Connecting Your Laptop to the ScanSnap iX500 via WiFi
With the scanner prepared and the software installed, it’s time to connect the two. This step is usually the most exciting, as it's when you finally see everything come together.
Open ScanSnap Manager: Launch the ScanSnap Manager software on your laptop. You'll typically find it in your applications list or on your desktop.
Start the Scanner: Make sure the ScanSnap iX500 is turned on and in WiFi setup mode (blue light flashing – if not, refer back to the preparation section).
Select Your WiFi Network: In the ScanSnap Manager software, you should see an option to connect to a WiFi network. The software will usually scan for available networks in your area. Choose your home or office WiFi network from the list.
Enter Your WiFi Password: You'll be prompted to enter your WiFi network's password. Ensure you type the password correctly (case-sensitive, sometimes with symbols). Double-check it before submitting.
Confirm the Connection: Once you've entered the password, the ScanSnap Manager will attempt to connect the scanner to your network. Watch for the blue light on the ScanSnap iX500 to turn solid, indicating a successful WiFi connection.
Wait for the Connection to Establish: The connection process might take a few moments. Be patient and allow the software to complete its task.
Test the Connection: To confirm that everything is working correctly, try a test scan. Place a document in the ScanSnap iX500 and press the scan button on the scanner. If the document is scanned and appears on your laptop, the connection is successful.
Troubleshooting Common ScanSnap iX500 WiFi Connection Issues
Even with the best efforts, connection issues can arise. Here are some common problems and their solutions.
- Scanner Not Appearing in ScanSnap Manager:
- Solution: Ensure the scanner is powered on, in WiFi setup mode (flashing blue light), and within range of your WiFi router. Restart both the scanner and your laptop. Check your router to see if the scanner is connected to the network.
- Incorrect WiFi Password:
- Solution: Double-check the WiFi password you entered. Ensure it is case-sensitive and that you haven't made any typos. Try entering the password again.
- Firewall or Security Software Blocking Connection:
- Solution: Temporarily disable your firewall or security software to see if it's blocking the connection. If this resolves the issue, you'll need to configure your firewall to allow the ScanSnap software to communicate. Consult your security software's documentation for instructions on adding exceptions.
- Router Compatibility Issues:
- Solution: Check your router's settings to ensure it's compatible with 802.11b/g/n wireless standards. You may also need to update your router's firmware. Consult your router's documentation for more information.
- Interference from Other Devices:
- Solution: Move the ScanSnap iX500 and your laptop closer to your WiFi router. Reduce any potential interference from other devices, such as microwave ovens or cordless phones.
- IP Address Conflicts:
- Solution: If you have multiple devices on your network, there's a chance of an IP address conflict. In your router's settings, you might consider assigning a static IP address to the ScanSnap iX500 to avoid potential conflicts.
- Software Corruption:
- Solution: In rare cases, the ScanSnap software might have become corrupted. Try uninstalling and reinstalling the ScanSnap Manager. Download the newest version available from the Fujitsu website.
- Network is Too Crowded:
- Solution: During peak hours, your WiFi signal might get overloaded. Consider using the 5 GHz band or upgrading your router for better capacity.
Optimizing Your ScanSnap iX500 for Enhanced Productivity
Once you've successfully connected your ScanSnap iX500 via WiFi, you can further optimize its performance and enhance your productivity.
Customize Scan Profiles: Within the ScanSnap Manager, you can create and customize scan profiles. These profiles allow you to set various settings, such as resolution, color mode, and file format, tailored to specific document types (e.g., receipts, business cards, photos).
Utilize Automatic Features: The ScanSnap iX500 offers several automated features, such as automatic paper size detection, automatic color detection, and automatic image correction. Enable these features to save time and effort.
Integrate with Cloud Services: The ScanSnap iX500 can be integrated with popular cloud services, such as Dropbox, Evernote, Google Drive, and OneDrive. This allows you to automatically upload your scanned documents to your preferred cloud service for easy access and sharing.
Use ScanSnap Organizer Efficiently: Familiarize yourself with the ScanSnap Organizer software. Learn how to use its features for organizing, searching, and editing your scanned documents.
Regularly Clean the Scanner: To ensure optimal scanning performance, regularly clean the scanner's rollers and lenses. Use a soft, lint-free cloth to gently wipe down the scanner components. Fujitsu provides cleaning instructions in the ScanSnap iX500 user manual.
Update Regularly: Keep your ScanSnap Manager and ScanSnap Organizer software up to date. Software updates often include performance improvements, bug fixes, and security enhancements.
Explore Advanced Features: The ScanSnap iX500 offers advanced features, such as the ability to create searchable PDFs
