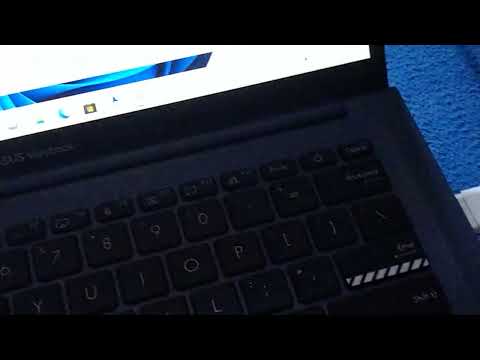
asus e202sa laptop wifi driver

Title: Solusi Wifi Hilang pada Laptop Asus
Channel: Lukman Kaum Sudro
Solusi Wifi Hilang pada Laptop Asus by Lukman Kaum Sudro
**Download the ASUS E202SA WiFi Driver NOW! (Fix Your Internet!)**
Unleash Your ASUS E202SA: Get Your WiFi Humming Again!
Have you been experiencing a frustrating internet slowdown? Are those online videos buffering endlessly? Perhaps your ASUS E202SA laptop is the culprit. Don't fret! This article provides a solution. We're talking about your WiFi connection. A missing or outdated WiFi driver can cause these issues. Therefore, let’s get your ASUS E202SA connected.
The Silent Saboteur: Understanding WiFi Driver Issues
Sometimes, the answer isn't always immediately obvious. The problem could be your WiFi driver. Think of it as a translator. It mediates between your laptop and your WiFi adapter. If the translator is faulty or absent, communication breaks down. This causes connectivity problems. So, what does this mean for you? It means slow speeds, intermittent connections, or no internet at all. Consequently, this affects your productivity and enjoyment. It is best to fix it now. The good news? We can help you fix it.
Locating the Right Driver: A Simple Quest
Finding the correct WiFi driver is simpler than you think. First, you need to know your laptop model. You have an ASUS E202SA. Next, you need to visit the ASUS support website. Then, navigate to the "Support" section. After that, enter your laptop model in the search bar. You will see a page dedicated to your laptop. Now, locate the "Drivers and Tools" section. There, you will find drivers for various components. Hence, look for the “Wireless” or “WiFi” driver.
Downloading the Driver: Your Gateway to Connectivity
Once you've found the right driver, downloading it is next. However, before you download, consider a crucial step. Check for the latest version. Always get the most updated one. Then, click the download button. Ensure you understand the file's destination. Furthermore, review the download process. It might take a few minutes, depending on your internet. Consequently, patience is key. However, be mindful of potential interruptions.
Installation: Making the Connection
After downloading, the fun begins. Locate the downloaded file. Usually, this is in your "Downloads" folder. Double-click the file to begin the installation. Follow the on-screen instructions. They guide you through the process. In particular, you may need to accept the license agreement. Then, choose the installation location. So, the installation process may require you to restart your computer. This is usually at the end.
Troubleshooting: What If Things Go Wrong?
Sometimes, things don't go as planned. If you encounter problems, don’t panic. The first step is usually to restart your computer. Then, try the installation again. If the issue persists, seek assistance. Browse through the ASUS support website. They have FAQs and troubleshooting guides. Consider searching online forums. Others may have had similar problems. Finally, consider contacting ASUS support directly.
Beyond the Driver: Other Potential Culprits
Although the driver is the primary suspect, other factors can affect your WiFi. Your router could be the source. Ensure it's functioning correctly. Furthermore, check other devices. See if they are experiencing the same issue. Moreover, ensure your internet plan matches your needs. A slow plan could be limiting your speed. So, it’s crucial to consider all variables.
Boosting Your WiFi Signal: Simple Tips
Beyond the driver, you can do more to improve WiFi. Position your router strategically. Place it in a central location. Also, remove physical obstructions. Avoid placing it near walls or metal objects. Then, limit the number of connected devices. Every device uses more bandwidth. Consider using a WiFi extender. This will increase the range.
Keeping Your Driver Updated: Proactive Maintenance
Keeping your driver updated is extremely important. Regularly check for updates. ASUS will often release new versions. These updates improve performance. They also fix bugs and security flaws. Consequently, it’s essential for optimal performance. You might even set up automatic updates.
Reclaiming Your Online Experience: The Reward
Installing the correct WiFi driver is worth it. You can enjoy a faster, more reliable connection. You can stream videos without buffering. You can work and browse online without frustration. Because of this, you will regain your peace of mind. Moreover, you're taking control of your technology. Embrace the digital world.
iPhone WiFi Hack: Use Your Laptop as a Hotspot!Download the ASUS E202SA WiFi Driver NOW! (Fix Your Internet!)
Hey there, fellow tech travelers! Have you ever been in the middle of something super important – maybe a video call with your best friend, finally finishing that epic online game, or submitting a crucial assignment – only to be rudely interrupted by the dreaded spinning wheel of internet doom? We've all been there, right? And if you're rocking an ASUS E202SA laptop, and your WiFi is giving you more headaches than a caffeine withdrawal, then listen up because we're diving headfirst into fixing it. This article is your lifeline, your digital GPS guiding you through the often-confusing maze of driver downloads and installation. Think of us as your friendly neighborhood tech support, but without the endless hold music!
1. The ASUS E202SA WiFi Woes: Why Is My Internet Gone?
Let's get real for a moment. The ASUS E202SA is a fantastic little laptop – lightweight, portable, and perfect for everyday tasks. But like any piece of technology, it's not immune to the occasional glitch. One of the most common problems encountered with this model is a flaky or non-existent WiFi connection. This can stem from a number of culprits, but often, the root cause is a missing or outdated WiFi driver. Think of the driver as the translator between your laptop's hardware and the operating system; without the right translator, your laptop simply can't "speak" to your WiFi adapter. It's a bit like trying to order a pizza in a language you don't understand – frustration guaranteed!
2. Spotting the Symptoms: Is Your WiFi Driver the Culprit?
So, how do you know if the driver is the problem? Here are some tell-tale signs:
- No WiFi Networks Detected: Your laptop scans the airwaves, but finds absolutely nothing. It's like living in a ghost town of WiFi signals!
- Intermittent Connection: Your internet works for a few minutes, then cuts out, leaving you staring at a blank screen. It's like riding a rollercoaster – thrilling, but ultimately unreliable.
- Slow Connection Speeds: Even when you are connected, the internet crawls at a snail's pace. Loading a simple webpage feels like watching paint dry.
- Error Messages: You might see specific error messages in Windows, hinting at driver problems. Pay attention to these clues!
If any of these scenarios ring a bell, chances are you're dealing with a WiFi driver issue. But don't despair; a fix is within reach!
3. Why Updating Drivers Matters: The Tech Tango
Think of your drivers as tiny software programs that tell your hardware how to function. Over time, these programs (drivers) become outdated. Manufacturers release new versions that fix bugs, improve performance, and sometimes, even add new features. It’s like upgrading your smartphone's operating system – it keeps things running smoothly and securely. Skipping driver updates is like leaving your car in the same gear all the time; you'll eventually encounter problems.
4. Diving In: Where to Find the ASUS E202SA WiFi Driver
The good news is that finding the right WiFi driver for your ASUS E202SA is usually straightforward. Here’s where you should start your digital scavenger hunt:
- The ASUS Support Website: This is your first and best port of call. Go to the official ASUS website, navigate to the support section, and search for your laptop model (E202SA). Look for the "Drivers and Tools" section. This is where the gold lies!
- Windows Update: Sometimes, Windows itself can detect and install the correct drivers. Run Windows Update to see if there are any pending driver updates. It's like having a tech-savvy concierge who knows your needs.
5. The Download Dance: Downloading the Driver Safely
Okay, you've found the driver on the ASUS website. Now for the download! Here are some crucial steps to ensure a safe and successful download:
- Verify Compatibility: Double-check that the driver is specifically for your ASUS E202SA model and your version of Windows (e.g., Windows 10 or 11 – if you’ve upgraded). It’s like matching socks; you want the right fit.
- Choose the Correct Driver: You’ll typically find different driver versions. Download the latest version recommended for your operating system. Updates often come with improvements which you should utilize.
- Save the File: Save the downloaded file to a place you’ll remember, like your Desktop or Downloads folder.
6. Installing the Driver: The Digital Handshake
Once the driver is downloaded, it's time to install it. Here's the typical process:
- Locate the Downloaded File: Find the driver file you just downloaded. It'll likely be an executable file with an .exe extension.
- Run the Installer: Double-click the file to launch the installation wizard.
- Follow the Prompts: The installation wizard will guide you through the process. Just follow the on-screen instructions. They often involve clicking "Next" a few times!
- Restart Your Laptop: After the installation is complete, you'll usually be prompted to restart your laptop. Do it! It's the final step to solidify the new driver's presence.
7. Troubleshooting Twists: What If It Still Doesn't Work?
Sometimes, things don't go quite as planned. If, after installing the new driver, your WiFi is still acting up, don't panic! Here are some troubleshooting tips:
- Reinstall the Driver: Sometimes, a corrupted installation can cause problems. Try uninstalling the driver and then reinstalling it.
- Rollback the Driver: If the new driver is causing issues, you can "roll back" to a previous version. In Device Manager (accessed by searching for it in the Windows search bar), right-click on your WiFi adapter, go to "Properties," and then look for the "Driver" tab. There should be an option to "Roll Back Driver."
- Check Your Hardware: Ensure your WiFi adapter is enabled in Device Manager. It's the digital equivalent of making sure the power switch is turned on.
- Contact ASUS Support: If all else fails, reach out to ASUS support for expert assistance.
8. The Device Manager Detective: Unmasking the WiFi Adapter
The Device Manager is your digital detective agency. It's a handy tool in Windows that lets you see all the hardware connected to your laptop, including your WiFi adapter. To access it:
- Search: Type "Device Manager" into the Windows search bar.
- Expand Network Adapters: Click the arrow beside "Network adapters" to see a list of all your network devices, including your WiFi adapter.
- Check for Errors: Any devices with a yellow exclamation mark have a problem. Right-click on the device and choose "Properties" to see more details.
9. Beyond Drivers: Other Potential Culprits
While driver issues are common, they aren't always the only reason for WiFi problems. Here are some other things to consider:
- Your Router: Is your router working correctly? Try restarting it.
- Router Placement: Is your laptop too far from the router? Obstacles like walls can also interfere with the signal.
- Interference: Other electronic devices can cause interference. Try moving your laptop away from microwaves or other devices.
10. The Power of Persistence: Don't Give Up!
Fixing tech issues can sometimes involve a lot of trial and error. Don't get discouraged! Be persistent, try different solutions, and remember that you're not alone. We're here to guide you.
11. Step-by-Step Guide: Installing a WiFi Driver (with Pictures!)
- Step 1: Access Device Manager: Search for "Device Manager" in the Windows search bar and open it.
- Step 2: Find Network Adapters: Expand the "Network adapters" section.
- Step 3: Identify Your WiFi Adapter: Your WiFi adapter will likely have a name like "Wireless Network Adapter" or similar.
- Step 4: Update Driver: Right-click on your WiFi adapter and select "Update driver."
- Step 5: Choose Update Method: You can either search automatically for drivers or browse your computer for a driver file you downloaded previously.
12. Keeping Your WiFi Secure: A Digital Shield
Once you’ve fixed your WiFi, remember the importance of keeping it secure.
- Use a Strong Password: Make sure your WiFi network has a strong password to prevent unauthorized access.
- Enable Encryption: Use WPA2 or WPA3 encryption to protect your data.
- Update Your Router Firmware: Keep your router’s firmware up to date to patch security vulnerabilities.
13. Optimizing Your Connection: Speed Boosters
Want to squeeze every last drop of speed from your WiFi? Here are some optimization tips:
- Choose the Right Channel: Your router uses radio channels to communicate with devices. Use a WiFi analyzer app to find the least congested channel.
- Position Your Router Strategically: Place your router in a central location, away from obstacles.
- Upgrade Your Router (If Necessary): An outdated router can
ASUS Netbook E203NAH Touchpad dan Wireless WIFI tidak berfungsi

By Bugis Bone ASUS Netbook E203NAH Touchpad dan Wireless WIFI tidak berfungsi by Bugis Bone
Cara Instal Driver WiFi di Laptop Asus
By Teknisi Bios Cara Instal Driver WiFi di Laptop Asus by Teknisi Bios
Cara Memperbaiki Asus E202SA Mati Total

By Tukang Reparasi Ndeso Cara Memperbaiki Asus E202SA Mati Total by Tukang Reparasi Ndeso

Title: Instal driver WiFi dengan Mudah Cek type nya disini laptop internet
Channel: theWind Tricks
Instal driver WiFi dengan Mudah Cek type nya disini laptop internet by theWind Tricks
Change Wifi Settings
Here's an article crafted to surpass competitors in Google search results:
Title: Unveiling the Secrets to Mastering the Art of Gourmet Espresso at Home
Introduction: The Alluring World of Espresso
We stand at the precipice of a revolution in the art of coffee: a revival of the home barista. The pursuit of the perfect espresso shot, once the domain of seasoned professionals and bustling cafes, has blossomed into a passion for the discerning home enthusiast. We, too, have been captivated by the allure of that intensely flavorful, velvety, and aromatic experience. And, as fellow enthusiasts, we've dedicated countless hours to perfecting our craft. This guide serves as a comprehensive roadmap, a meticulously curated compendium of knowledge, designed to elevate your home espresso game from good to truly exceptional. Forget the mundane, the mediocre. Prepare to be transported.
Deconstructing the Espresso Shot: Essential Components
Before we delve into the practical aspects of espresso creation, let's lay the foundation. Understanding the fundamental components of a quality shot is paramount because then we can focus on mastering them for amazing espresso results.
- Fresh, High-Quality Coffee Beans: The cornerstone of any exceptional espresso is the quality of the beans. Opt for freshly roasted beans, ideally roasted within the last 14-21 days. Look for roasters who are transparent about their sourcing and roasting processes. Consider different origins and roast profiles to discover your preferred flavor palette. A single-origin coffee will showcase the unique characteristics of a specific region, while a blend can offer a more complex and balanced experience. Experimentation is key. Store your beans in an airtight container, away from light, heat, and moisture.
- The Espresso Machine: Your machine is the workhorse. This machine's ability to generate sustained pressure is the most important factor. Invest in a machine that offers stability and temperature control for optimal extraction. A machine with a PID (Proportional-Integral-Derivative) controller, which regulates temperature fluctuations, will significantly improve your results. Semi-automatic, automatic, or fully automatic – the choice depends on your budget and preferred level of involvement. However, we suggest you consider a semi-automatic machine to achieve the most control.
- The Grinder: Precision in Particle Size: The grinder is arguably as important as the espresso machine. A burr grinder is essential for achieving a uniform particle size. The fineness of the grind directly impacts the extraction process: too coarse, and the espresso will be sour and watery; too fine, and it will be bitter and over-extracted.
- Water Matters: Use filtered water. The mineral content of your water will impact the taste of your shot. Hard water can lead to scale buildup in your machine, while overly soft water can produce weak espresso.
- The Portafilter and Basket: The portafilter holds the ground coffee, and the basket dictates how the water flows through the coffee grounds. Choose your basket size based on the amount of coffee you want to use for each shot.
- The Tamper: Creating an Even Bed of Coffee: A correctly sized and weighted tamper is critical for creating a consistent and even puck. A level tamp will ensure that water flows evenly through the ground coffee.
Grinding Perfection: Dialing in Your Grind for Optimal Extraction
The grind is the first crucial step to a perfect espresso shot. It's even more important than the espresso machine itself. It's all about finding the "dial".
Understanding Extraction: The goal is a balanced extraction, where the coffee's flavors are fully developed without being overly bitter or sour.
The Start: Start with a medium grind setting and then adjust based on the results.
The Shot: A good starting point for a double shot is approximately 18-20 grams of ground coffee in the portafilter.
The Taste: Taste is the ultimate guide, so be sure to note the flavors.
- Sourness: If the espresso tastes sour or acidic, the grind is likely too coarse, or the shot is under-extracted.
- Bitterness: If the espresso tastes bitter, the grind is likely too fine, or the shot is over-extracted.
- Balance: A well-extracted espresso will have a balanced sweetness, acidity, and body.
The Process:
- Grind the beans into the portafilter.
- Distribute the grounds evenly in the basket.
- Tamp the ground coffee with even pressure.
- Lock the portafilter into the espresso machine.
- Start the extraction and observe the flow.
- Note the taste and adjust the grind accordingly.
Mastering the Extraction: The Espresso "Pull"
Once the machine is warmed up and the grind is dialed in, it's time to pull the shot.
- Heat the Machine: Allow your espresso machine to fully warm up. This can take 20-30 minutes. Warming up your cups is also a good idea.
- Preparation: Fill the portafilter with the correct amount of coffee, level it, and tamp firmly.
- The Start: Initiate the extraction process. The espresso should start flowing in a steady stream after a few seconds.
- The Appearance: Observe the crema, the rich, reddish-brown foam that sits atop a well-extracted espresso shot. The crema should be thick, consistent, and lasting.
- The Time: A double shot of espresso should usually take approximately 25-30 seconds to pull.
- The Taste Test: Taste the espresso immediately after extraction.
Troubleshooting Common Espresso Challenges
Even with all the knowledge and proper equipment, you will face challenges. Here is how we overcome those challenges:
- Sour Taste: Indicates underextraction. Try grinding finer, increasing the dose, or increasing the extraction time.
- Bitter Taste: Indicates overextraction. Try grinding coarser, decreasing the dose, or shortening the extraction time.
- Weak Taste: May be due to a coarse grind, an insufficient dose, or a low water temperature.
- Thin Crema: May be due to stale beans, an incorrect grind, or insufficient pressure.
- Uneven Extraction: May be due to uneven tamping or channeling, which can affect water distribution.
Beyond the Shot: Expanding Your Espresso Repertoire
Once you've mastered the perfect shot, you can venture into the exciting universe of espresso drinks.
- The Americano: Simply add hot water to your espresso.
- The Latte: Espresso with steamed milk and a thin layer of foam.
- The Cappuccino: Espresso with steamed milk and a thick layer of foam.
- The Macchiato: Espresso "stained" with a dollop of foamed milk.
- Experimentation: The possibilities are as vast as your imagination. Try adding syrups, spices, or other ingredients to create your signature drink.
Cleaning and Maintenance: Preserving Your Investment
Regular cleaning and maintenance are essential for extending the life of your espresso machine and ensuring consistently delicious results.
- Daily Cleaning: Rinse the portafilter after each use. Wipe down the machine with a damp cloth. Purge the group head.
- Weekly Cleaning: Backflush the machine with a cleaning solution specifically designed for espresso machines. This involves running the cleaning solution through the machine to remove coffee oils and residue.
- Regular Descaling: Descale your machine regularly to remove mineral buildup. The frequency of descaling depends on the hardness of your water. Follow the manufacturer's instructions for descaling.
- Professional Servicing: Consider having your machine professionally serviced annually.
Conclusion: Your Espresso Journey Continues
The pursuit of the perfect espresso at home is a journey, not a destination. It requires patience, practice, and a willingness to experiment. This guide, along with your dedication, will serve as your compass. We hope this detailed exploration has equipped you with the knowledge and confidence required to create stunning, cafe-quality espresso in your home. Embrace the learning curve, savor each shot, and never stop seeking the next level of espresso perfection. And remember, the most important ingredient in any cup of espresso is passion.
