how to make my laptop wifi hotspot using cmd

Title: How to Setup a WiFi Hot-spot in Windows using CMD Command Prompt
Channel: SASI
How to Setup a WiFi Hot-spot in Windows using CMD Command Prompt by SASI
Unlock Your Laptop's Hidden Hotspot Power: CMD Trick Revealed!
Unleash the Wireless Wizard: Your Laptop's Secret Hotspot Command Revealed!
Ever wished you could share your internet connection without the hassle of fiddling with settings menus? You're not alone. Many of us crave a simple, reliable way to turn our laptops into mobile hotspots. Believe it or not, there's a hidden power within your computer. It’s a command, a secret weapon. This command resides directly within your laptop's operating system. Prepare to unlock wireless magic!
Bypassing the GUI: The Strength of CMD
We often rely on the graphical user interface (GUI). It's the friendly face of our operating systems. However, there's a more potent method for controlling your laptop's Wi-Fi capabilities. We're talking about the Command Prompt (CMD). It's a powerful tool. Many consider it a throwback. In reality, it’s incredibly versatile. CMD accesses core system functions. It bypasses the limitations of the GUI.
Crafting Your Wireless Gateway: Setting Up the Hotspot
Now, let's dive into the core of the matter. We'll use the CMD prompt. First, open CMD. You can search for it in your Windows search bar. Right-click on "Command Prompt" and select "Run as administrator." This is vital. You’ll need administrative privileges. Next, type the following commands carefully. This is the first step to create an ad-hoc network:
netsh wlan set hostednetwork mode=allow ssid="YourHotspotName" key="YourPassword"
Replace "YourHotspotName" with your desired network name. Choose a password that is secure, but easy for you to remember. This is important for security. Keep it safe. This single line of code does a tremendous amount. It initiates the hotspot setup.
Igniting the Connection: Starting Your Hotspot
Once you've configured the network, it's time to launch it. The command is simple:
netsh wlan start hostednetwork
Execute this command. Consequently, your laptop will become a Wi-Fi hotspot. Your chosen SSID will appear. Devices can now search for it. After entering your password, they'll connect. That's the power of CMD!
Sharing the Internet: Bridging the Connection
Your hotspot is now active. However, it’s not sharing your internet connection. This is a crucial final step. Open "Network Connections." You can find this by searching in the Windows search bar. Right-click on your active internet connection (e.g., Ethernet or Wi-Fi). Select "Properties". Go to the "Sharing" tab. Check the box that says "Allow other network users to connect through this computer's Internet connection." Select the hosted network connection in the dropdown menu. This will bridge the connection. Therefore, your laptop will share the internet with your devices.
Troubleshooting Triumphs: Conquering Common Hurdles
Sometimes, things don't go perfectly. Don't worry, it is fixable. Here's how to address common issues:
- Hotspot Not Starting: Double-check that your network adapter supports hosted networks. Run the following command in CMD:
netsh wlan show drivers. Look for "Hosted network supported: Yes." Then, verify your commands are correct. - No Internet Connection: Ensure you have an active internet connection on your laptop. Also, check that internet connection sharing is enabled correctly. Make sure you bridge the correct connection.
- Password Issues: Retype your password carefully during the initial setup. Confirm the password is accurate on your devices.
Elevating Your Wireless Experience: Customization and Control
You're now a wireless wizard. You can also customize your hotspot. You can change the SSID and password anytime. Simply repeat the initial setup command with your new details. This allows for control and freedom. You can also stop the hotspot whenever it is not needed. You can do this with the command: netsh wlan stop hostednetwork. This is a great way to save battery life.
The Advantages: Why Embrace the Command Prompt
Why bother with CMD, when GUI options exist? It offers several advantages:
- Speed: The command line approach is often faster. You can quickly set up a hotspot.
- Reliability: CMD can be more stable compared to the graphic interface.
- Customization: You have more granular control. You can fine-tune settings.
- Efficiency: It consumes fewer system resources. This is a good way to use the internet.
Beyond the Basics: Exploring Advanced Techniques
CMD offers even more functionality. You can create batch files to automate hotspot setup. This simplifies the process further. You can also configure your hotspot for specific devices. This enhances security and improves performance.
Your Wireless Future Awaits: Embrace the Power Within
You now possess the knowledge to unlock your laptop's hidden hotspot power. You know a trick with the CMD Prompt. You have a secret weapon. Now you can share your internet connection. You have bypassed the GUI. Start creating hotspots. Use your laptop’s full potential. Embrace the command line. Your wireless future has begun.
HP 245 G5 Govt Laptop: Download WiFi Drivers NOW! (Solved!)Let's get this show on the road! I'm going to unleash some serious hotspot wizardry on you guys today. Forget fiddling with those clunky GUI options; we're diving into the real power – the Command Prompt, the unsung hero of your laptop's capabilities. Get ready to unlock your laptop's hidden hotspot power with a little CMD magic!
Unlock Your Laptop's Hidden Hotspot Power: CMD Trick Revealed!
1. The Problem: Why Your Built-In Hotspot Is a Snooze-Fest
Let’s be honest, aren’t you tired of the built-in Wi-Fi hotspot options that are about as user-friendly as trying to herd cats? They’re often slow, unreliable, and make you jump through hoops to get them running. You click and click, only to be met with error messages and a general feeling of frustration. We’ve all been there, haven’t we? I remember being on a road trip, desperately trying to connect my tablet to my laptop’s hotspot so my kids wouldn't riot, only to have it fail spectacularly. That's when I started digging deeper, and, boy, did I find some gold!
2. Enter the CMD: Your Laptop's Secret Weapon
Think of the Command Prompt (CMD) as the backstage pass to your laptop's inner workings. It's where the real magic happens. This isn't just about typing commands; it's about understanding the language your computer already speaks. It’s like learning a secret handshake to access features the average user doesn't even know exist. And today, we're learning the handshake for creating a super-powered hotspot.
3. Before We Begin: Quick Pre-Flight Checks
Before we crank things up, a few quick things to keep in mind:
- Admin Privileges: You'll need administrator rights. Right-click the Command Prompt icon and select "Run as administrator.” This is crucial. Otherwise, you'll be staring at a bunch of “Access Denied” errors.
- Wireless Adapter: Ensure your laptop has a working wireless network adapter. This might seem obvious, but it's worth checking! You can find this in your Device Manager.
- Patience: This is a bit like baking a cake – follow the steps, and you’ll get a delicious result. Rushing can lead to a messy disaster.
4. Step-by-Step: Crafting Your CMD Hotspot
Alright, let’s roll up our sleeves. We're going to create a hotspot from scratch.
- Step 1: Open the Command Prompt – As mentioned above, and I can't stress this enough: Run it as administrator!
- Step 2: The Magic Command – Type the following command and hit Enter:
netsh wlan set hostednetwork mode=allow ssid="YourHotspotName" key="YourPassword"- Replace
YourHotspotNamewith the name you want for your Wi-Fi network. Something catchy, or even just…practical. (Mine is usually "LaptopHotspot" – not very creative, I know!) - Replace
YourPasswordwith a strong password. Seriously, don't use "password" or "12345678." Think of your hotspot like your house. You wouldn’t leave the door unlocked, would you?
- Replace
- Step 3: Activate the Network – Now, we need to start the hosted network. Type:
netsh wlan start hostednetworkand press Enter. This command is the ignition switch!
5. Sharing Your Internet: The Bridge to Connectivity
Your hotspot is now created, but you still need to share your internet connection from your laptop to the newly created hotspot.
- Step 1: Open Network Connections – You can do this by searching "Network Connections" in the Windows search bar.
- Step 2: Find Your Internet Connection – Identify the network connection you're using to connect to the internet (e.g., Wi-Fi or Ethernet). It'll probably have a status like "Connected."
- Step 3: Sharing Time – Right-click on your internet connection and go to “Properties.” Click on the “Sharing” tab.
- Step 4: Enable Sharing – Check the box that says “Allow other network users to connect through this computer’s Internet connection.”
- Step 5: Choose Your Hosted Network – In the dropdown menu, select the hosted network you just created. This is the Wi-Fi network you named using the
ssidcommand above. - Step 6: Apply and OK – Click “Apply” and then “OK.”
6. Diagnosing Common Roadblocks: Troubleshooting Like a Pro
Even wizards encounter glitches! Don’t worry, we’ll fix them.
- "Hosted network failed to start": Double-check your driver's network adapter. Make sure it's up to date. Rebooting your laptop can also work miracles.
- "Can't connect to the internet": Ensure you've correctly shared your internet connection as described above. Also, verify the password you entered.
- Slow speeds: This might be due to the distance between your devices or the number of devices connected. Also, your laptop's internet speed itself plays a huge role.
7. Security First: Shielding Your Wireless Fortress
Think of your hotspot as a digital castle. Strong passwords, like a deep moat, are essential. Consider using WPA2 or WPA3 encryption for maximum security. Regular password changes are also a good habit.
8. Monitoring and Managing Your Hotspot: Staying in Control
Keep tabs on who's connected to your hotspot. Most operating systems will show connected devices, allowing you to identify and even block suspicious activity.
9. Why CMD is Superior: The Freedom Factor
The CMD method provides more control and avoids the bloat and sometimes unreliable functionality of the built-in hotspot features. The simplicity and direct control are unmatched. It's like taking the scenic route instead of being stuck in traffic.
10. The Power of Automation: Batch Files for the Win
Want to make this even easier? Create a batch file! Open Notepad and paste the following, modifying the hotspot name and password as before:
@echo off
netsh wlan set hostednetwork mode=allow ssid="YourHotspotName" key="YourPassword"
netsh wlan start hostednetwork
echo Your hotspot is now active!
pause
Save the file with a .bat extension (e.g., hotspot.bat). Now, you can create and start your hotspot with a single click!
11. Laptop Hotspot Hacks: Going Beyond the Basics
Experiment! You can tweak commands to limit bandwidth for connected devices or even create a timed hotspot for situations where you only want it active for a set time.
12. CMD vs. Third-Party Software: Why Stay with CMD
While there are third-party hotspot applications, they often come with extra features you don't need, resource usage, and the potential for hidden costs. Using the CMD is lean, efficient, and it’s always free!
13. Real-World Scenarios: Hotspot Solutions in Action
- On the Go: Need internet access for your tablet or phone while traveling? Your laptop and the CMD are your best friends.
- Sharing with Friends: Hosting a study group or a game night? Easily share your internet with multiple devices.
- Emergency Backup: If your home Wi-Fi goes down, your laptop can serve as a temporary lifeline.
14. The Future of Hotspots: What's Next?
As technology evolves, we can expect even more sophisticated hotspot capabilities. But for now, the CMD method remains a reliable, powerful, and customizable solution.
15. Final Thoughts: You're Now a Hotspot Guru!
Congratulations! You've graduated from the basic hotspot tutorial to a CMD hotspot master. You now wield the power to create and control your own Wi-Fi network with ease and efficiency. Embrace the command line, and you'll find a world of untapped potential on your laptop.
Closing Segment
I hope you enjoyed this deep dive into the world of CMD hotspots. Armed with these commands and this new knowledge, you can finally banish those connectivity woes and create a reliable Wi-Fi hotspot from your laptop. Don’t be afraid to experiment, and keep exploring the hidden power of your computer. Who knows what other secrets you'll uncover? Now go forth and share the Wi-Fi love!
FAQs
1. My hotspot isn't showing up on other devices. What gives?
* Double-check that you've enabled internet connection sharing in your network settings. Also, make sure you’ve started the hosted network using the `netsh wlan start hostednetwork` command. Ensure your wireless adapter is enabled.
2. How do I stop my hotspot?
* Open Command Prompt as administrator and type `netsh wlan stop hostednetwork`. This will shut down your hotspot.
3. Can I change the hotspot name and password after creation?
* Yes! You'll need to stop the hosted network first (`netsh wlan stop hosted
How to Create a WiFi Hotspot Using CMD
By Tricknology How to Create a WiFi Hotspot Using CMD by Tricknology
How To Connect WiFi Network Using CMDCommand Prompt in Windows 10

By Tricknology How To Connect WiFi Network Using CMDCommand Prompt in Windows 10 by Tricknology
How To Send Messages On Lan Using CMDCommand Prompt

By Tricknology How To Send Messages On Lan Using CMDCommand Prompt by Tricknology
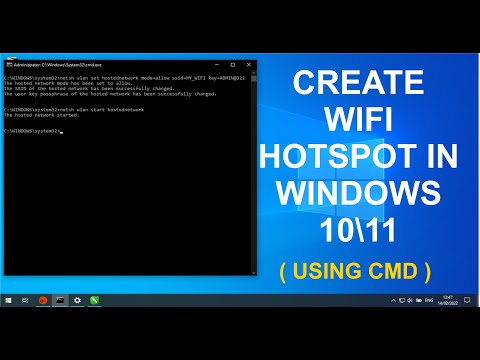
Title: How To create WIFI Hotspot in windows 1011 USING CMD
Channel: How To with Jeff
How To create WIFI Hotspot in windows 1011 USING CMD by How To with Jeff
Change Wifi Settings
The title of the article is: The Ultimate Guide to Choosing the Perfect Wedding Venue
The Ultimate Guide to Choosing the Perfect Wedding Venue
The journey to "I do" is filled with exhilarating moments, countless decisions, and the promise of a lifetime shared. Amongst the myriad of choices that shape this momentous occasion, selecting the perfect wedding venue stands as a cornerstone. It is the canvas upon which your love story will be painted, the stage where memories will be etched for generations to come. Choosing the right venue transcends the mere booking; it is about curating an experience, crafting an atmosphere, and making a statement about the values and aspirations of the couple at its heart. This comprehensive guide will navigate you through the essential considerations, ensuring that your venue choice aligns perfectly with your vision and sets the stage for an unforgettable celebration.
Establishing Your Wedding Vision: Defining Style and Atmosphere
Before venturing into the world of potential venues, take the time to clarify your wedding vision. Consider the ambiance you wish to create. Do you dream of a fairytale garden party, a sophisticated ballroom affair, or a rustic chic celebration? This foundational step will streamline your search and prevent you from being overwhelmed by the sheer volume of options.
Determine Your Preferred Wedding Style: Researching various wedding styles will help you narrow down your preferences. Are you drawn to the elegance of a classic wedding, the bohemian vibes of a beachside ceremony, or the minimalism of a modern aesthetic? Pinterest, Instagram, and wedding blogs are invaluable resources for visual inspiration. Collect images of venues and decor that resonate with your taste to create a mood board, a visual representation of your ideal wedding.
Consider Guest Count and Layout: The size of your anticipated guest list is a primary determinant in venue selection. Ensure the venue can comfortably accommodate your party without feeling cramped. Beyond capacity, consider the layout. Do you envision a flowing space for mingling and dancing, or a more intimate setting? Pay attention to the flow between different areas, such as the ceremony space, cocktail hour area, and reception hall.
Reflect on the Time of Year: Your wedding season significantly impacts venue choices. Outdoor venues are enchanting in spring and summer, while enclosed spaces with fireplaces offer cozy warmth in the fall and winter months. Consider the weather conditions and any potential restrictions associated with the season, especially for outdoor ceremonies.
Budgeting Wisely: Financial Planning for Venue Costs
The financial aspect of wedding planning is crucial. Setting a realistic budget early on is essential, as venue costs can vary dramatically.
Establish a Realistic Budget: Research the average cost of weddings in your area. Websites like The Knot and WeddingWire provide valuable data and tools for budgeting. Allocate a significant portion of your budget to the venue, as it often represents a substantial expense. Be sure to factor in expenses like venue rental fees, catering packages, bar services, and any additional fees, such as service charges or taxes.
Understand Venue Pricing Structures: Venues typically offer various pricing models, including rental fees, per-person costs, or a combination of both. Carefully review all the included features. Does the rental fee encompass tables, chairs, linens, and other essential items, or will you need to rent them separately? Clarify any additional charges for services such as setup, cleanup, and staffing.
Prioritize Your Spending: Once you have a budget in place, determine which aspects of the venue are most important to you. Are you willing to compromise on certain features to allocate funds to other areas, such as premium catering or a stunning ceremony location?
Identifying Venue Features and Amenities
Once you have a clearer vision, you can begin identifying specific features and amenities that align with your preferences and logistical needs.
Ceremony and Reception Spaces: Does the venue offer separate ceremony and reception areas, or will the transition take place within the same location? For separate spaces, consider the distance between the two and the ease of access for guests. If the ceremony and reception are in the same space, inquire about the logistical plan for flipping the room from ceremony to reception.
Catering and Beverage Services: Many venues offer in-house catering or partner with preferred vendors. Evaluate the catering options carefully, including menu selections, tasting opportunities, and the flexibility to customize your menu based on dietary needs or preferences. Consider the bar services, including the types of alcohol offered, bar staffing, and any corkage fees if you choose to bring in your own alcohol.
Parking, Accessibility, and Guest Accommodations: Adequate parking is a crucial aspect often overlooked. Assess the parking capacity and the distance between the parking area and the venue entrance. Ensure the venue is accessible for guests with disabilities, and inquire about ramps, elevators, and accessible restrooms. Consider nearby accommodations for your guests, such as hotels, and inquire about any preferred rates or shuttle services the venue may offer.
Vendor Coordination and Restrictions: Some venues offer vendor coordination services, which can streamline the planning process. Inquire about any limitations on the vendors you can use, like photographers, florists, or DJs. Understanding these restrictions upfront will avoid potential conflicts and complications.
Exploring Venue Types and Styles
The world of wedding venues is diverse, offering something to suit every taste and preference.
Ballrooms and Hotels: Ballrooms and hotels offer the elegance and sophistication of a grand celebration. These venues often provide comprehensive services, including catering, bar services, and guest accommodations. They typically offer established event coordination and experienced staff.
Barns and Rustic Venues: Barns and rustic venues exude a warm, inviting atmosphere. They are ideal for couples seeking a charming, country-inspired wedding. These venues offer ample opportunities for personalization with DIY decor and rustic accents.
Outdoor and Garden Venues: Outdoor venues, such as gardens, parks, and vineyards, offer a picturesque setting for a romantic ceremony and reception. They provide a stunning backdrop for photographs and allow you to incorporate natural elements into your decor. They may require a backup plan in case of inclement weather, such as a tent or indoor space.
Unique and Non-Traditional Venues: Consider unique venues such as museums, art galleries, historic buildings, or even a private estate. These venues provide a distinctive and memorable setting for your wedding day and can reflect your personal interests and passions.
The Venue Visit: Conducting a Thorough Inspection
Once you've narrowed down your list, schedule site visits to each potential venue. This is an opportunity to experience the space firsthand and assess its suitability for your wedding.
Observe the Ambiance: Pay attention to the details. How does the space feel? Is it warm and inviting, or does it feel sterile or impersonal? Visualize your wedding in the space and consider how your decor, lighting, and other elements will interact with the existing environment.
Questions to Ask the Venue Coordinator: Prepare a list of questions to ask the venue coordinator. Inquire about their experience and expertise in hosting weddings. Request information on their policies, cancellation fees, and other pertinent details. Ensure you acquire a clear understanding of all inclusions and exclusions.
Assess the Natural Light and Sound Quality: Evaluate the natural light in the space, particularly during the time of day your wedding will take place. Consider how light will impact your photographs and overall atmosphere. Test the sound quality by listening to the acoustics in the space, assessing if your music and announcements will be audible.
Inspect the Facilities: Examine the restrooms, kitchen area, and any other facilities. Ensure they are clean, well-maintained, and accessible. Confirm if the venue features enough restrooms for your guest count.
Finalizing Your Decision and Securing Your Date
After thorough research and careful consideration, it’s time to make your final decision.
Review Contracts Carefully: Before signing a contract, carefully review all the terms and conditions. Pay attention to the payment schedule, cancellation policies, liability, and any other legally binding clauses. Do not hesitate to seek legal advice if necessary.
Confirm the Details: Before signing, confirm all the details discussed during your site visits, including prices, services, and any other specific agreements. Ensure all the details are accurately reflected in the contract.
Secure Your Date: Once you are ready to move forward, finalize the contract and secure your date. Many venues require a deposit to hold your date.
Communicate and Coordinate Effectively: Stay in regular contact with the venue coordinator. Work closely with them from the moment the contract is signed up until the last dance on your wedding day.
Choosing the perfect wedding venue is an exciting journey. By following this comprehensive guide, you can navigate the process with confidence and choose a venue that perfectly reflects your unique love story. This is more than just choosing a venue; it is about finding a place where your dreams can take shape.
