how to hotspot wifi from laptop mac

Title: Enable WiFi Hotspot on Mac Share Internet Connection from Mac
Channel: Techy Druid
Enable WiFi Hotspot on Mac Share Internet Connection from Mac by Techy Druid
Mac Hotspot: The Secret Trick Apple Doesn't Want You To Know!
Unlocking the Hidden Power: Your Mac's Secret Hotspot Revealed!
Ever felt tethered, trapped by the limitations of public Wi-Fi? You need internet access, and your phone’s battery is dwindling rapidly. Frustrating, right? Well, prepare to break free. Your Mac holds a secret weapon. It's a hidden hotspot. It’s a feature Apple subtly buries. This guide pulls back the curtain. Prepare to transform your Mac into a wireless powerhouse.
The Myth of a Limited Connection: Debunking the Apple Conspiracy!
We often hear whispers. They tell us Apple withholds some functionalities. It's a tactic, supposedly, to drive sales of their other products. The persistent myth focuses on hotspots. Many believe Macs offer weak, limited sharing capabilities. This simply isn't true. In reality, your Mac boasts a robust and flexible hotspot feature. Furthermore, it’s remarkably easy to activate. Forget those anxieties about unreliable public Wi-Fi. Imagine creating your own personal, secure network. The possibilities are truly liberating. Therefore, we're dispelling outdated notions. We will empower you with knowledge.
Unveiling the Magic: Setting Up Your Mac's Personal Hotspot
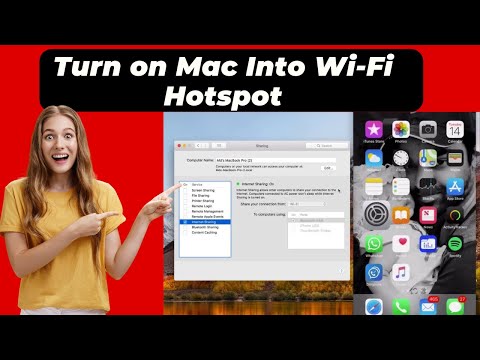
Ready for an adventure? Activating your Mac’s hotspot is surprisingly straightforward. First, ensure you have an active internet connection. This could be via Wi-Fi or, more excitingly, an Ethernet cable. Next, access your System Preferences. You'll find it in the Apple menu. This is in the top-left corner of your screen. Then, select "Sharing". Locate the "Internet Sharing" option. Check the box next to it. A dropdown menu reveals your sharing options. Select the source of your internet connection. This step is critical.
Now, choose how you want to share. This typically involves Wi-Fi or Bluetooth. If you opt for Wi-Fi, click "Wi-Fi Options". A window will appear. Give your hotspot a descriptive name. Also, choose a strong password. This encryption ensures your network's security. Finally, click "OK".
After that, ensure the “Internet Sharing” box is checked. The "Start" button will appear. Click this to activate your hotspot. Congratulations! Your Mac is now a mobile Wi-Fi router.
Beyond Basics: Fine-Tuning Your Wireless Fortress
So, you've created a hotspot. What now? Let’s delve deeper. Let’s explore advanced customization. Before you start, consider a few things. Always remember security. Use a strong password. Furthermore, consider your data usage. Tethering can consume significant data.
To modify settings, revisit the "Sharing" preferences. You can adjust the network name. Also, the password is changeable. Furthermore, you can switch the connection source. Therefore, customize everything to your needs. This level of control is empowering.
Consider using a firewall. This protects your Mac. It shields connected devices. Apple already incorporates one. However, further protection is available. Additionally, monitor your network activity. Mac's “Activity Monitor” helps. It provides insights into data usage. Hence, you can remain in control of your connection.
Troubleshooting Tango: Common Mac Hotspot Hurdles and Solutions
Sometimes, things don't go perfectly. Don’t worry. There are common pitfalls. You can easily resolve these. Let's troubleshoot some typical problems.
First, check your internet connection. Your Mac must have internet access to share it. Verify that Wi-Fi or Ethernet is working. Likewise, ensure you are paying your internet bill. It can be frustrating.
Secondly, verify the sharing settings. Confirm the correct internet source. Also, double-check your chosen sharing method. Ensure Wi-Fi is enabled. Also, confirm Bluetooth is enabled for Bluetooth sharing.
Thirdly, review your password. Ensure connected devices use the correct password. Confirm no typos complicate things. Moreover, try restarting both your Mac and the connecting devices. This often resolves minor glitches.
If still experiencing issues, check for software updates. Outdated software can cause problems. Keeping your Mac updated keeps it safe. Also, it assures functionality. Finally, consider contacting Apple Support. They can provide expert assistance.
Embrace the Freedom: Unleashing the Power of Mac Hotspot
Now you have the essential knowledge. You know how to transform your Mac into a powerful hotspot. Embrace the freedom! Connect multiple devices simultaneously. Work remotely. Access the internet securely. Enjoy the flexibility that comes with a personal Wi-Fi network.
This hidden gem is now yours. You control your connections. You control your experience. And that, dear friend, is empowering! So, go forth. Unleash the power of your Mac. Enjoy the freedom of being connected, anywhere and anytime.
WiFi Nightmare on Windows 10? FIX IT NOW!Mac Hotspot: The Secret Trick Apple Doesn't Want You To Know!
Alright, friends, let's be honest, we live in a world where Wi-Fi is basically oxygen. Can you imagine a life without it? I shudder just thinking about it! And while Apple makes some fantastic devices, sometimes their methods for sharing that precious internet connection, particularly on a Mac, can feel… well, a bit clunky. The good news? We've uncovered a secret trick, a hidden gem, a little hack that makes your Mac's hotspot capabilities exponentially better. And, no, it’s not a legal loophole, just a clever workaround. Ready to unlock the full potential of your Mac’s hotspot? Let’s dive in!
1. The Frustration of the Standard Mac Hotspot
Think back to those moments when you’re staring at your phone, desperately trying to connect to a Wi-Fi network that just won’t cooperate. Or those times when your Mac's built-in hotspot feels as reliable as a politician's promise. Sound familiar? We’ve all been there. Apple's default hotspot setup, while functional, sometimes feels like it's designed to make things slightly harder than they need to be. Imagine trying to juggle a burning torch, a bowling ball, and a cup of coffee – that's sometimes what it feels like trying to get a reliable connection.
2. Unveiling the Apple's Secret – The Hidden Limitation
Here’s the deal: Apple, in their infinite wisdom (and sometimes, their perplexing choices), has a few hidden limitations when it comes to their default hotspot. These aren't exactly "secrets" in a cloak-and-dagger sense, but they’re not exactly shouted from the rooftops either. They often involve bandwidth restrictions, connection hiccups, and the occasional head-scratching moment when your other devices just won't play nice. These limitations are like the fine print in a contract – crucial but often overlooked.
3. Why This Matters: Beyond Just Browsing
This isn't just about streaming cat videos (though, let's face it, that's important!). A reliable Mac hotspot is a game-changer for:
- Remote Work: Imagine working from a location with spotty Wi-Fi. A stable Mac hotspot is your lifeline.
- Travel: Traveling and need to connect multiple devices? You've got it covered.
- Backup Connection: When your home internet goes down (it always does at the worst possible moment, doesn't it?), your Mac acts as a ready-made backup.
- Sharing with Friends: Want to share your internet with your buddies on a camping trip? Now you can.
4. The Secret Sauce: Unleashing a More Robust Connection
Here's the magic bullet, the secret ingredient, the… well, you get the idea. The trick lies in understanding and optimizing your Mac's network settings. We’re not talking about anything complicated; trust me, if I can do it, you definitely can! We will not be using terminal, but rather a nifty setting that is often overlooked.
5. Step-by-Step: Setting Up Your Optimized Hotspot
Let's get down to brass tacks. Setting up the optimized hotspot is as easy as pie (and who doesn't love pie?). Here’s a simplified guide:
- Go to System Preferences/System Settings: Open up your System Preferences (or System Settings, depending on your macOS version). It’s the gear icon, a familiar friend.
- Choose Sharing: Click on the "Sharing" option. This is where the magic happens.
- Internet Sharing: Select "Internet Sharing" from the left-hand menu.
- Share Your Connection From: Here, you’ll need to select the connection you want to share. (e.g., Wi-Fi, Ethernet, etc.)
- To computers using: Check the box next to "Wi-Fi."
- Wi-Fi Options: Click the "Wi-Fi Options…" button.
- Network Name: Give your hotspot a memorable name. Make it something you'll easily recognize.
- Security: Choose a security type (WPA2 Personal is generally recommended).
- Password: Create a strong password. Keep those freeloaders away!
- Enable Internet Sharing: Check the box next to "Internet Sharing" to activate it.
- Test it Out: Connect your other device(s) to your new hotspot and browse like the wind!
6. Tweaking for Maximum Performance
The basic setup is great, but we can do better! After the initial setup, you can fine-tune things for optimal performance:
- Choose the Right Channel: If your hotspot is slow, consider changing the Wi-Fi channel. This can reduce interference.
- Monitor Connected Devices: Keep an eye on the number of connected devices to avoid overloading your connection.
- Consider a Stronger Antenna: If you need a wider range, a Wi-Fi extender can do wonders.
- Keep Your Mac Updated: Software updates often include performance improvements, so make sure your macOS is up-to-date.
7. Troubleshooting Common Mac Hotspot Problems
Let’s face it, things don’t always go smoothly. Here's a troubleshooting cheat sheet:
- Can’t Connect: Double-check your password, ensure the hotspot is enabled, and try restarting both your Mac and the connecting device.
- Slow Speeds: Too many connected devices, the Wi-Fi channel is congested, or the internet source is slow to begin with.
- Intermittent Disconnections: Interference from other devices, or the connection source is unstable.
8. Beyond the Basics: Advanced Hotspot Tricks
Want to truly become a hotspot ninja? Here are some advanced tips:
- Create a Guest Network: Use a different password and network name for guests. This keeps your main network secure.
- Manage Bandwidth: Use your Mac's built-in tools to limit bandwidth usage if you have data caps.
- Use a VPN: Protect your privacy by using a VPN on your Mac before sharing your connection.
9. Comparing Mac Hotspot To Other Options
How does the Mac hotspot stack up against alternatives?
- Mobile Hotspots: Typically more reliable, but require a dedicated device and can be more expensive in terms of data plans.
- MiFi Devices: Similar to mobile hotspots, with added security and often better range.
- Wi-Fi Routers: Best for fixed locations, offer the most reliable and fastest connections.
10. The Benefits of Using Your Mac as a Hotspot
- Cost-Effective: Save money by utilizing your existing Mac and internet connection.
- Convenience: No extra devices needed (usually!).
- Flexible: Easily share your internet connection anywhere, anytime.
11. Common Misconceptions About Mac Hotspots
- Myth: Mac hotspots are always slow. Reality: Properly configured, Mac hotspots can be quite fast.
- Myth: They’re hard to set up. Reality: The basic setup is surprisingly simple.
- Myth: They drain your battery too quickly. Reality: It depends on usage, but you can manage battery life.
12. Security Considerations: Keeping Your Connection Safe
Security is paramount. Always:
- Use a strong password.
- Keep your Mac’s software updated.
- Consider a VPN for added privacy.
- Monitor connected devices.
13. Maximizing Battery Life While Using Your Hotspot
Using your Mac as a hotspot can drain the battery, but here are some ways to mitigate this:
- Lower Screen Brightness: A bright screen uses more power.
- Close Unnecessary Apps: Minimize background activity.
- Use Power Saver Mode: Activate this setting to conserve energy.
- Plug In: The simplest solution!
14. The Future of Mac Hotspots: What’s Next?
What does the future hold? We can hope for:
- Improved Software: Apple may refine the built-in hotspot feature.
- Better Integration: Easier device pairing and connection management.
- More Features: Perhaps bandwidth control and guest network options baked in as standard.
15. Embrace the Power of Your Mac Hotspot
My friends, we've covered a lot of ground! But now you're armed with the knowledge to unlock the full potential of your Mac's hotspot. Now you can navigate the digital world without the anxiety of lost connections. Empower yourself, share your connection, and stay connected wherever life takes you. Go forth and surf!
Closing Thoughts:
Hopefully, this deep dive into the world of Mac hotspots has been enlightening. It's all about making your digital life a little smoother, a little more convenient. Just remember, knowledge is power, and with these tips, you're well on your way to becoming a Mac hotspot master! Keep exploring, keep learning, and most importantly, keep connected! Now go forth and share the Wi-Fi love!
FAQs:
1. Is Using My Mac as a Hotspot Safe?
Yes, if
Laptop WiFi Nightmare? FIX IT NOW! (Guaranteed!)How to share internet connection from Mac

By Mac2iPhone How to share internet connection from Mac by Mac2iPhone
CARA MEMBUAT WIFI HOTSPOT DI MACBOOK DENGAN MUDAH

By Nanang CARA MEMBUAT WIFI HOTSPOT DI MACBOOK DENGAN MUDAH by Nanang
How to Turn Your Mac Into a Wi-Fi Hotspot How To Enable Wifi Hotspot On Mac

By Technical Fix How to Turn Your Mac Into a Wi-Fi Hotspot How To Enable Wifi Hotspot On Mac by Technical Fix
Title: How to Turn Your Mac into a Wi-Fi Hotspot and Share Internet Connection
Channel: Research Rocks
How to Turn Your Mac into a Wi-Fi Hotspot and Share Internet Connection by Research Rocks
Laptop Wifi Hotspot
Let’s get this done. The title is: “The Ultimate Guide to Brewing the Perfect Cup of Coffee at Home”
The Ultimate Guide to Brewing the Perfect Cup of Coffee at Home
We, coffee enthusiasts, embark on a daily ritual, a sacred dance with beans and water. We, as a collective, seek that perfect cup, the one that sings on the palate, awakening the senses and preparing us for the day. The pursuit, while seemingly simple, involves a nuanced understanding of variables, from bean origin to brewing method. Let this guide illuminate the path, transforming the mundane into the magnificent, brewing the perfect cup of coffee, every single time.
Understanding the Coffee Bean: The Foundation of Flavor
Our journey commences with the humble coffee bean, the seed of the Coffea plant. Its origin, processing, and roasting profoundly influence the final cup.
- Origin Matters: Consider regions like Ethiopia, the birthplace of coffee, renowned for its bright, floral, and citrusy notes. Explore the rich, chocolatey profiles of beans from South America, or the bold, earthy characteristics of those from Indonesia. Researching the bean’s provenance helps us understand the expected flavor profile.
- Processing Methods: The method used to process the coffee cherries impacts the flavor. Washed coffees showcase the bean's inherent characteristics, offering crisp acidity. Natural (or dry-processed) coffees, where the cherry fruit dries around the bean, often present with sweet, fruity, and complex flavors. Honey-processed coffees fall between, offering a balance. Understanding these differences allows us to choose beans that will align with our taste preferences.
- Roasting Levels: Roasting is a transformative process. Light roasts highlight acidity and origin flavors, while medium roasts offer a balance of acidity and body. Dark roasts develop bold, often bitter, flavors with a heavier body. Experiment with different roast levels to find your preferred profile.
- Freshness is Key: Coffee is at its peak flavor shortly after roasting. Purchase whole beans and store them in an airtight container, away from light, heat, and moisture. Grind the beans just before brewing for optimal freshness.
The Art of Grinding: Unleashing the Aroma
Grinding is an essential step. The grind size determines the extraction rate, impacting the body and flavor of the coffee.
- The Right Grinder: Invest in a burr grinder. Burr grinders use two revolving abrasive surfaces to crush the beans evenly, resulting in a more consistent particle size. Blade grinders, on the other hand, chop the beans unevenly.
- Grind Size and Brewing Method: The ideal grind size varies depending on the brewing method:
- Coarse grind: French press, cold brew.
- Medium-coarse: Clever dripper.
- Medium: Pour-over, drip coffee.
- Medium-fine: Aeropress.
- Fine: Espresso.
- Consistency is King: Aim for a consistent grind size throughout. This ensures even extraction, which results in a balanced cup. Adjusting the grind size based on the brewing method and the specific bean will also enhance the flavor of the coffee.
Water: The Unsung Hero
Water is more than a mere solvent; it’s the vehicle that carries the coffee’s flavors.
- Water Quality: Use filtered water. Tap water can contain minerals and impurities that can negatively impact the flavor.
- Water Temperature: The ideal brewing temperature is between 195-205°F (90-96°C). Too cold, and the coffee will be under-extracted, sour and weak. Too hot, and the coffee will be over-extracted, bitter, and burnt.
- Water-to-Coffee Ratio: Start with a ratio of 1:15 or 1:16 (coffee to water). This means for every gram of coffee, use 15 or 16 grams of water. Adjust according to personal preference.
Mastering Brewing Methods: Exploring the Diverse World of Coffee
The brewing method profoundly influences the final cup's characteristics. Let's explore some popular methods:
- Pour-Over: This method allows for precise control over every aspect of the brewing process.
- Place a paper filter in the pour-over device. Rinse the filter with hot water to remove any papery taste. Discard the rinse water.
- Add ground coffee to the filter and level the grounds.
- Gently saturate the grounds with a small amount of hot water (about twice the weight of the coffee) for the bloom. Let it sit for 30-45 seconds. This step allows the coffee to release its trapped carbon dioxide, enhancing the flavor.
- Slowly pour the remaining water over the grounds in a circular motion, ensuring that all the grounds are evenly saturated.
- Brew time should be between 2-3 minutes. Adjust the grind size to control brew time.
- French Press: A timeless method, ideal for full-bodied coffee.
- Add coarse ground coffee to the French press.
- Pour hot water over the grounds.
- Stir gently to ensure all grounds are saturated.
- Let it steep for 4 minutes.
- Slowly press the plunger down.
- Serve immediately.
- Aeropress: A versatile method, producing smooth, clean coffee.
- Insert a paper filter into the Aeropress filter cap and rinse.
- Add medium-fine ground coffee to the Aeropress chamber.
- Pour hot water over the coffee.
- Stir gently for 10 seconds.
- Insert the plunger and gently press down for 20-30 seconds.
- Drip Coffee Maker: A convenient method for brewing larger quantities.
- Place a paper filter in the drip coffee maker.
- Add medium ground coffee to the filter.
- Fill the water reservoir with filtered water.
- Turn on the coffee maker and let it brew.
- Cold Brew: This method produces a smooth, low-acid coffee concentrate.
- Combine coarse ground coffee with cold, filtered water in a jar or container.
- Stir to ensure all grounds are saturated.
- Steep in the refrigerator for 12-24 hours using a lid.
- Filter the coffee using a fine mesh strainer or cheesecloth.
- Dilute the concentrate with water or milk to taste.
The Bloom: Unlocking Aromatics
The bloom, a crucial step in most brewing methods, allows the coffee to degas.
- The Science of the Bloom: Freshly roasted coffee beans release carbon dioxide when they come into contact with hot water. This gas hinders extraction. Blooming allows the carbon dioxide to escape, resulting in a more flavorful cup.
- The Blooming Process: Pour a small amount of hot water (about twice the weight of the coffee) over the grounds. Allow the coffee to bloom for approximately 30-45 seconds. Observe the coffee grounds expanding and bubbling. This is the carbon dioxide escaping.
Extraction: The Alchemy of Coffee
Extraction is the process of dissolving the soluble compounds from the coffee grounds into the water.
- Factors Influencing Extraction: Grind size, water temperature, brew time, and water-to-coffee ratio all influence extraction.
- Under-extraction: Results in sour, acidic, and underdeveloped flavors. Correct by using a finer grind or increasing the brew time.
- Over-extraction: Results in bitter, burnt, and hollow flavors. Correct by using a coarser grind or decreasing the brew time.
- Balanced Extraction: Creates a cup with a harmonious balance of sweetness, acidity, and body.
Tasting and Refining Your Brew
The final step is tasting and adjusting to find your perfect cup.
- The Coffee Tasting Ritual: Observe the appearance, smell the aromas, take a sip, and savor the flavors. Consider the acidity, body, sweetness, and aftertaste.
- Adjusting for Improvement: Based on the tasting experience, adjust the brewing parameters. If the coffee is too sour, grind finer or increase the brew time. If the coffee is too bitter, grind coarser or decrease the brew time. Experiment until you find the perfect balance.
- Keep Records: Maintain a coffee journal to document your brewing process. Note the bean origin, roast level, grind size, water temperature, brew time, and water-to-coffee ratio. This will help you replicate your favorite brews and identify patterns.
Storage and Maintenance: Preserving the Quality
Proper storage and equipment maintenance ensures the longevity of your coffee and brewing equipment.
- Coffee Storage: Store beans in an airtight container in a cool, dark place. Avoid storing beans in the refrigerator or freezer, which can affect their flavor.
- Cleaning Your Equipment: Regularly clean your brewing equipment to prevent the buildup of coffee oils and residue, which can affect the flavor. Descale your coffee maker regularly to remove mineral buildup. Clean your grinder to remove coffee oils that can affect flavors.
- Water Filter Maintenance: Replace your water filter regularly to ensure optimal water quality.
