how to make your laptop a wifi hotspot with dongle

Title: How to Connect WiFi internet to PC without WiFi Adapter
Channel: TECH4
How to Connect WiFi internet to PC without WiFi Adapter by TECH4
Laptop Hotspot HACK: Free WiFi Anywhere with a Dongle!
Unleash Free WiFi Freedom: Your Dongle's Secret Weapon
The digital nomad's dream? Seamless, cost-free internet access, wherever life takes you. Imagine escaping the shackles of expensive cafe WiFi and unreliable hotel connections. Well, grab your metaphorical pirate hat. We're about to dive into a world of connectivity possibilities. This isn't a technical deep dive. It's a narrative. It's a guide. Moreover, it is a solution.
The Dongle Debacle: A Missed Opportunity?
Let’s face it: dongles have a reputation. Remember those clunky, outdated USB sticks gathering dust in a drawer? However, they're often misunderstood. Consequently, they become a gateway, a key to unlock internet access. Many laptops possess amazing capabilities. Yet, this potential often goes untapped. We need to change that first. Think of the possibilities.
Decoding the Dongle: Your Pocket-Sized Savior
A dongle is more than just a piece of tech. Rather, it's a connection conduit. It is essentially a mobile broadband modem. It transforms your laptop into a powerful hotspot. Therefore, you can share its internet connection. It is a small device, typically that connects via USB port. It connects to the internet using cellular data networks. You must know this first.
Setting the Stage: What You’ll Need
Before we proceed further, you’ll need a few essentials. First, secure a compatible dongle. Consider your network provider. Check their plans and data allowances. Next, ensure your laptop has a functioning USB port. Also, you'll need a SIM card. It must be compatible with the dongle. Finally, a working internet connection is crucial.
The Connection Configuration: A Step-by-Step Journey
Alright, ready to get started? Here’s how to turn your laptop and dongle into a WiFi hotspot. Firstly, insert the SIM card into the dongle. Afterward, plugin the dongle into your laptop's USB port. Then, install the dongle's software. Commonly, this is needed to manage your internet connection.
Next, open the software. There, you can activate your connection. You might need to enter your SIM card's PIN. You will typically see a 'connect' button. Click it. Your dongle will then connect to the cellular network. Afterward, access your laptop’s settings. Find the “Mobile Hotspot” option.
Creating your Hotspot: Sharing the Wealth
Now comes the exciting part. You can now create your own WiFi hotspot. First, look for the "share my internet connection with other devices" option. Ensure it's enabled. Then, create a network name (SSID). This will be the name displayed to other devices. Choose a strong password. Because security is important.
Further, configure the maximum number of connected devices. This is optional. Set these up according to your needs. Finally, and after setting these up, save your settings to activate the hotspot. Now, other devices nearby can connect!
Troubleshooting Troubles: Navigating the Obstacles
Nothing is perfect. Therefore, some issues may arise. First, ensure you have signal strength. Sometimes, find a better location, and the signal should improve. Check your data allowance. You may have used all your data. Also, ensure your software is updated. Finally, restart your devices. This can solve many issues.
Beyond the Basics: Enhancing your Experience
Want to improve your setup? Consider a few extras. External antennas can boost signal strength. Some dongles offer this option. Monitor your data usage closely. Several apps offer data tracking. Secure your hotspot. Use a strong password. Furthermore, explore your network provider’s tools.
The Endless Advantages: Why Bother?
Why all the fuss? Well, several reasons exist. Firstly, it offers freedom. You can access the internet from virtually anywhere. Secondly, it's cost-effective. Skip paying for expensive WiFi hotspots. Finally, it offers convenience. Always maintain a stable connection.
Ethical Considerations: Staying on the Right Side
Always respect your network provider's terms of service. Avoid excessive data usage. Moreover, avoid unauthorized sharing of your connection. Always prioritize ethical behavior. The internet should be open to all.
Final Thoughts: Embracing the Unbound
You've now learned the secret to unlocking free WiFi. You have transformed your laptop and dongle into a powerful internet hub. Therefore, embrace the freedom, the convenience, and the savings. Moreover, explore the endless possibilities of a connected world. So, go forth, and connect!
Laptop WiFi Connection: The Ultimate Guide (Solved!)Laptop Hotspot HACK: Free WiFi Anywhere with a Dongle!
Alright, fellow digital nomads, tech enthusiasts, and budget-conscious travelers! Let's talk about a little secret weapon that can turn your laptop into a WiFi powerhouse, potentially freeing you from the tyranny of pricey hotel WiFi, unreliable airport connections, and that dreaded data-hungry tethering from your phone. We're diving deep into the world of the “Laptop Hotspot HACK: Free WiFi Anywhere with a Dongle!"
1. The WiFi Wilderness and Our Quest for Connectivity
Picture this: You're on a scenic train journey, miles from civilization, or perhaps stuck in a bustling airport with a dead data plan. The need for fast, reliable internet strikes, and BAM! That's where the "Laptop Hotspot HACK" comes in. It's like having a little WiFi genie in your tech arsenal, ready to grant your internet wishes whenever and wherever you need them. This isn't just about convenience; it's about empowerment. It's about taking control of your online experience and staying connected on your terms.
2. What the Heck is a Dongle, Anyway? Let's Get Technical (But Keep it Simple!)
Okay, let's demystify this "dongle" thing. At its heart, a dongle is generally a small, portable device that gives your computer access to a network, which in our case, is a mobile broadband network. Think of it as a tiny antenna that connects to cellular towers, much like your smartphone does. They come in various shapes and sizes – some are sleek, resembling USB drives, while others might be a bit more robust. The magic happens inside, where a SIM card slot allows you to tap into mobile data services, essentially creating a personal WiFi hotspot.
Think of it like this: Your phone is your personal radio station receiving radio signals. The dongle is similar, except it receives radio signals (cellular data) and rebroadcasts them as Wi-Fi.
3. Why Bother? Benefits Beyond Belief
Why should you even care about a dongle? Well, the benefits are numerous and, frankly, pretty fantastic:
- Freedom From WiFi Fees: Say goodbye to exorbitant hotel WiFi charges and airport internet fees.
- Unleashed Mobility: Work or play from anywhere with a cellular signal. The world is basically your office, your cafe, or your gaming arena.
- Enhanced Security: Using a dongle can be more secure than public WiFi networks, which are often vulnerable to hacking.
- Data Plan Control: You choose the data plan that fits your needs and budget. No more surprise overage charges.
- Backup Connection: Having a dongle provides a backup internet connection if your home internet goes down, or you need to stay connected on the go.
4. Choosing Your WiFi Freedom Companion (The Dongle Selection Process)
Selecting the right dongle is crucial. It's like choosing a trusty sidekick for your adventures. Consider these factors:
- Network Compatibility: Ensure the dongle supports the cellular bands and technologies used in your area (4G LTE, 5G, etc.).
- Data Plans: Research data plans from different providers. Compare costs, data limits, and contract terms.
- Speed: Look for dongles that support fast data speeds for optimal performance.
- Reviews: Read customer reviews to get insights into reliability and performance.
- Ease of Use: Look for dongles which are easy to set up and manage.
5. Setting Up Your Laptop Hotspot: The Easy Steps
Setting up your laptop hotspot is typically a breeze, much like plugging in a flash drive. Here's the general process:
- Insert the SIM Card: Carefully insert your data SIM card into the dongle.
- Plug It In: Plug the dongle into a USB port on your laptop.
- Install the Software: Your computer should recognize the dongle and prompt you to install the necessary software (or it might install automatically).
- Connect to the Internet: Once the software is installed, follow the on-screen instructions to connect to your data plan.
- Share the Connection: Most dongle software allows you to create a WiFi hotspot, allowing other devices (phones, tablets, etc.) to connect to your laptop's internet.
6. Data Plans: Navigating the Mobile Data Maze
Data plans are the fuel for your hotspot engine. Choosing the right one is key to avoiding those dreaded overage charges. Consider these points:
- Data Allowance: Assess your typical internet usage. Video streaming, large file downloads, and online gaming consume more data than simple web browsing and email.
- Data Speed: Consider the speed on your data plan. Are you paying, for instance, for an expensive car but using it in a traffic jam? Consider whether this is good value.
- Contract Terms: Do you prefer a long-term contract, or a short-term or pay-as-you-go option?
- Coverage: Research the coverage area of your chosen provider to ensure reliable connectivity.
7. Maximizing Your Mobile WiFi Speed: Tips & Tricks
Even with a great dongle and data plan, you might want to optimize your connection for top speed:
- Location, Location, Location: Cellular signal strength varies. Find a spot with a good signal (near a window, away from thick walls).
- Antenna Power: Some dongles have external antenna ports, or, you can purchase a dongle with an internal antenna to potentially boost signal strength.
- Reduce Usage: Minimize unnecessary background data usage on connected devices. Close apps you're not using.
- Restart Regularly: Occasionally restarting your dongle and laptop can refresh the connection.
- Optimize Browsing: Consider using a browser with a data-saving mode to reduce data consumption.
8. Security First: Keeping Your Laptop Hotspot Safe
While public WiFi is as safe as a house of cards in a hurricane, your laptop hotspot can be surprisingly safe, given the right measures:
- Strong Password: Set a strong password for your WiFi hotspot. Use a unique password – a random collection of letters, numbers, and symbols.
- Encryption: Enable WPA2 or WPA3 encryption on your hotspot for increased security.
- Firewall: Ensure your laptop's firewall is enabled and up-to-date, offering an extra layer of protection.
- Regular Updates: Keep your dongle software and laptop operating system updated to patch security vulnerabilities.
- Beware of Phishing: Be cautious of suspicious emails and websites, even when using your hotspot.
9. The Dongle vs. Tethering: A Tale of Two Internet Options
You may ask yourself, "Why not just use my phone's hotspot (also known as tethering)?" Both tethering and dongles offer mobile internet, but here’s the truth:
- Phone Hotspot (Tethering): Convenient, but can drain your phone battery quickly and often has hidden costs. Performance might vary.
- Dongle: Dedicated device. Can offer better performance and is designed for extended use.
It's like comparing a bicycle to a car. Both take you places, but one is specifically designed for longer journeys.
10. Troubleshooting: What to Do When Things Go Wrong
Even the best technology can experience hiccups. Here's a fix-it guide:
- No Connection: Check your SIM card is inserted properly in the dongle, that your data plan is active, and you have a good cellular signal.
- Slow Speeds: Move to a location with a better signal. Check the data limits on your plan.
- Software Issues: Try restarting your laptop, dongle, or reinstalling the dongle software. Check with the data provider.
- Device Compatibility. Check the dongle is compatible with the Operating System of your laptop.
11. Powering Your Productivity: Laptop Hotspot Use Cases
From the coffee shop to the campsite, there are countless ways to leverage your laptop with a dongle:
- Remote Work: Stay online and productive when traveling or working from different locations.
- Travel: Connect as you tour, check emails, and stay updated.
- Education: Access online resources while studying at the library or at a remote location.
- Emergency Backup: Always have an internet connection available for emergencies.
12. Beyond the Basics: Advanced Dongle Features
Some dongles offer advanced features:
- Multiple Device Connectivity: Connect multiple devices to your hotspot, allowing everyone to access the internet.
- External Antennas: Improve signal strength from a difficult location.
- Network Statistics: Monitor data usage on your dongle to adjust your plan use appropriately.
13. The Future of Mobile Connectivity
The evolution of technology is unstoppable. We can expect:
- 5G revolution: Faster speeds and wider coverage.
- Improved Technology: Enhanced battery life, and better antenna technology.
- Smart Devices: Seamless integration and management.
14. Dongle Alternatives: Exploring Other WiFi Solutions
While dongles provide an excellent solution, there are alternatives as well:
- Mobile Routers: Create a WiFi network for multiple devices.
- MiFi Devices: Compact, portable WiFi routers that use cellular
How to Create Wifi Hotspot in Windows 10 Tutorial

By MDTechVideos How to Create Wifi Hotspot in Windows 10 Tutorial by MDTechVideos
Don't Throw Your Old Sim Card Get Free Internet Wifi

By Test Tech Lab Don't Throw Your Old Sim Card Get Free Internet Wifi by Test Tech Lab
How to Add Wireless Wifi Network Manually in Windows 10 PC or Laptop

By Discover You How to Add Wireless Wifi Network Manually in Windows 10 PC or Laptop by Discover You
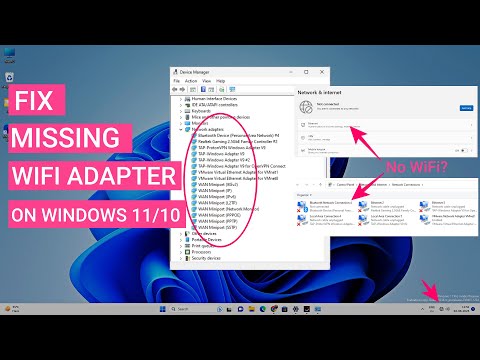
Title: Fix WiFi Adapter Missing In Windows 1110 Get Back Wireless Adapter
Channel: Sandeep Singh
Fix WiFi Adapter Missing In Windows 1110 Get Back Wireless Adapter by Sandeep Singh
Change Wifi Settings
Here's the title: The Ultimate Guide to Baking the Perfect Chocolate Chip Cookie
The Ultimate Guide to Baking the Perfect Chocolate Chip Cookie
For generations, the humble chocolate chip cookie has reigned supreme, a symbol of comfort, celebration, and the simple joys of life. But within its seemingly straightforward form lies a world of nuance, a delicate dance of ingredients, temperatures, and techniques that separates the ordinary from the extraordinary. This guide will serve as your compass, leading you through the intricacies of chocolate chip cookie mastery, ensuring that each batch you bake is a testament to your newfound expertise. Prepare to transcend the realm of good cookies; you are about to embark on a journey to baking perfection.
Choosing Your Ingredients: The Foundation of Excellence
The foundation of any exceptional chocolate chip cookie lies in the quality of its ingredients. Skimping on even a single component can compromise the final outcome. Therefore, let us begin with a meticulous examination of each element:
- Flour: The Structural Architect: The type of flour you choose will directly impact the cookie’s texture. While all-purpose flour is the standard, it’s often beneficial to incorporate a blend. Replacing a portion (up to 25%) with cake flour can yield a softer, more tender cookie, while bread flour, with its higher protein content, provides a chewier alternative. Experiment to discover your preferred textural profile. Sift your flour; this creates a lighter, more airy consistency.
- Butter: The Flavor Embellishment: Unsalted butter provides greater control over the salt content, allowing you to adjust it to your own preferences. Be certain to use quality butter. European-style butter, with its higher fat content, contributes to a richer flavor and a more tender crumb. Ensure your butter is properly softened; it should yield easily to gentle pressure without being melted.
- Sugars: The Sweet Symphony: Brown sugar, with its molasses content, imparts a chewy texture and a deeper, caramelly flavor. The proportion of brown to granulated sugar can significantly alter the final result. A higher ratio of brown sugar will produce a chewier cookie, while more granulated sugar will result in a crisper edge and a slightly flatter cookie. It is best to thoroughly, gently cream the butter and sugars until light and fluffy.
- Eggs: The Binding Agent: Eggs bind the ingredients and contribute to the cookie's structure, richness, and moisture. Use large eggs at room temperature; this allows for better emulsification with the butter and sugar. Don't overmix once you add your eggs, otherwise you may end up with a tough cookie.
- Chocolate: The Star Attraction: Choosing the right chocolate is critical. High-quality chocolate chips or chunks are essential. Opt for chocolate with a cocoa content of at least 55% for a balanced sweetness and a rich, complex flavor. Experiment with different types, such as dark chocolate, milk chocolate, and even bittersweet chocolate, to discover your favorite combinations. Chop the chocolate into pieces if you wish for different textures.
- Leavening Agents: The Rise to Perfection: Baking soda and baking powder are the workhorses of the baking world. Baking soda requires an acidic ingredient (like brown sugar) to activate and produce carbon dioxide, which causes the cookies to rise. Baking powder contains the acid and the base, so be sure to use the correct ratio. Ensure your leavening agents are fresh; expired baking powder or baking soda can lead to flat, disappointing cookies.
- Salt: The Flavor Enhancer: Salt is not just for flavor; it also enhances the other flavors in the cookie. A pinch of sea salt on top, after baking, adds a contrasting burst of flavor. Use fine sea salt.
- Vanilla Extract: Enhancement: Vanilla extract adds complexity and enhances the other flavors in your cookies. Use quality vanilla extract.
The Art of the Dough: A Culinary Alchemy
Creating the perfect dough is an art form, requiring precision, patience, and a keen sense of observation. Follow these steps meticulously:
- Creaming the Butter and Sugars: In a large bowl, or the bowl of your stand mixer, cream together the softened butter, granulated sugar, and brown sugar until light and fluffy. This process incorporates air, which is essential for a light and tender cookie.
- Adding the Eggs and Vanilla: Beat in the eggs one at a time, followed by the vanilla extract. Ensure each egg is fully incorporated before adding the next.
- Combining the Dry Ingredients: In a separate bowl, whisk together the flour, baking soda, baking powder, and salt. This ensures the leavening agents are evenly distributed throughout the dough.
- Gradually Adding the Dry Ingredients to the Wet Ingredients: Slowly add the dry ingredients to the wet ingredients, mixing on low speed until just combined. Do not overmix; overmixing can develop the gluten in the flour, resulting in a tough cookie.
- Folding in the Chocolate: Gently fold in the chocolate chips or chunks. Be careful not to overmix, as this can cause the chocolate to break down and lose its distinct shape during baking.
- Chilling the Dough (Highly Recommended): Chilling the dough for at least 30 minutes, and preferably longer (up to 24 hours), allows the flavors to meld and prevents the cookies from spreading too much during baking. The fat in the butter solidifies, which slows down the melting process in the oven.
Baking Techniques: Mastering the Heat
Baking is a science, and achieving consistent results requires careful attention to detail. Follow these guidelines:
- Preheating the Oven: Preheat your oven to the precise temperature specified in your recipe. Use an oven thermometer to ensure accuracy, as oven temperatures can vary.
- Preparing the Baking Sheets: Line your baking sheets with parchment paper; this prevents the cookies from sticking and makes for easy removal.
- Scooping the Dough: Use a cookie scoop to measure out uniform portions of dough. This ensures even baking. The size of your cookies will determine the baking time.
- Arranging the Cookies: Place the dough balls on the prepared baking sheets, leaving enough space between each cookie for spreading.
- Baking Time: Bake the cookies until the edges are golden brown and the centers are still slightly soft. The baking time will vary depending on the size of the cookies and your oven, so be sure to monitor them closely. Rotate the baking sheet halfway through baking for even browning.
- Cooling the Cookies: Allow the cookies to cool on the baking sheet for a few minutes before transferring them to a wire rack to cool completely. This prevents them from sticking and allows them to set properly.
- Doneness Test: Gently press the edge of a cookie. If it feels firm, the cookie is done. Make sure the center is not overcooked, as overbaked cookies will be hard.
Troubleshooting Common Cookie Conundrums
Even the most seasoned bakers encounter challenges. Here are solutions to some common cookie problems:
- Flat Cookies: Flat cookies can result from several factors: too much butter, too much sugar, the oven temperature is too low, or the dough was not chilled. Ensure you measure your ingredients carefully, follow the recipe precisely, and chill the dough.
- Tough Cookies: Overmixing the dough, using too much flour, or overbaking can lead to tough cookies. Mix the dough until just combined, measure your flour accurately, and bake the cookies for the recommended time.
- Dry Cookies: This is often caused by overbaking. Reduce the baking time slightly and/or make an adjustment to your oven temperature.
- Cookies that Spread Too Much: The oven temperature being too hot, the dough not being chilled, or the use of too much butter can all contribute to excessive spreading. Follow the recipe carefully, chill the dough, and use the proper oven temperature.
- Crumbly Cookies: This can be caused by not enough fat or too much flour. Ensure you used the proper measurements for your ingredients.
Elevating Your Chocolate Chip Cookie: Creative Variations
Once you've mastered the classic chocolate chip cookie, you can explore a world of creative variations:
- Add-ins: Incorporate other ingredients such as nuts (walnuts, pecans, macadamia nuts), dried fruits (cranberries, raisins), or other types of chocolate (white chocolate, butterscotch chips).
- Flavorings: Experiment with extracts like almond, coffee, or peppermint. A pinch of cinnamon or nutmeg can add warmth.
- Toppings: Sprinkle the baked cookies with sea salt or dust them with powdered sugar.
- Stuffed Cookies: Hide a surprise inside! Insert a piece of caramel, a dollop of Nutella, or a peanut butter cup into the center of the cookie dough before baking.
Storage and Enjoyment: Preserving Cookie Perfection
To maintain the freshness and flavor of your chocolate chip cookies, proper storage is essential.
- Cool Completely: Allow the cookies to cool completely before storing them.
- Airtight Container: Store the cookies in an airtight container at room temperature for up to 3-4 days.
- Freezing: For longer storage, freeze the baked cookies in a freezer-safe container or bag for up to 2 months. Thaw at room temperature before serving.
- Reheating: Reheat the cookies in the oven (at a very low temperature) or microwave them briefly to restore their warmth and texture.
Conclusion: The Enduring Legacy of the Chocolate Chip Cookie
The chocolate chip cookie is more
