how to turn on wifi adapter in windows 7 laptop

Title: How To Enable WiFi Internet Connection In Windows 7
Channel: MDTechVideos International
How To Enable WiFi Internet Connection In Windows 7 by MDTechVideos International
WiFi Nightmare? Fix Your Windows 7 Adapter NOW!
Is Your Wi-Fi a Digital Dud? Windows 7 Adapter Woes Solved!
Stepping into the digital age shouldn't feel like wading through molasses. Yet, for many Windows 7 users, a reliable Wi-Fi connection is a far-off dream, an elusive butterfly flitting just beyond their grasp. Does this sound familiar? If your internet access is more intermittent than a politician's promise, your network adapter might be the culprit. Fortunately, it's rarely a death sentence, offering surprisingly straightforward solutions. Let's dive in and breathe new life into your ailing Wi-Fi.
The Sneaky Culprit: Understanding Your Adapter's Temperament
Your network adapter, the unsung hero of your online existence, functions as a communication gateway. It translates digital signals into something your computer understands. Unfortunately, like any tech, it's susceptible to glitches, errors, and the occasional bout of digital stubbornness. Think of it as a child throwing a tantrum, refusing to play unless things are just right. Drivers, software that allows your adapter to "speak" the language of your operating system, can become outdated, corrupted, or simply incompatible with network changes. Indeed, this is often the root of the issue. As a result, your connection becomes spotty, slow, or non-existent.
Diagnosing the Digital Pains: Pinpointing the Problem
Before charging into battle, understanding the enemy is paramount. So, how do you know if your adapter is truly the problem? First, scrutinize your Wi-Fi icon in the system tray. Does it display limited connectivity, or a frustrating red "X"? Then, scrutinize your Wi-Fi icon. Try other devices. Do they connect flawlessly? Thus, if other devices connect without issues, your suspect is quite probably your Windows 7 machine. Next, attempt to connect to different Wi-Fi networks. If even new networks fail to resolve the problems, the issue strengthens. Consider the adapter's physical location. Obstructions or interference could definitely play a role. Moreover, perform a basic speed test. If your speeds are dramatically slower than expected, your adapter needs attention.
Reviving the Connection: Your Windows 7 Adapter Toolkit
Now comes the rewarding part: fixing the problem. Remember, even a simple reset can work wonders.
Driver Updates: The Key to Compatibility
Outdated drivers are frequently the silent saboteurs. To update them, access your Device Manager, found in the Control Panel. Then, locate ‘Network adapters’ and right-click on your Wi-Fi adapter. Select "Update driver software." Windows will then search for and install the latest drivers. Though, if Windows fails to find anything, visit your adapter manufacturer's website. Download the drivers from there. Afterwards, install them manually. This, very often, is the magic bullet.
Driver Rollback: When New Isn't Always Better
Sometimes, newer drivers introduce issues. Therefore, reverting to a previous driver version can fix problems. Again, within your Device Manager, right-click your adapter. Then choose "Properties." Go to the "Driver" tab and click "Roll Back Driver," if the option is available. This feature could instantly solve your woes.
Network Troubleshooting: The Built-In Lifesaver
Windows 7 has built-in troubleshooting tools. Then, right-click the Wi-Fi icon. Select "Troubleshoot problems." Windows will automatically work through common connectivity problems. In fact, it's surprisingly effective, offering simple solutions. This should always be considered.
Power Management Tweaks: Letting the Adapter Breathe
Certain power-saving settings can interfere with an adapter's performance. In the Device Manager, select your adapter’s properties. Then, go to the "Power Management" tab. Disable the option that allows the computer to turn off the device to save power. This permits the adapter to function consistently.
Reinstalling Your Adapter: Giving It a Fresh Start
If other methods fail, consider reinstalling your network adapter. From the Device Manager, right-click your adapter and choose "Uninstall." Afterward, restart your computer. Windows will automatically try to reinstall the correct driver. It's a slightly drastic step, but it works.
Network Reset: A Final Resort
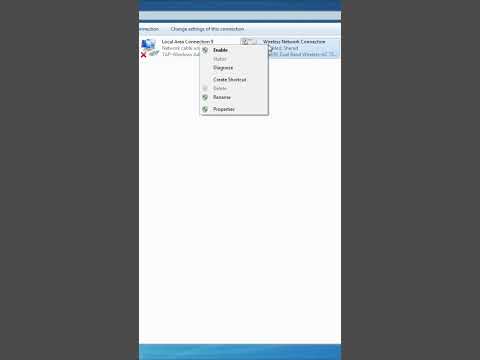
Sometimes, it's not the adapter but the underlying network configuration causing issues. Open the Control Panel, go to "Network and Sharing Center," then choose "Change adapter settings". Right-click your Wi-Fi adapter and select "Disable," then "Enable." This refreshes the connection. If everything fails, reset your network configuration.
Troubleshooting Hardware Problems
If none of the above works, the actual adapter might be faulty. Check the physical connection. In fact, consider external USB Wi-Fi adapters. They're easy to install, inexpensive, and allow you to determine if your internal adapter is the problem. However, be sure the new adapter is fully compatible with Windows 7.
Preventing Future Wi-Fi Headaches: Proactive Measures
Prevention is the kindest cure, right? Regularly update your drivers. Also, run network diagnostics regularly. Furthermore, consider a wired connection whenever possible. Indeed, strong passwords are also a must. Finally, ensure your router firmware is up to date. Because, these proactive measures can help avert future issues.
Conclusion: Embracing a Seamless Online Experience
So, there you have it. By following these steps, you should be able to reclaim your smooth, reliable Wi-Fi connection. No longer should your browsing be hindered by frustrating disconnections. Now, go forth and enjoy a seamless online experience. Don't let a malfunctioning Wi-Fi adapter steal your valuable time. Good luck, and happy surfing!
Steal Your Neighbor's Wi-Fi: The Secret Laptop Download Trick!WiFi Nightmare? Fix Your Windows 7 Adapter NOW!
Remember those days when the internet seemed like a fickle friend, constantly abandoning you at the worst possible moments? Yeah, we've all been there. Specifically, if you're still rocking a Windows 7 machine (no judgment, we have a soft spot for classic tech!), you might be intimately familiar with the WiFi woes. It's a frustrating dance of dropped connections, agonizingly slow speeds, and the constant, nagging question: "Why isn't my internet working?!" Don't despair, fellow tech travelers. We're going to diagnose and fix your Windows 7 WiFi adapter issues, so you can get back to streaming, browsing, and connecting with the world without the buffering blues.
1. The WiFi Whisperer: Understanding Your Windows 7 Adapter’s Woes
First things first, let's get philosophical. Why is your WiFi acting out? Think of your WiFi adapter as a tiny radio, broadcasting and receiving signals to communicate with your router. When things go wrong, there are a few likely suspects: driver issues (think of them as the adapter's instruction manual being outdated), physical interference (like thick walls or your neighbor's microwave blasting), or the router itself being a grumpy old man. We'll explore all of these.
2. Driver's Seat: Updating Your Adapter's Software
This is usually the first port of call and often the easiest fix, like giving your adapter a software upgrade. Imagine your adapter is a car, and the drivers are the mechanics that control the engine, wheels, etc.. Outdated drivers? Your adapter’s not going to run efficiently. Here’s how to rev up those drivers:
- Open Device Manager: Click on the Start button, type "Device Manager" (without the quotes), and hit Enter. Alternatively, right-click on "Computer" (or "This PC") on your desktop or in the Start menu and select "Properties," then click "Device Manager" in the left panel.
- Network Adapters: In Device Manager, look for "Network adapters" and click the little triangle to expand it. You should see your WiFi adapter listed – it might have a name like "Wireless Network Adapter" or a specific brand/model (e.g., "Intel Wireless-N 7260").
- Update Driver: Right-click on your WiFi adapter and select "Update driver."
- Search Automatically: Choose "Search automatically for updated driver software." Windows will try to find and install the latest drivers. Patience is a virtue here; it might take a few minutes.
- If Automatic Fails: If Windows can't find an update, you can try going to the manufacturer's website (Intel, Broadcom, etc.) and downloading the drivers for your specific adapter model.
3. Reboot the Router: The Grand Old Reset
This is the tech equivalent of a good night's sleep. Sometimes, your router just needs a breather. Unplug it from the power outlet for about 30 seconds, then plug it back in. Let it fully boot up before you try connecting again. It's amazing how often this solves the problem! Think of it as hitting the reset button for your WiFi universe.
4. Signal Strength SOS: Checking Your Proximity
Is your WiFi connection weak as a kitten? Physical obstructions can be the villains here. Is your router tucked away in a basement, buried under a pile of books and a tangle of wires? Try these helpful checks:
- Move Closer: Get closer to the router. This is the simplest test. If the connection improves, congratulations, you've identified your culprit!
- Elevate the Router: Is it on the floor? Raise it up. Place your router in a more central and elevated location in your home.
- Clear the Path: Remove any obstacles between your computer and the router. Think walls, microwaves, and even large metal objects.
5. Channel Surfing: Finding the Least Crowded WiFi Lane
WiFi routers broadcast on different channels, like radio stations. If your neighbors' routers are using the same channel, it can cause interference, like a traffic jam on the digital highway. To change channels:
- Access Your Router's Settings: You'll typically need to log into your router's admin panel via your web browser. The specific address (e.g., 192.168.1.1 or 192.168.0.1) and login credentials (username/password) are usually found on a sticker on the router itself or in the router's manual.
- Find the WiFi Settings: Once logged in, look for the WiFi settings.
- Change the Channel: Experiment with different channels (1, 6, and 11 are often recommended for a 2.4GHz connection). Save the settings and reboot your router.
6. Wireless Mode Matters: Choosing the Right Technology
Outdated WiFi standards can drag down your performance. Your router might be broadcasting on ancient frequencies. Ensure your adapter setting is appropriate for your network:
- Check the Router's Capabilities: Find out which wireless standards your router supports (e.g., 802.11n, 802.11ac).
- Adapter Settings: Go back to the Device Manager (steps in section 2). Right-click on your WiFi adapter, select "Properties," then navigate to the "Advanced" tab.
- Wireless mode selection: Choose the appropriate Wireless Mode, the standard you are compatible with.
7. Windows 7 Power Plan Plays a Role!
Windows 7 has power-saving settings where your adapter might be throttled. This can lead to slower speeds or dropped connections. We're going to tell your adapter to stay awake!
- Open Power Options: Go to the Control Panel (click the Start button and type "Control Panel").
- Hardware and Sound: Click on "Hardware and Sound," then “Power Options.”
- Change Plan Settings: You'll see your current power plan (likely "Balanced" or "Power saver"). Click "Change plan settings" next to your chosen plan.
- Change Advanced Power Settings: Click on "Change advanced power settings."
- Wireless Adapter Settings: Scroll down and find "Wireless Adapter Settings," then expand "Power Saving Mode."
- Set to Maximum Performance: Change the setting from "Maximum Power Saving" (or similar) to "Maximum Performance." Click "Apply" and "OK."
8. Network Reset: A Fresh Start for Your WiFi
Sometimes your network settings might be jumbled. You can perform a network reset. However, this will remove and reinstall the network adapters.
- Open Command Prompt: Go to the Start Menu, search for "cmd," right click, and select "Run as administrator.”
- Type: Type
netsh winsock resetand then press Enter. - Next: Type
netsh int ip resetand then press Enter. - Restart: Restart your computer.
9. Firewall Frenzy: Checking for Blockades
Sometimes the Windows Firewall can be a little overzealous and inadvertently block your WiFi connection. We can double-check to be sure:
- Open Control Panel: Go to the Start Menu and type "Control Panel."
- System and Security: Click "System and Security," then "Windows Firewall."
- Allow a Program or Feature: Select "Allow a program or feature through Windows Firewall."
- Check WiFi Adapter: Make sure your WiFi adapter is allowed (has a checkmark) for both "Private" and "Public" networks. If not, check the box and click "OK."
10. Antivirus Interference: The Security Sidekick's Side Effect
Your antivirus software might occasionally be too protective and interfere with your WiFi. We don't want our protector blocking our internet!
- Temporary Disable: Temporarily disable your antivirus software (right-click the icon in your system tray and look for an option to disable or pause protection).
- Test the Connection: Try connecting to WiFi. If it works, your antivirus is the culprit.
- Adjust Settings: Consult your antivirus software's documentation to adjust its settings to allow your WiFi connection.
- Enable it again: Once the WiFi is working, enable the antivirus protection. There are settings that allow your WiFi connection while staying protected.
11. Run a Network Troubleshooter
Windows 7 includes a built-in network troubleshooter. It's like having a tech-savvy friend who performs a quick diagnostic.
- Network and Sharing Center: In the Start Menu, type "Network and Sharing Center," and open it.
- Troubleshooting: Click "Troubleshoot problems."
- Network Adapter: Select "Network Adapter" and follow the prompts.
12. Hardware Hiccups: Examining the Adapter Itself
Sometimes, the adapter itself might be failing. This is like a sick engine.
- Is it Lit?: Check the adapter light.
- Try a different port: If using a USB WiFi adapter, try a different USB port.
- Try a second Adapter: Consider using a different WiFi adapter.
13. Update Windows 7: Microsoft's Last Hurrah (But Still Helpful!)
Even though Microsoft has ended support for Windows 7, keeping your system updated (if
5GHz WiFi Nightmare? Fix Your Laptop's Connection NOW!How to enable network adapter in Windows 7
By Data Science How to enable network adapter in Windows 7 by Data Science
Not connected no connections are available windows 7 laptop

By IT Magics Not connected no connections are available windows 7 laptop by IT Magics
How to enable your network connection in Windows 7

By MHELP2U How to enable your network connection in Windows 7 by MHELP2U
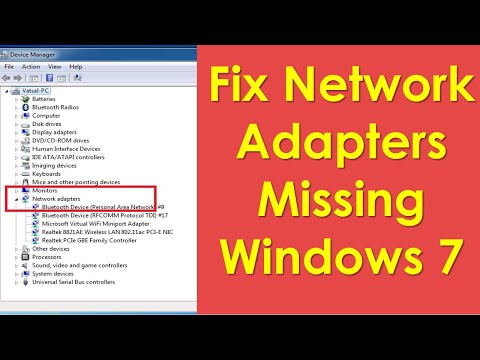
Title: Network adapters missing windows 7
Channel: Being Selftech
Network adapters missing windows 7 by Being Selftech
Working With Laptop
Here's the title for your article:
The Ultimate Guide to Mastering the Art of Espresso Extraction
Let's dive into it!
The Ultimate Guide to Mastering the Art of Espresso Extraction
The aromatic promise of espresso, that concentrated elixir of dark roasted beans, has captivated coffee lovers for centuries. More than just a beverage, it signifies a moment of ritual, a brief pause in the day. But the journey from bean to cup demands precision, a mastery of technique that separates the merely acceptable from the truly exceptional. This guide serves as your definitive resource, equipping you with the knowledge to elevate your espresso game from enthusiast to artisan. We will peel back the layers of complexity, exploring the nuances of extraction and uncovering the secrets to unlocking the full potential held within every carefully roasted bean.
Understanding the Core Principles of Espresso Extraction
At its heart, espresso extraction is a delicate dance of pressure, temperature, and time. The goal is to coax the solubles – the flavorful oils, acids, and sugars – from the ground coffee, creating a concentrated, intensely flavored shot. This process, however, is far from simple. Imperfections within the extraction stage often manifest in a bitter, sour, or unevenly flavored espresso. To consistently produce exceptional espresso, it is crucial to grasp the fundamental principles.
- Pressure: Typically, a pressure of nine bars (approximately 130 psi) is considered ideal. This force drives hot water through the compacted coffee grounds, facilitating the extraction of desirable compounds. Deviations from this pressure can drastically alter the taste profile. Too little pressure may result in a weak, under-extracted shot, while excessive pressure can lead to bitterness and muddiness.
- Temperature: Water temperature plays a critical role. A range of 195-205 degrees Fahrenheit (90-96 degrees Celsius) is generally considered optimal and is dependent on the characteristics of the beans. Lower temperatures may not extract enough flavor, producing a sour taste, while excessively hot water can scorch the grounds, resulting in a burnt, bitter taste.
- Time: The extraction time, or the duration the water is allowed to flow through the coffee grounds, is a direct consequence of other variables. A typical espresso shot should extract for approximately 25-30 seconds. Shorter extraction times usually produce an under-extracted shot, while longer times often result in over-extraction, the creation of an unpleasant product.
These three elements – pressure, temperature, and time – are the trinity of espresso. Mastering control over them is the key to unlocking the secrets of exceptional espresso.
Choosing the Right Equipment: A Foundation for Success
The pursuit of espresso perfection begins with the right tools. Selecting the appropriate equipment is just as important as the understanding of the extraction process.
- The Espresso Machine: This is the heart of your setup. Consider an automatic or a semi-automatic machine. Automatic machines streamline the process, while semi-automatic machines offer more control but require greater knowledge of the entire process.
- The Grinder: A quality grinder is paramount. A burr grinder, with its ability to provide a consistent grind size, is far superior to a blade grinder. A consistent grind is crucial for achieving uniform extraction and a balanced flavor profile. Micro-adjustability is an essential feature of a good grinder.
- The Tamper: This tool compacts the coffee grounds within the portafilter. Invest in a tamper that fits your portafilter snugly and is made of high-quality materials. Ensure the tamper has a flat, even base for an effective tamp.
- The Scales: Digital scales allow you to accurately measure both the dose of coffee and the yield (the amount of espresso extracted), which is essential for consistency.
- Water Filtration: Water quality affects the drink. Use a water filter to remove impurities and minerals that may harm the taste of the espresso.
The initial expense of quality equipment is an investment in your espresso craft that will pay dividends with every delicious shot.
The Bean: Selecting and Preparing Your Coffee
The quality of your espresso is inextricably linked to the quality of the beans.
- Roast Level: The bean affects the flavor. Darker roasts often produce a bolder, more intense flavor, while lighter roasts tend to showcase brighter acidity and more nuanced flavors.
- Origin: Single-origin coffees offer unique flavor profiles based on their geographical location and the specific characteristics of the bean, while blends can provide a more balanced and complex taste.
- Freshness: One of the most important factors. Coffee beans should be used within two to three weeks of their roast date. Freshly roasted beans produce the best flavor and crema. Storing beans in an airtight container away from light, heat, and moisture is crucial for preserving their freshness.
- Grinding: Experiment with different grind settings to find the ideal grind for your beans and your machine. The grind size is a critical variable in achieving consistent extraction. This requires experimentation and calibration.
Selecting the right beans and preparing them properly is the first step in achieving espresso nirvana.
Grinding and Dosing: The Art of Preparation
Grinding and dosing your coffee is the first critical stage in the espresso-making process.
- Grind Size: Finding the correct grind size is crucial. Adjust the grinder until you find a setting that produces a 25-30 second extraction time. Start with a medium-fine grind and adjust as needed.
- Dose: The amount of ground coffee used will affect the strength and flavor of the shot. The dose commonly ranges from 18-20 grams for a double shot. Experiment to find the dose that works best with your beans.
- Distribution: After dosing the coffee, evenly distribute the grounds within the portafilter basket. Uneven distribution can lead to channeling, where the water flows through the path of least resistance, leading to uneven extraction.
- Tamping: The final step before extraction is tamping. This compacts the coffee grounds and ensures an even surface for the water to flow through. Use a flat, even tamp with a pressure of approximately 30 pounds.
Precise execution in these steps sets the stage for a successful extraction.
The Extraction Process: From Bloom to Final Shot
The extraction process is where all the preparation comes together.
- Pre-infusion: Begin the extraction with a pre-infusion phase. This involves gently saturating the coffee grounds with water before applying full pressure. The goal is the uniform saturation of the grounds and the release of carbon dioxide.
- Extraction: After pre-infusion, apply full pressure. Observe the flow of the espresso. A well-extracted shot will flow like thick, viscous honey.
- The Shot: A balanced shot will have three distinct layers: a rich, golden crema on top, a body of dark brown espresso, and a thin layer of lighter brown liquid at the bottom.
- Yield: Measure the total amount of espresso extracted. A typical double shot will yield around 36-40 grams of espresso.
- Taste: Evaluate the espresso's flavor profile. Note the aroma, acidity, body, and finish. Fine-tune the variables – grind size, dose, and tamping – until you achieve the desired taste.
Consistency is key. Keep meticulous records of your coffee, grind, and extraction, as well as the results of your experiments.
Troubleshooting Common Espresso Problems
Even with the best equipment and meticulous preparation, you may encounter issues.
- Under-extraction: This is signaled by a sour, acidic taste and a fast extraction time (less than 25 seconds). The solution is to adjust your grind finer, increase the dose, or improve your tamping technique.
- Over-extraction: This is indicated by a bitter, burnt taste and a slow extraction time (more than 30 seconds). To solve this, coarsen your grind, decrease the dose, or decrease your tamping pressure.
- Channeling: This occurs when the water finds paths of least resistance through the grounds, resulting in uneven extraction. This can be caused by uneven distribution, improper tamping, or an uneven grind.
- Weak Crema: A weak crema can be due to stale beans, incorrect dose, water temperature issues, or improper tamping.
The experience of troubleshooting allows you to achieve mastery of espresso extraction.
Milk Steaming and Latte Art: Elevating the Experience
Espresso is only one part of a larger coffee culture.
- Milk Steaming: Mastering milk steaming is essential for creating lattes, cappuccinos, and other milk-based drinks.
- Texture: The goal of steaming milk is two-fold: to heat the milk and to introduce microfoam. The steam wand should be positioned to create a vortex in the milk, which incorporates air to create a velvety texture.
- Temperature: Heat the milk to approximately 140-150 degrees Fahrenheit (60-65 degrees Celsius).
- Latte Art: Once the milk is properly steamed, you can begin to create latte art. Practice and patience are the keys to being able to turn beverages into beautiful art forms.
Elevating the entire experience with the practice of latte art is an aspect of espresso artistry.
Continuous Improvement: Refining Your Technique
Espresso extraction is a journey.
- Experimentation: Experiment with different beans, roast levels, grind settings, and extraction times.
- Observation: Pay close attention to the details of each shot – the aroma, the flow, and the taste.
- Documentation: Keep a journal of your
