connecting iphone se wifi to windows laptop

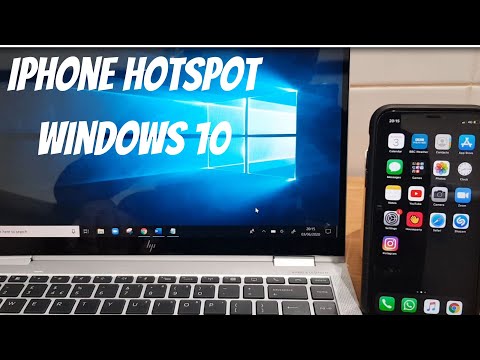
Title: Share Internet from iPhone to PCLaptop via USB
Channel: NETVN82
Share Internet from iPhone to PCLaptop via USB by NETVN82
iPhone SE WiFi to Windows Laptop: The SHOCKINGLY Easy Fix!
From iPhone SE to Windows Laptop: Seamless WiFi Magic Revealed!
Ever felt the frustrating disconnect between your slick iPhone SE and your trusty Windows laptop? You’re not alone! Transferring files, sharing your internet, it all feels like a digital puzzle sometimes. But here’s the secret: it doesn't have to be a battle. Actually, the solution to bridge this divide is surprisingly straightforward.
Cracking the Code: Why WiFi Matters
Think about it. Your iPhone SE and your Windows laptop likely live on the same home WiFi network. Therefore, leveraging that shared connection is your golden ticket. Instead of wrestling with cables or unreliable Bluetooth, consider the power of your existing setup. It’s like having a secret passage right under your nose! This shared WiFi is the cornerstone of our shockingly easy fix.
Unveiling the Unexpected Simplicity: WiFi Hotspot
So, how do you unlock this WiFi magic? First of all, you'll need to establish a personal hotspot. This is surprisingly simple. Your iPhone SE already has this capability built-in. Consequently, you're just a few taps away from sharing your cellular data. The laptop can then use it to connect.
Step-by-Step: Setting Up Your iPhone SE Hotspot
Now, let's get to the practical stuff. Begin by unlocking your iPhone SE. Navigate to your "Settings" app. After that, locate and tap on "Personal Hotspot." You'll see a switch to enable it. Turn it on! You may need to set a password. Make sure it's something secure. Then, remember it!
Connecting Your Windows Laptop: The Grand Finale
Okay, the iPhone side is ready. Next, on your Windows laptop, look for the WiFi icon in the system tray (usually near the clock). Click it to see a list of available networks. You should see your iPhone's name listed there (likely named after your phone). Select it. Enter the password you set on your iPhone. Done! Your laptop should now be connected to the internet via your iPhone's WiFi.
Beyond Basic Browsing: Expanding Your WiFi Horizons
This simple connection empowers so much more than just checking your email. Consider these bonus use cases. Perhaps you need to download urgent files. Maybe you need to update software. You can even stream videos, provided your cellular data plan permits it. The possibilities multiply exponentially.
File Transfer Freedom: Sharing Made Simple
Now, let's dive into sharing files. This is where things get truly convenient. With your laptop and iPhone on the same WiFi network (either direct or through the Hotspot!), options abound. You can effortlessly share photos and documents. Explore cloud storage services such as Google Drive or Dropbox. Then you can upload files from your iPhone. Afterwards, you can then access them on your laptop.
Troubleshooting Tips: Smooth Sailing Ahead
What if things don't go perfectly at first? Don't worry! It’s rare for issues to be significant. Here are a few quick troubleshooting steps. Verify your iPhone has cellular data enabled. Ensure your laptop's WiFi is turned on and connected. Then, check your password: is it correct? Finally, reboot both devices. This resolves many common hiccups.
Security Savvy: Protecting Your Connection
Security should always be a priority. Therefore, use a strong password for your iPhone's personal hotspot. Additionally, be mindful of the data you are transmitting. Never share sensitive information over an unsecured network. Keep software updated on both your iPhone and laptop. Regularly scan for malware.
The Unexpected Benefits: Beyond the Connection
This simple solution also unlocks unexpected advantages. For instance, you could enjoy a more mobile workflow. Moreover, it allows you to access the internet anywhere your iPhone gets a signal. It’s an excellent backup if your home WiFi is down.
The Bottom Line: Embrace the Easy Fix
Connecting your iPhone SE to your Windows laptop via WiFi is exceptionally easy. No complex software is needed. Consequently, you don't even need technical expertise. It’s a streamlined process. You'll be surprised by its efficiency. So, leverage your existing WiFi network. Embrace this remarkably easy fix. You'll be glad you did.
Laptop WiFi 6: The Ultimate Speed Upgrade You NEED!iPhone SE WiFi to Windows Laptop: The SHOCKINGLY Easy Fix!
Alright, folks, let’s be honest. We’ve all been there. You’re ready to transfer that epic photo of Fluffy the cat, or maybe a super important document, from your iPhone SE to your trusty Windows laptop. But the dreaded WiFi connection feels more like a tangled ball of yarn than a seamless, wireless bridge. Fear not! We’re diving headfirst into the shockingly simple solution that'll have you transferring files faster than you can say "cheese." This isn't rocket science, I promise. Think of it as learning to ride a bike - once you get the hang of it, you'll never forget.
1. The Wireless Woes: Why Is This So Hard?
Let's address the elephant in the room. Why, in this age of instant communication and flying cars (okay, maybe not the cars yet…), does connecting your iPhone SE to your Windows laptop feel like navigating a minefield? Sometimes, it’s like trying to herd cats. Different operating systems, varying software versions, and the ever-present gremlins of wireless networks can all conspire to make your life a digital nightmare. We've all felt the frustration – the spinning wheel of doom, the error messages, and the sheer exasperation of it all. Trust me, I've been there, wrestling with Wi-Fi settings for hours, muttering under my breath.
2. The Usual Suspects: Common Culprits for Connection Chaos
Before we jump into the "easy fix," let's quickly eliminate some of the usual suspects. Think of it as a digital detective case. Here's a quick checklist:
- Is your Wi-Fi actually on on both devices? Sounds silly, but we've all been guilty of missing this one. Check your iPhone SE's Control Center and your laptop's system tray for that telltale Wi-Fi symbol.
- Are both devices connected to the same Wi-Fi network? This is absolutely crucial. If your phone is on your home Wi-Fi and your laptop is connected to your neighbor's (hypothetically, of course!), you're going nowhere fast.
- Are your devices up-to-date? Software updates are your friends! They often contain vital bug fixes and performance improvements that can smooth out the connection process.
- Is your firewall acting up? Your Windows firewall might be blocking the connection. We'll touch on this later, but consider temporarily disabling it to see if it's the culprit. (Just remember to turn it back on afterward for security!)
3. The Secret Weapon: AirDrop for Windows (Sort Of!)
Okay, time for the good stuff. While Apple doesn't officially offer AirDrop for Windows (and believe me, we wish they did!), there is a workaround that's almost as painless thanks to the power of third-party apps and the magic of Wi-Fi. We're going to look at a couple of options that make the process stupid-simple.
4. Enter SHAREit: A Digital Delivery Driver
One of the most popular and user-friendly solutions is SHAREit. Think of it as a digital delivery driver, zipping files between your devices with impressive speed.
- Installation is a breeze: Download and install SHAREit on both your iPhone SE (from the App Store) and your Windows laptop (from their website).
- The Connection: Launch SHAREit on both devices. You'll be prompted to choose whether you want to "Send" or "Receive." Select "Send" on your iPhone SE and "Receive" on your laptop.
- Sending Your Treasures: On your iPhone, select the files (photos, videos, documents – you name it!) you want to transfer. SHAREit will then scan for nearby devices. Tap on your laptop's name, and the transfer will begin.
It's that simple! No cables, no complex configurations, just pure, unadulterated file-sharing bliss.
5. Another Option: Wondershare MobileTrans
Wondershare MobileTrans is another great tool, especially if you want to transfer more than just files. It can move entire phone contents, backups, and much more. While it’s a bit more comprehensive than SHAREit, the basic transfer process is still pretty straightforward. You'll need to install it on your laptop. Follow the on-screen prompts, ensuring both your iPhone and laptop are on the same WiFi network for the transfer.
6. Troubleshooting Time: When Things Go Wrong
Sometimes, even with the best tools, things can go awry. Here's a quick troubleshooting guide:
- Check your Wi-Fi connection: Ensure both devices have a strong and stable Wi-Fi signal.
- Restart your devices: A simple restart can often work wonders.
- Disable your firewall (temporarily): As mentioned earlier, your firewall might be interfering. Try disabling it temporarily to see if it resolves the issue. Remember to turn it back on afterward!
- Update drivers: Make sure your network adapter drivers on your laptop are up-to-date.
7. The Importance of a Strong Wi-Fi Signal: Like a Superhero's Power Source
Think of your Wi-Fi signal as the invisible highway connecting your devices. A weak signal is like a poorly maintained road – slow, bumpy, and prone to breakdowns. Ensure your devices are within a reasonable range of your router, and consider using a Wi-Fi extender if needed to boost the signal strength in your home.
8. Beyond Just Files: What Else Can You Transfer?
The beauty of easy file transfer goes beyond just your photos and videos. You can also:
- Transfer Documents: Quickly share important work files or personal documents.
- Share Contacts: Easily back up and move your contact list.
- Back Up Your Data: Create a quick backup of your phone's contents.
9. Speed Matters: How Fast Can You Go?
The speed of your file transfer depends on a few factors: the size of the files, the strength of your Wi-Fi signal, and the capabilities of the software you're using. Generally, you can expect transfer speeds to be significantly faster than using a USB cable, sometimes several times faster for certain files!
10. Security First: Keeping Your Data Safe
When transferring files wirelessly, it's important to be mindful of security. Always ensure you're connected to a secure Wi-Fi network (avoid public Wi-Fi hotspots unless absolutely necessary). The software tools we've recommended generally employ encryption to protect your data during transfer, but it’s always good to be cautious.
11. Comparing Your Wi-Fi Options: A Quick Snapshot
Let's quickly compare the two main methods mentioned:
| Feature | SHAREit | Wondershare MobileTrans | | ---------------- | ------------------------------- | ----------------------------- | | Ease of Use | Very User-Friendly | User-Friendly | | File Types | All types | All types, plus more | | Speed | Generally Fast | Generally Fast | | Additional Features | Some media streaming features | Phone backup/restore |
12. Avoiding Annoying Ads and Pop-ups: Keeping It Clean
Both SHAREit and Wondershare MobileTrans operate with a free and a premium subscription. While the free versions are perfectly functional, they often contain advertisements. Consider the paid options if the ads become overly distracting or if you require advanced features.
13. The Power of Patience (and Repetition)
Sometimes, things simply don't work the first time. Don't get discouraged! Try restarting your devices, double-checking your Wi-Fi connection, and repeating the process. You'll eventually get the hang of it. Think of it like learning to tie your shoes – it takes a few tries, but eventually, it becomes second nature.
14. The Future of File Transfer: What's Next?
The world of file transfer is constantly evolving. We can expect even faster transfer speeds, more seamless integration between devices, and perhaps even new features that we haven't even imagined yet. The key is to stay curious, experiment with new tools, and embrace the ever-changing digital landscape.
15. You've Got This! The Final Verdict
So there you have it! Transferring files from your iPhone SE to your Windows laptop via Wi-Fi is no longer a daunting task. With the right tools and a little patience, you can achieve a seamless and efficient transfer process. Go forth, conquer those files, and enjoy the newfound freedom of wireless file sharing!
Closing Thoughts
We hope this guide has provided you with a simple, yet elegant fix for transferring files between your iPhone SE and your Windows laptop. Implementing these steps, you should, in all likelihood, have a much smoother experience!
FAQs: Your Burning Questions Answered!
1. Is this method safe for my data?
Yes, the recommended methods (like SHAREit and Wondershare MobileTrans) generally employ encryption to protect your data during transfer. However, always ensure you're connected to a secure Wi-Fi network.
2. Do I need an internet connection to use SHAREit?
No, the beauty of SHAREit is that it works over a local Wi-Fi network. However, you'll need an internet connection to download the app initially.
**3. What if my transfer
Dell Laptop WiFi Nightmare? FIX IT NOW!Setup iPhone Hotspot And Connect To Laptop
By Team AG Setup iPhone Hotspot And Connect To Laptop by Team AG
Share Internet from iPhone to Windows PC via USB, Hotspot, Bluetooth

By Techy Druid Share Internet from iPhone to Windows PC via USB, Hotspot, Bluetooth by Techy Druid
iPhone Hotspot Not Connecting to Laptop SOLVED

By Nam Anh Cap iPhone Hotspot Not Connecting to Laptop SOLVED by Nam Anh Cap
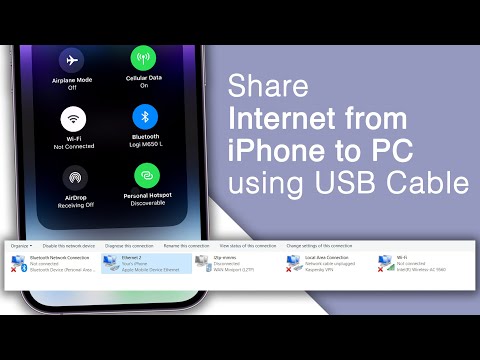
Title: How to Share iPhone Internet Connection with PC via USB Cable
Channel: Jigxor Tutorials
How to Share iPhone Internet Connection with PC via USB Cable by Jigxor Tutorials
Laptop Wifi Connect
iPhone SE WiFi to Windows Laptop: Effortless Connectivity Unveiled
The digital age demands seamless integration. You’re bouncing between tasks, and your iPhone SE, a pocket-sized powerhouse of communication and information, needs to share its WiFi lifeline with your Windows laptop. Frustration mounts when the connection proves stubbornly elusive. But fear not, for the solution isn't shrouded in technical jargon or complex configurations. It’s surprisingly simple, and we're going to guide you through a process so streamlined, it feels almost magical.
Understanding the Connection Quandary: Why Isn't it Working?
Before diving into the fixes, let's briefly consider the landscape of potential issues. Generally, the problem stems from miscommunication between your devices. Are your devices even capable of the connection? Do you know the exact steps to properly enable the connection? Operating systems, security protocols, and even the current network environment can all play a role. But the good news is: we will explore all the most common problems and ensure no stone is left unturned.
Method 1: The Mobile Hotspot Marvel - Sharing WiFi Directly
This is, arguably, the most straightforward approach. Your iPhone SE acts as a mobile WiFi hotspot, broadcasting its internet connection to your Windows laptop. Here’s how to orchestrate this digital dance:
- Unlock the iPhone SE: Ensure your phone is unlocked. This eliminates any potential initial hurdles.
- Access the Settings Menu: Navigate to the "Settings" app on your iPhone SE. This is the central hub for all your device's configurations.
- Find "Personal Hotspot": Scroll down until you find the “Personal Hotspot” option. Tap this section.
- Activate the Hotspot: Toggle the "Allow Others to Join" switch to the "on" position. This activates your phone's ability to dish out WiFi.
- Take Note of the Password: The "Wi-Fi Password" section is critical. Write this down. It's the key that unlocks your phone's internet connection for your laptop. You can tap to edit the password if you prefer a more memorable string. The password is case-sensitive, so make sure you type it exactly as it appears on your screen.
- Switch to Your Windows Laptop: Now, it’s time to shift your focus to your Windows machine.
- Activate WiFi: Click the WiFi icon in the system tray (usually in the bottom-right corner of your screen). This pulls up a list of available WiFi networks.
- Locate Your iPhone: Look for your iPhone SE’s name in the list of available WiFi networks. It's easy to identify; it will likely be labeled with your iPhone's device name or "iPhone" followed by the model.
- Enter the Password: Click on your iPhone's network name and when prompted, carefully enter your phone's WiFi password.
- Connect and Conquer: Click “Connect.” Your Windows laptop should now be successfully tethered to your iPhone SE's WiFi.
This process should be near instantaneous. If you’ve followed the steps correctly, you should be up and running quickly.
Method 2: The USB Tethering Advantage - A Wired Connection
For situations where a more stable, consistent connection is needed, or when you want to conserve battery life on your iPhone, USB tethering is an excellent choice. Here’s how:
- Connect the Devices: Plug one end of your iPhone SE's charging cable (Lightning to USB) into your phone. Plug the USB end into a USB port on your Windows laptop.
- Trust the Connection: On your iPhone SE, you may receive a prompt asking if you "trust" this computer. Tap "Trust." This grants your laptop the necessary permission to interact with your phone.
- Back to Your iPhone Settings: This is where things get a little different. Return to the “Settings” app on your iPhone SE.
- Find "Personal Hotspot" As before, navigate to "Personal Hotspot."
- Activate via USB: The option for “Personal Hotspot” should already be toggled to "on" or it may be grayed out. If it's grayed out, be sure your iPhone SE is connected to the laptop via USB.
- Confirm Internet Access on the Laptop: Your Windows laptop should now automatically detect and utilize the iPhone SE's internet connection. You might see a new network connection icon appear in your system tray. If nothing happens, restart your laptop.
- Troubleshooting USB Connections: The USB cable is the lifeline here. Ensure it's a working cable; try another one if you're having trouble. Also, verify that the USB port on your laptop is functional.
Method 3: Bluetooth Personal Hotspot - The Wireless Alternative
Bluetooth tethering offers a wireless connection, though it's often slower than WiFi or USB tethering. However, it's a viable option when you want to avoid any tangling cables.
- Enable Bluetooth on Both Devices: On your iPhone SE, go to Settings > Bluetooth and make sure Bluetooth is turned to the 'on' position. Repeat this process on your Windows laptop.
- Pair the Devices: On your Windows laptop, open the Bluetooth settings (search for "Bluetooth settings" in the Windows search bar). Scan for available devices. Your iPhone SE should appear in the list. Click on your phone's name to initiate the pairing process. Follow any prompts on your laptop and iPhone SE to confirm the pairing. You might receive a security code to type in.
- Return to iPhone Settings: On your iPhone SE, head back to Settings > Personal Hotspot.
- Allow Others to Join via Bluetooth: If it isn't already, enable the "Allow Others to Join" option. Now, in the same section, tap on “Personal Hotspot” from your Windows laptop.
- Confirm Internet Access on the Laptop: Your Windows laptop should now be able to connect to the internet via your iPhone SE.
- Troubleshooting Bluetooth Tethers: Bluetooth connections, while convenient, can be finicky. Ensure the devices are within close proximity. Turn Bluetooth off and on again on both devices if you're experiencing connectivity issues.
Advanced Troubleshooting: When Things Don't Go as Planned
Even with these straightforward steps, you might encounter complications. Here are some troubleshooting tips:
- Restart Everything: This is a universal fix. Restart both your iPhone SE and your Windows laptop. This clears temporary glitches and forces a fresh start.
- Check for Software Updates: Outdated software on either device can cause compatibility issues. Make sure that the latest available operating system and software updates are installed.
- Network Settings Reset (iPhone SE): If you suspect network configuration errors on your iPhone SE, you can reset them. Go to Settings > General > Transfer or Reset iPhone > Reset > Reset Network Settings. This will remove saved WiFi passwords and other network configurations, so you'll need to re-enter them afterward. Make sure that you know the password before you do this.
- Check Firewall and Antivirus Settings (Windows): Your Windows firewall or antivirus software might be blocking the connection. Temporarily disable these security features (after, of course, ensuring you are safe to do so, and re-enable them immediately after testing to restore your security).
- Contact Your Carrier: On some occasions, your cellular carrier may have specific settings that affect tethering.
Optimizing the Connection: Enhancing Speed & Stability
To maximize your connection experience, consider these points:
- Location, Location, Location: Move your iPhone SE to an area with a strong cellular signal. The better the signal, the faster the connection.
- Monitor Data Usage: Tethering consumes your cellular data. Keep an eye on your data plan usage to avoid unexpected overage charges. Your iPhone SE allows you to review data usage in Settings > Cellular.
- Limit Background Processes: Close unnecessary apps and processes running on your Windows laptop. These can consume bandwidth and slow down your connection.
- Consider USB Tethering for Stability: If consistent connectivity is crucial or you frequently use the tether, USB tethering generally offers the most reliable connection.
Beyond the Basics: Unleashing the Power
Once you've successfully tethered, the digital world becomes your oyster. Answer emails, stream videos, browse the web, work remotely – all using your iPhone SE’s WiFi connection. The power of seamless connectivity is now at your fingertips.
With these detailed steps, you have the knowledge to quickly set up your iPhone SE to share its connection to your Windows laptop.
