how to transfer files over wifi laptop to dekstop

Title: Transfer Files Between Two Laptops over Wi-Fi
Channel: Techy Druid
Transfer Files Between Two Laptops over Wi-Fi by Techy Druid
WiFi File Transfer: Laptop to Desktop – The SHOCKINGLY Easy Method!
Effortless File Sharing: From Laptop to Desktop, No Wires Required!
Have you ever wrestled with clunky USB drives or tangled cords? Surely, the struggle of transferring files between your laptop and desktop is a tale as old as time. But prepare to be amazed. There's a method so simple, so streamlined, it'll revolutionize your workflow. This article unveils the secret to seamless file sharing. It's all thanks to the magic of WiFi.
Cutting the Cord: The Wi-Fi Transfer Revolution
Gone are the days of physical connections. Now, you can transfer files wirelessly. Consequently, imagine effortlessly moving documents, photos, and videos. That's the power of Wi-Fi file transfer. It's a game-changer for anyone who juggles between a laptop and desktop. This newfound freedom will save you time. Therefore, it’s an incredibly convenient solution.
Setting the Stage: Preparing Your Devices
First, ensure both your laptop and desktop are on the same Wi-Fi network. This is the most crucial step. Think of it as building the bridge for your data. Next, you will need a file transfer application. Several options exist. For example, popular choices include dedicated apps. Alternatively, you can use built-in operating system features.
Unleashing the Power: Using File Transfer Apps
Apps dedicated to file transfer offer a user-friendly experience. They often streamline the process. They are readily available. Moreover, they are often cross-platform compatible. Therefore, consider an app like "ShareIt," or "Xender." As a result, these enable swift transfers between devices. To begin, download and install the app. Then, open it on both your laptop and desktop. You'll likely need to grant permission for file access. The app will then establish a connection. After that, follow the on-screen instructions. Usually, this involves selecting the files you want to send. Finally, tap the send button, and watch the magic happen.
Harnessing the Power of Built-In Features
Your operating system might already have a built-in file-sharing feature. First, navigate to your network settings. Find the file-sharing options. Next, enable file sharing. After that, your desktop or laptop will become visible to other devices. However, security is a must. Ensure you set up a password. Consequently, this protects your shared files. Explore your computer's settings. Generally, the steps involve right-clicking on the file. Then, choosing "Share."
Step-by-Step Guide: Making the Transfer
Here's a simplified breakdown of the process. Firstly, choose your preferred method. Secondly, open the chosen application. Afterward, select the files. Next, initiate the transfer. Finally, confirm the transfer on the receiving device. Voila! Your files will arrive in a flash.
Addressing Common Challenges
Sometimes, things don't go as planned. Let's solve some common issues. Are files not transferring? Ensure your Wi-Fi connection is stable. Is the app giving you issues? Try restarting both devices. Moreover, verify your firewall isn’t blocking the connection. If all else fails, consult the app's support documentation.
Maximizing Your Efficiency
Want to optimize your file transfer experience? Organize your files beforehand. Consequently, it'll make the sending process quicker. Furthermore, consider using a compression utility. Compressing large files drastically reduces transfer times. Additionally, update your apps and operating systems. Updates often include performance improvements.
Security Matters: Protecting Your Data
Security is always paramount. Always download apps from trusted sources. Never share your Wi-Fi password with strangers. Moreover, consider using encryption. It safeguards your file transfers. A little caution goes a long way.
Beyond the Basics: Exploring Additional Features
Many apps offer extra features. Explore the app's capabilities. For example, some apps allow you to transfer entire folders with ease. Furthermore, some have features for media streaming. As a result, you can watch videos directly from your laptop on your desktop.
The Future is Wireless: Embracing the Freedom
Wi-Fi file transfer is more than a convenience. Hence, it’s a glimpse into the future. As technology evolves, expect even more seamless and intuitive methods. So, embrace the freedom of wireless file sharing. It will transform the way you work.
Conclusion: Your Hassle-Free File Transfer Solution
We've explored a simple yet effective method. Transferring files from your laptop to your desktop has never been easier. Armed with this knowledge, you're now ready to ditch the wires. You can embrace the convenience of Wi-Fi file transfer. So, go ahead. Share those files wirelessly. Enjoy the enhanced productivity.
Android to Laptop WiFi Transfer: The SHOCKINGLY Easy Method!WiFi File Transfer: Laptop to Desktop – The SHOCKINGLY Easy Method!
Alright, folks, let's talk about a tech pain point that's probably plagued us all at some point: transferring files. Specifically, getting those precious photos, those vital documents, or that massive video file from your laptop to your desktop (or vice versa) without resorting to ancient methods like USB sticks, which are about as fun as waiting in line at the DMV. Believe me, I've been there. Hours of plugging, unplugging, and praying the little drive wouldn't decide to corrupt itself right before the big presentation. But guess what? We've evolved. We're in the age of Wi-Fi, and transferring files wirelessly is not only possible, but it’s also shockingly easy. So, buckle up, because we're diving into the world of WiFi File Transfer: Laptop to Desktop – The SHOCKINGLY Easy Method!
1. The USB Stick Blues: Why We Need a Better Way
Remember those days of wrestling with USB drives? I do. They’d always seem to be too small, too slow, or mysteriously vanish right when you needed them most. It’s like they had a personal vendetta. The frustration was real, and the wasted time was even worse. We need a faster, more reliable, and, frankly, more convenient way to get files from point A to point B. Think of it as the digital equivalent of teleportation, but without the potential for accidentally merging with a coffee machine (thankfully!).
2. What is WiFi File Transfer, and Why Should You Care?
Simply put, WiFi file transfer is the process of moving files between devices over your existing Wi-Fi network. No wires, no fuss, just a smooth, seamless experience. Why should you care? Because it's a game-changer. Imagine being able to instantly access your photos from your laptop on your desktop, or vice versa, without having to get up and physically connect anything. It's freeing, efficient, and saves you countless hours. It's like having a superhighway for your digital data.
3. Prerequisites: Making Sure You're Ready to Go Wireless
Before we jump into the nitty-gritty, let's make sure you have the essentials:
- Both Devices Connected to the Same Wi-Fi Network: This is non-negotiable. Your laptop and desktop need to be on the same network for this to work. Think of it like two ships needing to be in the same harbor to share goods.
- Sufficient Storage Space: Make sure both devices have enough free space to accommodate the files you’re transferring. No point starting a transfer if one of the machines is already bursting at the seams!
- Basic Computer Literacy: You don't need to be a tech whiz, but a basic understanding of how to navigate your operating system is helpful. Don't worry; it's simpler than assembling IKEA furniture!
4. Method 1: The Built-in Windows Magic (For Windows Users)
For Windows users, Microsoft has made things incredibly easy. Here's a straightforward method that’s built right into Windows:
- Enable Network Discovery: On your desktop, go to "Network and Sharing Center" (search for it in the Start menu). Then, click on "Change advanced sharing settings." Make sure "Turn on network discovery" and "Turn on file and printer sharing" are enabled.
- Share a Folder: Right-click on the folder you want to share on your desktop, select "Properties," then go to the "Sharing" tab. Click "Share" and choose the relevant account, usually "Everyone."
- Access the Shared Folder from Your Laptop: On your laptop, open File Explorer (Windows key + E) and click on "Network" in the left-hand pane. You should see your desktop listed. Click on it, and you’ll be able to access the shared folder and transfer files. It's that simple!
5. Method 2: The Built-in MacOS Simplicity (For Mac Users)
Mac users, rejoice! Apple has always prioritized user-friendliness, and file sharing is no exception. Here's how to do it on macOS:
- Enable File Sharing: Go to System Preferences > Sharing. Check the "File Sharing" box.
- Add a Shared Folder: Click the "+" button under "Shared Folders" and select the folder you want to share.
- Set Permissions (Important!): Click "Options…" to ensure the appropriate user has read/write access. Decide on the account.
- Connect from Your Laptop (or other Mac): In Finder, click on "Go" > "Connect to Server" (or press Command + K). Type
smb://[Your Desktop's IP Address or Name](you can find your IP address in System Preferences > Network). You'll then need to log in with your desktop's username and password.
6. The Third-Party App Advantage: When Built-In Isn't Enough
While the built-in methods are often sufficient, sometimes you need a little extra oomph, especially if you have a more complex setup or want more advanced features. This is where third-party apps shine. Think of it like choosing between a basic car and a luxury model.
7. Popular Third-Party Apps for Effortless Transfer:
- ShareX: A free and open-source program that offers file sharing and screen capture capabilities. It's a great all-rounder, known for its flexibility and ease of use.
- Feem: Easy to use on Windows, macOS, Android, iOS, and Linux. No internet or configuration is needed to send files between devices.
- AirDroid: This is a powerhouse of features. Through a web interface it allows for remote file access, mirroring, and communication.
- KDE Connect: Especially useful for Linux users, it also works on Windows and has a great Android app which adds a lot of functionality to file transfer, as well as allowing you to control your desktop from your phone.
8. Step-by-Step Guide to Using a Third-Party App (Example: Feem)
Let's use Feem as an example showing the general process:
- Download and Install: Download and install Feem on both your laptop and desktop.
- Connect to the Same Wi-Fi: Ensure both devices are on the same Wi-Fi network.
- Select and Send: On one device, open Feem, select the file(s) you want to send. Choose the device you want to receive it.
- Receive: On the other device, accept the file(s). That's it! It's like a digital handshake.
9. Security Concerns: Keeping Your Files Safe
While WiFi file transfer is convenient, it's crucial to be aware of security. Here's how to stay safe:
- Password Protect Your Shared Folders: Always set up user accounts and passwords on the devices you're sharing files from. Never share without a password.
- Use a Secure Wi-Fi Network: Avoid transferring sensitive files over public or unsecured Wi-Fi networks. Those are like open invitations to digital eavesdroppers.
- Keep Your Software Updated: Regularly update your operating systems and any file transfer apps to take advantage of the latest security patches. It's like having a digital shield.
10. Troubleshooting Common Problems: Because Tech Troubles Sometimes Happen
Let's face it: technology can be a bit… temperamental. Here are some common issues and how to fix them:
- Devices Not Visible: Double-check that both devices are on the same Wi-Fi network, that network discovery is enabled (Windows), and that file sharing is allowed.
- Slow Transfer Speeds: This can be due to network congestion, distance from the router, or the speed of your Wi-Fi standard. Try moving closer to the router, or use a 5GHz connection instead of 2.4GHz.
- Permissions Issues: Make sure the user accounts on the receiving device have the necessary permissions to access and write to the shared folder.
11. Beyond Basic File Transfer: Exploring Advanced Uses
Once you've mastered the basics, you can explore more advanced applications:
- Remote File Access: Access your files from anywhere in the world! Some apps allow for remote access.
- Media Streaming: Stream movies and music directly from your desktop to your laptop or other devices.
- Automatic Backups: Set up automated backups of your important files over Wi-Fi. It's like having a safety parachute for your data.
12. Optimizing Transfer Speeds: Making Things Even Faster
Want to supercharge your file transfers? Here are some speed-boosting tips:
- Use a Wired Connection (If Possible): If your desktop has a wired Ethernet connection, use it! It's often faster and more stable than Wi-Fi.
- Upgrade Your Router: A modern router with Wi-Fi 6 (802.11ax) or Wi-Fi 6E can significantly improve transfer speeds.
- Minimize Network Interference: Keep your router away from walls, metal objects, and other devices that emit radio waves.
13. The Future of File Transfer: What to Expect
Lenovo WiFi Nightmare? Solved in 60 Seconds!How to transfer files from PC to PC using WiFi Windows 10 7 8

By IT Magics How to transfer files from PC to PC using WiFi Windows 10 7 8 by IT Magics
Sharing Files Between Computers Wirelessly Solution for sharing folders on WIFI network

By FIXsage Sharing Files Between Computers Wirelessly Solution for sharing folders on WIFI network by FIXsage
Transfer Files from PC to PC using a LANEthernet Cable
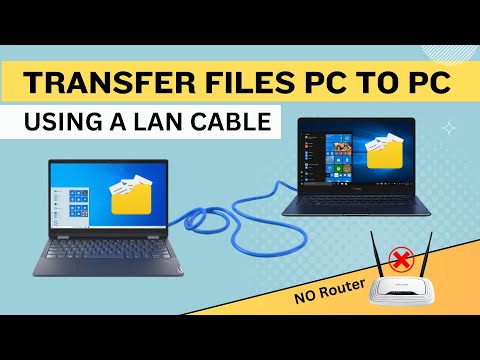
By Techy Druid Transfer Files from PC to PC using a LANEthernet Cable by Techy Druid

Title: How to transfer files from PC to PC using WiFi Windows Sharing Files Between Computers Wirelessly
Channel: Each and Everything
How to transfer files from PC to PC using WiFi Windows Sharing Files Between Computers Wirelessly by Each and Everything
Laptop Wifi Connect
WiFi File Transfer: Laptop to Desktop – Your Effortless Guide
We’ve all been there: stranded with a laptop brimming with crucial files, yearning to liberate them onto the spacious dominion of your desktop. The antiquated dance of USB drives, the convoluted cable connections, the sheer frustration of it all. Forget those digital detours. This isn't just about transferring files; it's about reclaiming your time, streamlining your workflow, and reveling in the seamless synergy between your laptop and desktop. We're going to unravel the secrets of WiFi file transfer – a method so elegantly simple, you’ll wonder why you ever wrestled with wires in the first place. Prepare to be amazed.
Why WiFi File Transfer Reigns Supreme
Let’s be candid: the humble USB drive is a relic. It's slow, it's prone to loss, and it necessitates physical movement. WiFi file transfer, on the other hand, bestows upon you the ultimate in digital freedom. Here's what sets it apart:
- Unrivaled Convenience: No more fumbling for cables or plugging in external devices. Initiate the transfer from the comfort of your couch, your home office, or even your backyard (assuming your WiFi extends that far!).
- Speedy Deliveries: Modern WiFi networks, particularly those adhering to the 802.11ac or 802.11ax standards, offer blistering transfer speeds, easily eclipsing the limitations of USB 2.0. Watch your files migrate in a fraction of the time.
- Universal Compatibility: The beauty of WiFi file transfer lies in its adaptability. Whether you're using a Windows laptop talking to a Windows desktop, a macOS laptop communicating with a macOS desktop, or even a blend of operating systems, the process is consistently straightforward.
- Enhanced Security: With the right security protocols in place (and we’ll delve into those shortly), your WiFi network can provide a secure environment for file transfers. No need to worry about leaving your data on a lost or stolen USB drive.
- Eliminating Physical Wear and Tear: The constant plugging and unplugging of cables and devices can lead to damage over time. WiFi file transfer eliminates these physical processes.
Decoding the Essential: Prerequisites for Seamless Transfer
Before we plunge into the specifics, let's ensure you have everything you need. The fundamental ingredients for a successful WiFi file transfer are surprisingly few:
- A Shared Network: Both your laptop and desktop must be connected to the same WiFi network. This is the essential conduit for communication. Double-check that your devices are linked to the same network's SSID (Service Set Identifier) – the name of your WiFi network.
- A Functional Operating System: Both the laptop and the desktop ought to be running a relatively updated version of their respective operating systems (Windows, macOS, Linux). While these methods tend to function perfectly well on older variants, it's always best to be up to current standards.
- Sufficient Storage Space: Verify that your target device (usually your desktop) has ample storage capacity to accommodate the files you wish to transfer. This might seem obvious, but it’s a critical step. You don't want a transfer to grind to a halt because of a full hard drive.
- A Stable WiFi Connection: This is crucial. A weak or fluctuating WiFi signal can interrupt the transfer process, leading to frustration and potential data corruption. Ensure your devices are in a location with a strong, reliable connection. Test your connection to confirm that your WiFi is strong.
Windows: Your Step-by-Step Guide to WiFi File Sharing
Windows is incredibly user-friendly when it comes to WiFi file transfer. Follow these well-defined steps, and you'll be zipping files across your home network in minutes:
- Network Discovery: On your desktop, search for "Network" in the Windows search bar and click on "Network status." Then, select "Change advanced sharing settings." Ensure "Network discovery" is turned on for both "Private" and "Guest or Public" networks. This permits other devices on your network to find your computer. Additionally, confirm file and printer sharing is enabled.
- Sharing a Target Folder: Right-click on the folder you want to share (e.g., your "Documents" folder, a newly created folder specifically for the transfer, etc.). From the context menu, select "Give access to" and then choose "Specific people."
- Selecting Sharing Permissions: In the "Network access" window, specify the user(s) you want to share the folder with. Typically, selecting "Everyone" grants access to all devices on your network. Assign the permission level (Read or Read/Write). If you intend to move files from the desktop to the laptop, grant Read/Write permissions.
- Accessing the Shared Folder from Your Laptop: On your laptop, open File Explorer (Windows Key + E). In the left-hand navigation pane, click on "Network." Your desktop should appear as a device you may select to go to. Double-click on your desktop's icon to launch the shared folder.
- Initiating the Transfer: You can now copy and paste files from your laptop into the shared folder on your desktop or the other way around. Alternatively, you could drag and drop files as well.
macOS: A Refined Approach to WiFi File Sharing
macOS, with its elegant simplicity, provides an equally seamless experience for WiFi file transfer:
- Enabling File Sharing: Launch "System Preferences" (Apple menu > System Preferences). Click on "Sharing." Select "File Sharing" from the left-hand pane.
- Creating a Shared Folder: Click the "+" button below the "Shared Folders" list. Select the folder on your desktop that you want to share. This might be your "Documents" folder, a dedicated transfer folder, or another specific directory.
- Setting User Permissions: Under the "Users" section, you will see a list of users associated with your Mac. Select the account(s) that need access to the shared folder. Configure the permissions. "Read Only" allows your laptop to view the contents of the folder. "Read & Write" allows your laptop to view, copy, move, and delete files on your desktop. "Read Only" is a safer approach if you only need to transfer data from your desktop.
- Accessing the Shared Folder from Your Laptop: From your laptop, open Finder. On the left-hand pane, under "Shared," you should see your desktop's name. If you don't see it, click on "Go" > "Connect to Server" from the menu bar (Command + K) and enter the appropriate network address (e.g.,
smb://yourdesktop'sIPaddress). - Executing the Transfer: Similar to Windows, you can drag and drop files between your laptop and the shared folder on your desktop. Copy-pasting works seamlessly as well.
Advanced Techniques: Elevating Your File Transfer Game
While the basic methods outlined above cover the vast majority of use cases, let's explore some advanced techniques to further refine your WiFi file transfer arsenal:
- Using Third-Party Applications: For even more control and features, consider using free file transfer applications such as "Filezilla" or "Cyberduck" (for more technical users or to facilitate transfers with non-traditional systems). These tools often offer advanced features, such as the ability to resume interrupted transfers, improved transfer speed optimization, automated procedures, and other specific functions.
- Implementing Secure Data Encryption: If you're transferring sensitive data, consider implementing end-to-end encryption, such as Secure Shell (SSH) file transfer protocol (SFTP), which is a built-in feature on most Linux and macOS systems that offers high security. However, more complex setups often require technical expertise.
- Optimizing Your WiFi Network: Employing a dual-band router is a solid start. Consider using 5 GHz instead of 2.4 GHz (if your devices support it) for better bandwidth and less interference, thus resulting in faster transfers. It’s worth optimizing your router settings to maximize performance. Consult your router's manual for guidance.
- Setting Static IP Addresses: Assigning static IP addresses to your devices can sometimes improve connection reliability. Consult your router's manual on how to do this.
Troubleshooting Common WiFi File Transfer Roadblocks
Even the most meticulously planned WiFi file transfer operation can encounter snags. Here's how to navigate the most common issues:
- Network Discovery Issues: Double-check that network discovery is turned on for both the laptop and desktop. This setting allows the devices to see each other. Restarting both devices and your router can often resolve temporary network glitches.
- Firewall Interference: Windows Firewall or third-party firewalls can sometimes block file-sharing traffic. Ensure that your firewall allows file and printer sharing. You might need to create explicit rules to permit the necessary network connections, or simply temporarily disable the firewall for testing purposes (remember to re-enable it afterward).
- Incorrect User Permissions: Ensure that the user accounts on each device have the necessary permissions to access the shared folders. Double-check the read/write settings.
- Hidden Network SSD Issues: Sometimes, hidden network SSDs can cause connectivity issues. Check the settings on your router. Often, creating a separate guest network for file transfers (if possible) can resolve networking issues.
- **
