how to tether wifi from laptop to desktop withh ethernet

Title: Share Internet from PC to PC via EthernetLAN cable
Channel: Techy Druid
Share Internet from PC to PC via EthernetLAN cable by Techy Druid
how to share internet from laptop to pc with ethernet cable, how to share wifi from laptop to desktop, how to share internet from laptop to desktop using ethernet cable, can you share wifi from laptop to pc
Tether Your Laptop's WiFi to Your Desktop's Ethernet: The SHOCKINGLY Simple Trick!
Unlock Blazing Speeds: Bridge Your Laptop's WiFi to Your Desktop's Ethernet – It's Easier Than You Think!
Remember those days of agonizingly slow internet on your desktop? You know, the frustration when downloads crawl and video calls stutter. Well, prepare to be amazed. Because this simple hack could drastically alter your online experience. It essentially turns your laptop into a WiFi-to-Ethernet bridge. Believe it or not, this is a surprisingly simple process.
The Scenario: Desktop with No WiFi, Laptop Has the Goods
Let's paint a picture. Your desktop, a powerful machine, sits proudly on your desk. But it’s missing one crucial connection – WiFi. Perhaps the built-in adapter is faulty, or a wired connection reigns supreme in your setup. Meanwhile, your laptop, connected to the world via glorious WiFi, is happily surfing the web. Wouldn't it be awesome if you could share that connection without extra cables?
Your Superpower: Internet Connection Sharing
Enter the game changer: Internet Connection Sharing (ICS). This brilliant feature, built into Windows, lets you share your laptop's WiFi connection with other devices. Think of it as a digital relay race. Your laptop gets the baton (the internet), and passes it to your desktop. This method is highly effective.
Setting the Stage: What You'll Need
First, gather your essential tools. You need your laptop, with a working WiFi connection. Then, grab your desktop. Finally, you'll require an Ethernet cable. This humble cable is the physical link between your two machines. Ensure it’s readily accessible.
Step-by-Step Magic: The Connection Conundrum Solved
Now, let's dive into the delicious details. The process might seem daunting, but stay with me. It's actually incredibly straightforward.
Connect the Hardware: Plug one end of the Ethernet cable into your laptop's Ethernet port. The other end goes into your desktop's Ethernet port. So, quite literally, establish a physical link.
Navigate Windows Settings: On your laptop, go to the Windows Settings. You can usually find this by clicking the Start button and then selecting the gear icon.
Enter Network & Internet: Select "Network & Internet" from the Settings menu. Then, click "Mobile hotspot."
Share Your Connection: Locate the drop-down menu labeled "Share my internet connection from." Select your WiFi connection specifically.
Turn on the Hotspot: Activate the "Mobile hotspot" feature by toggling the switch to “On”.
Unleash the Power: Check your desktop. It should now have internet access. The change occurs immediately.
Troubleshooting Titans: When Things Don't Go Smoothly
Sometimes, technology throws a curveball. If your desktop isn't connecting, don’t panic. Troubleshooting is usually quick.
- Check the Cable: Make sure the Ethernet cable is securely plugged into both devices. It seems simple but is often the culprit!
- Verify the Connection: On your laptop, make sure WiFi is active. If it's disabled, the whole process comes crashing down.
- Restart Both Machines: A simple reboot can often fix minor glitches. So, restart both your laptop and desktop.
- Driver Troubles? Rarely, outdated network drivers can cause issues. Update your network adapter drivers on your desktop.
- Firewall Friction: Your firewall might be blocking the connection. Temporarily disable your firewall to see if that resolves the problem.
The Benefits: Speed, Stability, and Sheer Convenience!
So, why bother with this little trick? Consider the significant advantages. First, you get potentially faster speeds. Ethernet connections are often more reliable than WiFi. Therefore, you can enjoy a noticeably quicker experience. Second, stability is improved. Wired connections are generally less prone to dropouts. Finally, this is incredibly convenient. This method is a fast, easy solution.
Beyond the Basics: Advanced Tweaks and Considerations
Want to explore further for additional improvements? Some things can maximize your setup.
- Prioritize Bandwidth: You can usually adjust the bandwidth allocation on your laptop. Explore your network settings. This allows you to optimize performance.
- Consider Security: When using Internet Connection Sharing, be mindful of security. Ensure your laptop's firewall is active. This practice enhances your security posture.
- Monitor Data Usage: Be aware of your laptop's data usage, especially if you have a limited data plan. However, the main focus should be on improved access.
Conclusion: Embrace the Enhanced Online Experience
There you have it. You’ve successfully bridged your laptop's WiFi to your desktop's Ethernet. You've transformed your desktop into a more powerful machine. You should now enjoy faster, more stable internet. As a result, your online activities should be smoother. So, go forth and conquer the digital world! With this trick, your internet frustrations are a thing of the past. Now you can enjoy seamless browsing, faster downloads, and uninterrupted streaming.
Laptop WiFi Dying? KILL It (Without Losing Your Mind!)Tether Your Laptop's WiFi to Your Desktop's Ethernet: The SHOCKINGLY Simple Trick!
Ever stared at your desktop, a powerful beast of a machine, while your laptop is desperately clinging to a weak Wi-Fi signal? It's a scenario that screams inefficiency, isn't it? We've all been there. We're talking about those moments when your online gaming lags, your video calls stutter, or that massive file download crawls at a snail's pace. The solution, surprisingly, is often simpler than you think. Today, we’re going to unpack a shockingly simple trick to tether your laptop's Wi-Fi connection to your desktop's Ethernet, essentially using your desktop as a Wi-Fi bridge. Prepare to be amazed!
1. The Frustration of Weak Wi-Fi: A Shared Pain
Let's be honest; Wi-Fi, glorious as it often is, can be a fickle friend. Walls, distance, and the dreaded interference from your neighbor's microwave oven (or, let's face it, their own Wi-Fi) can wreak havoc on your connection. This translates to dropped calls, buffering wheels of doom while streaming, and a general feeling of digital sluggishness. It's like trying to run a marathon in quicksand. We all feel the sting of it, be it for work, play, or simply staying connected.
2. The Silent Powerhouse: Your Desktop's Untapped Potential
Your desktop, meanwhile, is likely plugged directly into that glorious Ethernet port, enjoying the steady, unwavering reliability of a wired connection. Think of it as the internet's equivalent of a luxury liner, smoothly sailing through the digital waves. It's a powerhouse, often far more capable than your laptop at handling serious data transfer. But what if we could share that power?
3. Enter the Superhero: The Internet Connection Sharing (ICS) Feature
The good news? We can share that power, and it’s primarily done through a built-in Windows feature called Internet Connection Sharing (ICS). Think of ICS as a clever little internet traffic director. It takes the incoming data from your Ethernet connection and reroutes it through your desktop's Wi-Fi card, creating a personal hotspot for your laptop to connect to. Simple, right?
4. Setting the Stage: What You’ll Need
Before we dive in, let's get our ducks in a row. You'll need a few things:
- A Desktop with an Ethernet connection and a Wi-Fi adapter: This is your internet “hub.”
- A Laptop with a Wi-Fi adapter: This is the receiver.
- Windows Operating System: This method is primarily for Windows based systems.
- A little patience: It’s straightforward, but we’ll walk you through each step.
5. Step-by-Step Guide: The Unveiling of the Trick
Alright, let's roll up our sleeves and get this show on the road. Here's how to set up Internet Connection Sharing:
5.1. Accessing Network Connections
First things first, we need to access the Network Connections settings. There are a couple of ways to do this:
- Method 1 (Easiest): Type "View Network Connections" in the Windows search bar (the little magnifying glass, usually in the bottom-left corner). Click the result that appears.
- Method 2: Go to Control Panel > Network and Internet > Network and Sharing Center > Change adapter settings.
5.2. Identifying Your Connections
You'll now see a list of your network adapters. You'll likely see something like:
- Ethernet: This is your wired connection (the one plugged into your router).
- Wi-Fi: This is your wireless adapter.
5.3. The Sharing Magic: Configuring Ethernet
Right-click on your Ethernet connection (the wired one) and select "Properties."
5.4. Navigating to the 'Sharing' Tab
In the Ethernet Properties window, click on the "Sharing" tab.
5.5. Enabling Internet Connection Sharing
Check the box that says "Allow other network users to connect through this computer's Internet connection".
5.6. Selecting Your Wi-Fi Adapter
In the "Home networking connection" dropdown menu, select your Wi-Fi adapter. This tells Windows to share the internet connection through your Wi-Fi.
5.7. Final Touches and Configuration
Click "OK". You may be prompted to restart your network adapters – do so.
5.8. Laptop Side: Connecting the Dots
Now, grab your laptop. Go to the Wi-Fi settings and look for a new Wi-Fi network. The name will likely resemble your desktop’s name, or a variation of it. Connect to this network. You might need to enter a network security key depending on the Wi-Fi security settings on your desktop. Voila! Your laptop should now be surfing the internet through your desktop’s Ethernet connection. You’ve successfully tethered your laptop.
6. Troubleshooting Troubles: Common Roadblocks and Solutions
Sometimes, things don’t go perfectly smoothly. Don't worry; it's often fixable. Here are a few common issues and how to address them:
- No internet access on the laptop: Double-check the steps, especially the adapter selection. Reset both the desktop's and the laptop's network adapters.
- Slow speeds: Make sure your desktop's Wi-Fi adapter is capable of handling the bandwidth. Consider upgrading your Wi-Fi adapter on the desktop.
- Connection dropping: This can be due to interference. Try moving your laptop and desktop closer together, or changing the Wi-Fi channel on your desktop.
7. Beyond the Trick: Real-World Applications
This simple trick has some fantastic applications:
- Gaming: Achieve lower latency and smoother gameplay by using the wired connection.
- Video Conferencing: Minimize dropped calls and maximize video quality.
- Large File Downloads: Faster and more reliable file transfers.
- Troubleshooting: If your Wi-Fi is spotty, use this method to isolate the problem.
8. Security Considerations: Protecting Your Digital Fortress
While this method is generally secure, it's always good to be mindful of security. Make sure your desktop's Wi-Fi network is protected with a strong password. If you’re concerned about security, consider enabling a firewall on your desktop.
9. Performance Boost: Unlocking the Speed Potential
The improvement in speed can be astonishing. You’re essentially bypassing the often-limited capabilities of your laptop's Wi-Fi and using the raw power of your desktop's wired connection. Think of it as upgrading from a single-lane road to a six-lane highway for your internet traffic.
10. The Convenience Factor: Portability Without Compromise
This method allows you to enjoy the benefits of a wired connection while retaining the portability of your laptop. Work from the couch, the kitchen table, or even the backyard, all while enjoying the speed and reliability of a wired connection.
11. Comparing Alternatives: Why ICS Reigns Supreme
You might be wondering about other options, such as using a dedicated Wi-Fi router or a wired connection directly. While those have their place, ICS offers a unique blend of simplicity and efficiency. It's the best solution if you already have the hardware on hand and want a quick, easy improvement to your internet experience.
12. The Hidden Benefits: Beyond Faster Internet
Beyond the obvious speed benefits, using ICS can also reduce the load on your laptop’s Wi-Fi adapter, potentially extending its lifespan and improving overall system stability.
13. The Environmental Angle: Reducing Energy Waste
Believe it or not, using a more efficient internet connection can indirectly reduce your carbon footprint. Faster downloads and more streamlined online experiences mean less time your devices are powered on, consuming energy.
14. The Future of Connectivity: Bridging the Gap
As technology evolves, the need for seamless connectivity will only increase. Methods like ICS bridge the gap between the limitations of individual devices and the power of the internet.
15. Conclusion: Embrace the Simplicity, Unleash the Speed!
There you have it, folks! The surprisingly simple trick to tethering your laptop’s Wi-Fi to your desktop's Ethernet. We've explored the frustrations of weak Wi-Fi, the untapped power of your desktop, and the magic of Internet Connection Sharing. We’ve walked through the steps, addressed potential roadblocks, and highlighted the incredible benefits. This isn’t just about faster internet; it's about reclaiming your digital life, whether you're a gamer, a remote worker, or simply someone who values a reliable connection. So, go ahead, unleash the speed!
FAQs: Your Burning Questions Answered
1. Is this method secure?
- Yes, generally. Ensure your desktop's Wi-Fi network is password-protected.
2. Does this work on all versions of Windows?
- Yes, this method works on most Windows versions, including Windows 10 and 11. The steps may vary slightly.
3. What if I don't have a Wi-Fi adapter on my desktop?
- You'll need to purchase a Wi-Fi adapter for your desktop. They're relatively inexpensive.
**4
Steal Your WiFi Password: The Laptop Trick Nobody Knows!How to share internet from laptop to desktop using ethernet cable

By IT Magics How to share internet from laptop to desktop using ethernet cable by IT Magics
How to share the Internet from one PC to another using an ethernet Cable or LAN Cable

By Loxyo Tech How to share the Internet from one PC to another using an ethernet Cable or LAN Cable by Loxyo Tech
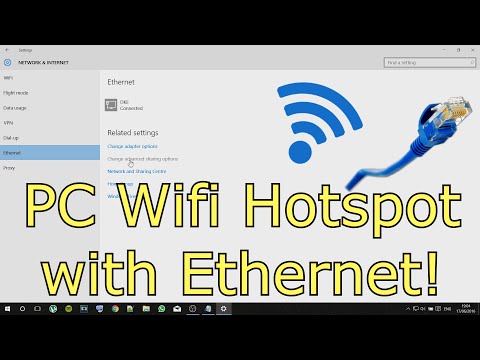
Use PC as WiFi Hotspot with Ethernet
By Tech4Time Use PC as WiFi Hotspot with Ethernet by Tech4Time

Title: Help Desktop connect Wi-Fi via Laptop NETVN
Channel: NETVN82
Help Desktop connect Wi-Fi via Laptop NETVN by NETVN82
My Laptop Work
Tether Your Laptop's WiFi to Your Desktop's Ethernet: The SHOCKINGLY Simple Trick!
We've all been there – wrestling with unreliable Wi-Fi, particularly in locales where the signal fluctuates or simply isn't up to the demands of our online endeavors. Maybe your desktop, comfortably plugged into a robust Ethernet connection, is enjoying a blazing-fast internet experience. Meanwhile, your laptop, relying solely on Wi-Fi, is suffering from buffering woes, dropped connections, and the general frustration of a slow online experience. But what if we told you there's a shockingly simple way to bridge that gap, transforming your desktop's stable Ethernet connection into a Wi-Fi hotspot for your laptop? Forget complex configurations or expensive hardware. This trick is surprisingly accessible and allows you to leverage your desktop's superior internet access on your laptop, creating a seamless and powerful internet experience across your devices.
Unveiling the Power of Internet Connection Sharing
The secret lies in a feature often embedded within the operating system itself – Internet Connection Sharing (ICS). This built-in functionality allows you to share your desktop's internet connection with other devices on your local network. Think of it as a gateway, your desktop acting as the central hub that distributes the wired internet signal to your laptop via Wi-Fi. This eliminates the need for a separate Wi-Fi router, potentially saving you money and simplifying your setup. While the exact steps may vary slightly depending on your operating system, the fundamental principles remain consistent. This process prioritizes ease of use and efficiency, ensuring a smooth transition from a Wi-Fi-dependent laptop to one connected to the power of your desktop's Ethernet.
Harnessing Internet Connection Sharing on Windows: A Step-by-Step Guide
For those using a Windows operating system, the process is remarkably straightforward. We shall guide you through each step, ensuring clarity and ease of execution.
Accessing Network Connections: Begin by opening the "Network Connections" settings. You can typically find this by searching for "View network connections" in the Windows search bar or by navigating through the Control Panel. This area displays all your active and inactive network adapters.
Identifying Your Ethernet Adapter: Within the Network Connections window, locate the Ethernet adapter that's currently connected to your desktop's network cable. This adapter is responsible for receiving the internet signal from the Ethernet cable and is the key component in this process. Typically, it will be labeled with a name that clearly indicates it's a wired connection, such as "Ethernet" or the name of your network card.
Enabling Internet Connection Sharing: Right-click on your Ethernet adapter and select "Properties". This opens a dialog box with various settings for your connection.
Navigating to the Sharing Tab: In the Properties window, navigate to the "Sharing" tab. This tab contains the options for Internet Connection Sharing.
Activating Internet Connection Sharing: Check the box that says "Allow other network users to connect through this computer's Internet connection." This is the core setting that enables ICS.
Selecting the Network for Sharing: Below the "Allow other network users" option, you'll see a dropdown menu labeled "Home networking connection". From here, select your Wi-Fi adapter or the wireless network adapter on your desktop. If you have multiple Wi-Fi adapters, pick the one you plan to use to create the Wi-Fi hotspot.
Confirming and Applying Changes: Click "OK" to save your changes and close the Properties window. Windows will now configure the connection sharing, effectively turning your desktop into a Wi-Fi hotspot.
Verifying the Process: After applying the changes, Windows may automatically configure the network settings. Check that the Wi-Fi adapter is enabled and broadcasting a Wi-Fi signal. On your laptop, look for this new Wi-Fi network.
Troubleshooting Windows Internet Connection Sharing
While the process is usually seamless, you might encounter minor issues. Here's how to remedy some common problems.
- Firewall Interference: Your Windows firewall can sometimes block the connection. Temporarily disabling the firewall (be cautious and do so only for the duration of the setup) or configuring it to allow connections from other devices on your local network is a good place to start.
- Network Driver Issues: Outdated or corrupted network drivers can cause problems. Update your Ethernet and Wi-Fi adapter drivers through Device Manager to ensure optimal performance.
- IP Address Conflicts: Ensure that your laptop and desktop are not assigned the same IP address. If necessary, manually assign a static IP address to your laptop to avoid conflicts.
- Rebooting: A simple restart of both your desktop and laptop can often resolve connectivity issues. It allows the system to refresh its configurations and establish a stable connection.
- Checking for Network Card Issues: Make sure your desktop's Ethernet connection is functioning correctly by browsing the internet directly on your desktop and verifying that your Wi-Fi card is enabled, operational, and displaying available networks.
Internet Connection Sharing on macOS: A Streamlined Approach
The Apple operating system, macOS, offers its unique implementation of Internet Connection Sharing. The steps are designed to be user-friendly, and the entire process is often completed in a few clicks.
Accessing Sharing Preferences: Click the Apple menu in the top-left corner of your screen, then select "System Preferences" or "System Settings", depending on your macOS version. Then click on "Sharing."
Selecting Internet Sharing: In the Sharing preferences, select "Internet Sharing" from the list on the left side.
Choosing Your Internet Connection: In the "Share your connection from" dropdown menu, select your Ethernet adapter. This is the connection that receives the internet signal from your network cable.
Selecting the Sharing Method: In the "To computers using" section, check the box next to "Wi-Fi." This tells your Mac to share the internet connection via Wi-Fi.
Configuring Wi-Fi Options: If you're using Wi-Fi for the first time, click on the "Wi-Fi Options…" button. There, you'll set up:
- Network Name: Name your Wi-Fi network (SSID).
- Security: Choose a security type (WPA2 Personal or WPA3 Personal are recommended for security).
- Password: Set a strong password.
Enabling Internet Sharing: Check the box next to "Internet Sharing" to enable it. macOS will then configure the connection sharing and turn your Mac into a Wi-Fi hotspot.
Verifying and Connecting: On your laptop, search for the Wi-Fi network you named earlier, enter the password you set, and connect. Once connected, your laptop should have internet access.
Troubleshooting macOS Internet Connection Sharing
If you face challenges with macOS' sharing feature, take these steps:
- Firewall Settings: Open "Security & Privacy" in System Preferences and ensure that your firewall isn't blocking the connection. Disable the firewall temporarily or configure it to allow connections from other devices on your local network.
- Restart: As with Windows, restarting your Mac and laptop can often resolve network issues.
- Driver Updates: Make sure your network drivers are up-to-date for both your Ethernet and Wi-Fi adapters. macOS generally manages these automatically, but it's good to check for any available updates.
- Network Settings Reset: If you still experience problems, consider resetting your network settings. However, remember that this will remove Wi-Fi passwords and other network configurations.
- Checking Hardware: Make sure your desktop's Ethernet connection is fully working by browsing the internet directly on your desktop and verifying that your Wi-Fi card is enabled, operational, and displaying available networks.
- IP Address Conflicts: You can manually configure a static IP address if your laptop and desktop are having IP address conflicts. Open Network settings, choose your Wi-Fi interface, and enter an IP address on your laptop.
Beyond the Basics: Optimizing Your Shared Connection
Now that you have successfully shared your desktop's Ethernet connection, consider these optimizations:
- Prioritize Bandwidth: Some operating systems allow you to prioritize bandwidth allocation. Ensure that the shared connection is given adequate bandwidth to ensure a good experience on your laptop, especially if others are using your desktop.
- Security First: Always use a strong password for your Wi-Fi network to protect your internet access from unauthorized users. Regularly update your password for added security.
- Monitor Usage: Monitor your data usage to ensure you don't exceed any data caps provided by your internet service provider.
- Wi-Fi Placement: Position your desktop strategically to maximize Wi-Fi signal strength and coverage for your laptop. Place it in a central location, if possible, and avoid obstructions like thick walls or metal objects.
- Regular Maintenance: Periodically check your settings and optimize your drivers to maintain optimal performance and to ensure that the connection remains stable and reliable.
The Benefits: Speed, Stability, and Simplicity
The advantages of tethering your laptop to your desktop's Ethernet are clear. You gain a far more reliable and faster internet connection than relying solely on Wi-Fi, especially in situations with a poor signal or for activities requiring a stable connection. It's a simple, cost-effective solution, eliminating the need for additional hardware or complicated configurations. This effortless setup gives you the flexibility to work, stream, or browse with confidence, regardless of your Wi
