cara setting wifi di laptop windows 7 ultimate

Title: CARA MENGAKTIFKAN WIFI DI WINDOWS 7
Channel: Rdn Channel
CARA MENGAKTIFKAN WIFI DI WINDOWS 7 by Rdn Channel
Unlock Your Windows 7 WiFi: The Easiest Guide EVER!
Windows 7 WiFi: A Smooth Sailing Guide to Wireless Connectivity
So, you are grappling with getting your Windows 7 machine connected to the internet via WiFi? No worries, we've all been there! Furthermore, it can sometimes feel like navigating a labyrinth. Yet, in reality, setting up WiFi on Windows 7 doesn't have to be a headache. Believe me, this isn't rocket science!
Locating Your Wireless Network: The First Step
First things first, let's find your network. Consequently, ensure your laptop's or desktop's wireless adapter is enabled. Luckily, this process is usually quite straightforward. Typically, you'll notice a physical switch on the side or front of your laptop. Alternatively, a function key combination (like Fn + a key with a WiFi icon) might toggle it. If you have a desktop, check your WiFi adapter's settings.
Now, go to the system tray (lower right corner of your screen). You should see a network icon. The icon will likely be a set of bars or a computer monitor. Click it! Immediately, a list of available wireless networks will pop up.
Selecting and Connecting to Your Network
Here's the exciting part. From the list, pick your home WiFi network. It could be labeled with your internet provider's name or a custom name you chose during setup. After selecting your network, click "Connect." Often, Windows 7 prompts you for your network security key (password).
Type in your WiFi password accurately. Be careful with capitalization and special characters! If you're unsure of your password, check your router's label. Furthermore, you can look for it in your router's settings.
Troubleshooting Common WiFi Glitches
Sometimes, things don’t go as planned. But don't panic! Frequently, a simple restart will resolve network connection problems. Restart both your computer and your router. Therefore, give them a couple of minutes to fully boot up.
Next, verify your WiFi adapter is enabled. Go to “Network and Sharing Center.” You can find this in your Control Panel. Then, click “Change adapter settings.” Right-click on your wireless network adapter. Ensure it's enabled. If it's disabled, click “Enable.”
Moreover, check your router's settings. Ensure WiFi is enabled. Also, confirm your network isn’t blocking devices. Additionally, inspect the signal strength. Move closer to your router if necessary. Remember, obstacles like thick walls can weaken the signal. In addition, outdated drivers can cause issues.
Advanced Troubleshooting: Diving Deeper
Still facing trouble? Let's get a little more technical. Right-click on your network icon in the system tray. Select “Troubleshoot problems.” Windows 7's built-in troubleshooter is surprisingly effective. It often identifies and fixes common network problems automatically.
As an alternative, try renewing your IP address. Open a command prompt (search for “cmd” in the Start menu). Then, type ipconfig /release and press Enter. After that, type ipconfig /renew and press Enter again. This process often resolves IP address conflicts.
Updating Your Network Adapter Drivers
Outdated drivers can be the silent villains behind WiFi woes. Go to the Device Manager (search for it in the Start menu). Expand the “Network adapters” section. Right-click on your wireless network adapter. Afterwards, select "Update driver software."
Choose “Search automatically for updated driver software.” Windows 7 will search for the most recent drivers online. If a newer driver is found, it will install it accordingly. If not, manually download the latest driver from your adapter manufacturer's website.
Securing Your Wireless Connection
Security is paramount. Make sure your WiFi network is password-protected. Use a strong password, including a mix of uppercase and lowercase letters, numbers, and symbols. Utilize WPA2 or WPA3 encryption for the best security.
In addition, consider changing your router's default password. This prevents unauthorized access to your network settings. Moreover, regularly update your router's firmware. Updated firmware includes security patches.
Final Thoughts and Further Assistance
Connecting to WiFi on Windows 7 shouldn't be a burden. Through these straightforward steps, you can easily get your connection working. Nonetheless, if you've tried everything above and still struggle, it might be time to seek help. Start by contacting your internet service provider. Their tech support can often diagnose and resolve more complex issues.
Furthermore, explore online forums. Numerous tech communities offer expert advice and troubleshooting tips. Lastly, remember to be patient. WiFi setup can sometimes be a test of endurance. However, remain persistent, and you will get connected! Indeed, happy surfing!
JFK Airport: FREE WiFi & Laptop Rental?! Score HUGE Savings Now!Unlock Your Windows 7 WiFi: The Easiest Guide EVER!
Alright, tech adventurers! Let's be candid for a second: we've all been there. You're itching to binge-watch that new series, catch up with friends, or simply, you know, exist online, but that pesky WiFi refuses to play ball. Windows 7, bless its heart, can sometimes feel like a grumpy old friend. But don't you worry, because we’re about to crack the code and get you connected faster than you can say "internet speeds!" We're talking about unlocking that Windows 7 WiFi, making it sing, and ensuring you're back in the digital loop in a flash. This is the guide, folks, the easiest one you'll ever find. Promise.
1. The WiFi Whammy: Why Isn't My Windows 7 Connecting?
Before we dive headfirst into solutions, let's understand the problem. Think of your WiFi as a locked door. There are a few reasons why you might be standing outside, locked out of the digital party. Is it a bad password? A driver hiccup? A rogue setting playing havoc? We'll explore all the usual suspects, from the simplest fixes to the slightly more techy ones. Consider this step the "detective phase" – we need to identify the culprit before we can bring down the curtain. We're building a solid foundation before we even think about the WiFi!
2. The Basics First: Checking the Obvious (and Often Overlooked!)
Okay, let's start with the super-duper obvious, the things that might make you roll your eyes, but trust me, they're often the culprits.
- Is the WiFi switch on? Yes, I know, sounds silly. But on many laptops, there's a physical switch (sometimes a button combination) to turn the WiFi on or off. Check it! Seriously, don’t be ashamed. We’ve ALL been there.
- Are you in range? Think of your router as a friendly giant. They all have their limits. Make sure you're close enough to it (or have a strong signal). Walls and other devices can weaken the signal.
- Restart the Router and the Computer. It’s like giving your brain a factory reset, but for your tech gear. Sometimes, a simple restart is all it takes to clear away the cobwebs. Power off both devices, wait about 30 seconds, and turn them back on.
See? Easy peasy. If those steps didn’t work, don't sweat it. We have more tricks up our sleeves!
3. Dive Into the Network and Sharing Center: Your WiFi Command Center!
Think of the Network and Sharing Center as the central control room for your internet connectivity. It's where you can monitor your network, troubleshoot problems, and generally boss around your WiFi. To access it:
- Click on the network icon in your system tray (bottom right corner of your screen – looks like a little computer screen or a signal bar).
- Click on "Open Network and Sharing Center".
Let's see what the center has to reveal.
4. Troubleshooting Wizards to the Rescue! (Your Built-In Detectives)
Windows 7 has a secret weapon: a built-in troubleshooting feature designed to diagnose and fix common network issues.
- In the Network and Sharing Center, click on "Troubleshoot problems".
- Select "Network Adapter" or "Internet Connections" (depending on the issue you're experiencing).
- Follow the on-screen prompts.
These helpful wizards can often pinpoint the issue and offer solutions, like fixing a corrupted network driver. It's like having your personal tech support robot.
5. The Device Manager: Your Hardware Inspector
The Device Manager is your window into the heart of your computer's hardware. Here, you can check on your network adapter, ensure it's working correctly, and update its drivers.
- Open the Start Menu and type "Device Manager" into the search bar.
- Click on "Device Manager."
- Look for "Network Adapters." Expand this category.
- Right-click on your WiFi adapter (it might be called something like "Wireless Network Adapter" or something similar, depending on your specific hardware).
- Select "Properties."
- In the "General" tab, check the "Device status." If there's an error message, it'll give you a clue!
- Click on the "Driver" tab. See if there is an update available.
Updating your drivers is like giving your computer a software tune-up. It can resolve compatibility conflicts, bug, and keep your system running smoothly.
6. Driver Dilemmas: Updating or Reinstalling Your WiFi Adapter
Sometimes, the problem lies in your WiFi adapter's drivers, the software that allows your computer to communicate with the hardware. Outdated, corrupted, or incompatible drivers can cause all sorts of issues.
If updating drivers in the Device Manager didn’t do the trick, you might need to reinstall them.
- In the Device Manager (as described above), right-click on your WiFi adapter.
- Select "Uninstall."
- Restart your computer. Windows will often reinstall the drivers automatically.
- If it doesn't, visit the manufacturer's website for your computer or network card to download the latest driver.
Think of it as a software reboot, a fresh start for your WiFi connection.
7. Check Your Security Settings: Is Your Password the Problem?
Double-check your WiFi password. We've ALL been caught by a typo. Consider this step like checking the lock on your front door. One wrong number, and you will be locked out.
- Click on the network icon in your system tray.
- Select your WiFi network.
- If prompted, enter your password carefully, ensuring no typos or capitalization mistakes.
8. The IP Address Tango: Static Vs. Dynamic
Your computer needs an IP address to connect to the internet. Sometimes, these settings can go awry.
- In the Network and Sharing Center, click on "Change adapter settings."
- Right-click on your WiFi connection.
- Select "Properties."
- Select "Internet Protocol Version 4 (TCP/IPv4)" and click "Properties."
- Ensure that "Obtain an IP address automatically" and "Obtain DNS server address automatically" are selected.
These settings allow your network to assign you an IP address automatically.
9. Disabling and Enabling Your WiFi Adapter: A Quick Reset
Sometimes, the simplest solutions are the best. Disabling and then re-enabling your WiFi adapter is like giving it a little electrical shock to get it working again.
- In the Network and Sharing Center, click on "Change adapter settings."
- Right-click on your WiFi connection.
- Select "Disable."
- Wait a few seconds.
- Right-click on the connection again.
- Select "Enable."
This refreshes the connection.
10. Firewall Frustrations: Is It Blocking Your Connection?
Your firewall protects your computer from threats, but sometimes, it can be a bit too protective, blocking your WiFi.
- Open the Control Panel (Start Menu).
- Click on "System and Security" then "Windows Firewall."
- Click on "Allow a program or feature through Windows Firewall."
- Make sure that your WiFi adapter is allowed access. If not, click "Change settings" and check the box next to its corresponding entry.
It’s like getting your bodyguard to stand down.
11. Resetting Your TCP/IP Stack: A Deep Network Cleanse
This is a more advanced troubleshooting step, but it can be helpful if you're still running into problems. It clears out your network settings and can resolve various connectivity issues.
- Open the Start Menu and type "cmd."
- Right-click on "cmd" and select "Run as administrator."
- In the command prompt, type the following commands, pressing Enter after each one:
netsh winsock resetnetsh int ip resetipconfig /releaseipconfig /renewipconfig /flushdns
- Restart your computer.
This is the network equivalent of a deep clean for your computer.
12. Consider a Network Reset: A More Radical Step!
A network reset restores all your network settings to their default values. This often clears up lingering configuration issues.
- Open the Start Menu and type "Network Reset" into the search bar.
- Select "Network Reset."
- Follow the on-screen prompts.
This step is more thorough than a simple restart.
13. The Router Review: Is Your Router the Culprit?
Remember, the router is your gatekeeper to the internet. While we've focused on your computer, the problem might be with your router.
- Restart your router: Unplug the router from the power for at least 30 seconds before plugging it back in.
- **Check the
Cara Cepat Mengaktifkan Wifi di Windows 7

By HandleCustom Cara Cepat Mengaktifkan Wifi di Windows 7 by HandleCustom
Cara Atasi Wifi Mati, Wifi Tidak Mau Konek Not Connected Wifi Pada Windows 7

By asal ngelik Cara Atasi Wifi Mati, Wifi Tidak Mau Konek Not Connected Wifi Pada Windows 7 by asal ngelik
Cara Mengaktifkan Koneksi Internet WiFi Di Windows 7

By MDTechVideos International Cara Mengaktifkan Koneksi Internet WiFi Di Windows 7 by MDTechVideos International
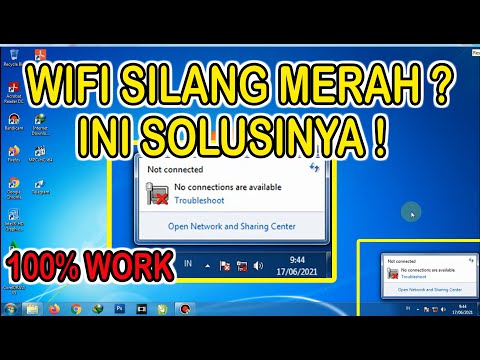
Title: Cara mengatasi wifi silang merah di windows 7 TERBARU
Channel: Ani Saja
Cara mengatasi wifi silang merah di windows 7 TERBARU by Ani Saja
Wifi On Laptop
Unlock Your Windows 7 WiFi: The Definitive Guide to Effortless Connectivity
Navigating the digital landscape requires a constant, reliable WiFi connection. For users still leveraging the robust functionality of Windows 7, establishing and maintaining a stable wireless network is paramount. This comprehensive guide provides a streamlined, step-by-step approach to configuring your WiFi on Windows 7, ensuring a smooth and frustration-free online experience. We will delve into every facet of WiFi setup, from initial configuration to advanced troubleshooting, equipping you with the knowledge to conquer any connectivity challenge. We promise, after reading this guide, you'll experience a world of seamless browsing, high-speed downloads, and crystal-clear video calls.
Section 1: Initial Setup: Laying the Groundwork for Wireless Success
Before diving into the intricacies of WiFi configuration, ensure your hardware is prepared for action. The most crucial element is, of course, a functional wireless network adapter. Windows 7 typically detects and installs drivers for most modern wireless adapters automatically. However, it's wise to proactively confirm driver availability.
1.1 Checking Your Wireless Network Adapter Status and Drivers
Begin by accessing the Device Manager. You can find this by clicking the Start button, typing "Device Manager" in the search bar, and selecting it from the results. Alternatively, right-click on "Computer" (either on your desktop or in the Start menu) and select "Manage". In the Computer Management window, choose "Device Manager."
In the Device Manager, expand the "Network adapters" category. You should see your wireless network adapter listed here. If your adapter has a yellow exclamation mark next to it, the driver is missing or outdated. If a red "X" appears, the adapter is disabled.
If you identify a driver issue, there are several courses of action. Windows 7 often includes drivers for common adapters. Right-click on your adapter and select "Update driver software". Choose "Search automatically for updated driver software". Windows will attempt to locate and install the appropriate driver. If this yields no results, you'll need to download the correct driver from the manufacturer's website. Common manufacturers include Intel, TP-Link, and Realtek. Navigate to their support pages, enter your adapter's model number, and download the driver compatible with Windows 7.
1.2 Enabling Your Wireless Network Adapter
If your adapter is listed with a red "X", it is disabled. Right-click your adapter and select "Enable." This will activate the adapter and allow you to begin the WiFi setup process.
Section 2: Connecting to Your Wireless Network: The Step-by-Step Guide
Once your wireless network adapter is functioning correctly, establishing a connection to your WiFi network is a straightforward process. Windows 7 simplifies this process with an intuitive interface.
2.1 Accessing the Wireless Network Connection Menu
Click the network icon in your system tray (the area in the bottom-right corner of your screen, next to the clock). This icon resembles a series of bars or a computer screen with a signal. This will display a list of available wireless networks within range.
2.2 Selecting Your Network and Entering Your Password
From this list, identify your WiFi network's name (also known as the SSID). It's typically displayed as the name you assigned to your network during router setup. Select your network and click "Connect".
You will then be prompted to enter your network security key (or password). This password is crucial for protecting your network from unauthorized access. Carefully enter the password, paying close attention to capitalization and special characters. The "Hide characters" checkbox can be deselected to show the password. This helps in confirming you have entered the correct password. Once you've entered the password, click "OK" or "Connect".
2.3 Troubleshooting Connection Issues: Common Roadblocks and Solutions
Sometimes, the connection process doesn't go as smoothly as planned. Here are some common issues you may encounter and their solutions:
Incorrect Password: Double-check your password. Ensure you're entering the correct characters, including capitalization and symbols. Try connecting again.
Network Out of Range: Move closer to your router. Walls and other obstructions can weaken the WiFi signal.
Router Issues: Restart your router by unplugging it from the power outlet for 30 seconds, then plugging it back in. This often resolves temporary router glitches that can disrupt connectivity.
Firewall Interference: Your firewall might be blocking the connection. Temporarily disable your firewall to see if this resolves the issue. If it does, you'll need to configure your firewall to allow access to your wireless network. Instructions on how to do so vary depending on the firewall software you’re using. Ensure to re-enable the firewall.
Section 3: Advanced Configuration and Optimizing Your WiFi Experience
Once you've established a basic connection, you can further customize your WiFi settings to optimize performance and security.
3.1 Changing Network Properties
After connecting to the wireless network, you can adjust network properties. Right-click the network icon in the system tray and click on "Open Network and Sharing Center." Here, you can modify the network profile (e.g., Home, Work, or Public). This affects file sharing and security settings. You can also view the properties of your wireless connection. Click on "Change adapter settings" on the left-hand side. Right-click on your wireless network adapter and select "Properties."
3.2 Configuring TCP/IP Settings: IP Addressing and DNS
In the properties window, you’ll find a list of network components. Select "Internet Protocol Version 4 (TCP/IPv4)" and click the "Properties" button.
By default, Windows 7 is configured to obtain an IP address and DNS server addresses automatically. This is the recommended setting for most users. However, if you require a static IP address (often necessary for advanced network configurations), you'll need to enter the IP address, subnet mask, default gateway, and DNS server addresses manually. This information will be provided by your network administrator or ISP.
3.3 Securing Your Wireless Network: Encryption Protocols
Security is paramount when it comes to your wireless network. It’s important to use a strong encryption protocol, such as WPA2 or WPA3*. If your router supports it, strongly consider using WPA3 for the best security. These encryption protocols provide a high level of protection against unauthorized access. To configure your router's encryption settings, you'll need to access your router's administration interface. This is typically accessed through a web browser by entering your router's IP address (usually 192.168.1.1 or 192.168.0.1) in the address bar. Consult your router's manual for the specific IP address and login credentials.
Section 4: Troubleshooting Common WiFi Problems
Even with a perfectly configured network, occasional issues may arise. This section provides solutions for common problems.
4.1 Slow Internet Speed
If your internet speed is noticeably slow, several factors could be at play. Check your internet speed using an online speed test. If the speed is significantly lower than what you're paying for, your router or internet service provider (ISP) may be experiencing issues.
Router Placement: Ensure your router is placed in a central location, away from obstructions.
Interference: Other devices (microwaves, cordless phones) can interfere with the WiFi signal. Try repositioning your router away from potential sources of interference or changing the WiFi channel.
Number of Connected Devices: Too many devices connected to the network simultaneously can strain the bandwidth.
Malware: Run a full system scan using your antivirus software.
4.2 Constant Disconnections
If your WiFi connection frequently drops, consider these steps:
Driver Updates: Ensure your wireless adapter drivers are up-to-date.
Router Firmware: Check for a firmware update for your router. Firmware updates often include performance enhancements and bug fixes.
Router Reset: Resetting your router to factory settings can sometimes resolve persistent connection issues.
Interference: Again, check for interference from other devices.
4.3 Limited or No Connectivity
If you're connected to the network but can't access the internet, the problem may lie with your IP address configuration, DNS settings, or router. Double-check your settings and ensure they're correct. Try restarting your router. Contact your ISP if the problem persists.
4.4 Managing Saved Wireless Networks
Windows 7 stores information about the wireless networks you’ve connected to. To manage these networks, go to "Open Network and Sharing Center" (as described in Section 3.1). Click on "Manage wireless networks" on the left side. From here, you can remove networks, change connection settings, or view saved passwords.
4.5 Using the Network Troubleshooter
Windows 7 includes a built-in network troubleshooter that can automatically diagnose and fix common network problems. Right-click the network icon in the system tray and choose "Troubleshoot problems". Follow the on-screen instructions. This can often resolve connection issues.
Section 5: Staying Connected: Proactive Measures for Wireless Resilience
Maintaining a strong and reliable WiFi connection requires ongoing vigilance. By implementing these proactive measures, you can minimize the likelihood of future connectivity woes.
5.1 Regular Driver Updates
Make it a habit to periodically check for driver updates for your wireless network adapter. Manufacturers frequently release updated drivers to improve performance, stability, and security. Visit the
