function key on hp laptop for wifi
Title: How to Lock or Unlock the Fn Function Key on an HP Notebook HP Support
Channel: HP Support
How to Lock or Unlock the Fn Function Key on an HP Notebook HP Support by HP Support
function key on hp laptop for wifi, which function key turns on wifi on hp laptop
HP Laptop WiFi Button: The Secret Your Tech Guru Isn't Telling You!
Unlocking the Wi-Fi Enigma: The Hidden Truth About Your HP Laptop's Button
Ever glanced at that innocent-looking button on your HP laptop, the one bearing the Wi-Fi symbol? You probably flick it on and off without a second thought. However, there’s a fascinating story behind this simple interface. It’s a tale most tech gurus conveniently omit from their tutorials. Prepare to delve into the secrets of your HP laptop's seemingly mundane Wi-Fi button.
Beyond the Binary: More Than Just On and Off
The Wi-Fi button isn't just a switch. Consider it the gatekeeper to your digital realm. It manages a complex dance of signals. Consequently, it's far more important than most users realize. Initially, you might think it just enables or disables your wireless connection. But, its function extends deeper. For instance, this button's role is paramount in how your laptop interacts with the internet. It directly influences your online experience.
The Invisible Hand: How the Button Orchestrates Wi-Fi Magic
This petite button holds immense power. The button doesn't merely flip a switch. Instead, it communicates with your laptop's internal systems. It signals the network adapter to search for available Wi-Fi networks. Therefore, it's about more than just turning the Wi-Fi on. It also oversees the connection process, ensuring a smooth and secure experience. Surprisingly, even when you think your Wi-Fi is off, the button might still be playing a hidden role. It could be conserving power, for example.
Troubleshooting Troubles: When the Button Betrays
Have you ever experienced Wi-Fi woes? Perhaps your connection drops unexpectedly. Maybe your laptop refuses to connect at all. In such situations, the Wi-Fi button is often the first suspect. However, its behavior can provide clues. Consider if the button lights up, for example. A solid light generally indicates Wi-Fi is enabled. Conversely, a blinking light might signal a connection attempt. Therefore, observing its behavior provides vital clues. So, what if it doesn't light up at all? Troubleshoot the button itself, next.
Software Shenanigans: Drivers and the Digital Dance
Your Wi-Fi button relies heavily on software. Specifically, it relies on drivers. These are essentially translators. They bridge the communication gap between hardware and the operating system. Consequently, outdated or corrupted drivers can cripple the button's functions. Updating these drivers is crucial. You should regularly check for updates. Also, reinstalling the drivers might resolve persistent connectivity problems.
Hardware Hiccups: Examining the Physical Realm
Sometimes, the problem transcends software. It delves into the physical realm. The Wi-Fi button itself might be faulty. It’s rare, but it happens. Furthermore, physical damage can hinder its performance. Inspect the button for any visible issues. Are there any cracks or loose parts? If you suspect a hardware malfunction, you may need professional help. You could consider taking it to a repair shop.
Power Savings and the Button's Subtle Influence
Beyond connectivity, the Wi-Fi button plays a significant role in energy efficiency. When you disable Wi-Fi, your laptop conserves power. This is especially important for battery life. The button contributes to a longer lifespan by preventing background processes. Therefore, it directly impacts the overall performance of your device. It's often more effective than some realize.
Beyond the Basics: Advanced Button Behavior
The Wi-Fi button offers more than simple on/off functionality. Some HP laptops support a "hardware switch" which offers a more direct control over the Wi-Fi adapter. Furthermore, this physical switch bypasses the operating system. In these cases, you control Wi-Fi even if the operating system is unresponsive. Consequently, this offers added security. It is also helpful during critical troubleshooting.
The Guru's Secret: What They Aren't Telling You
Now for the real secret. Many tech experts focus on the surface. They don’t delve into the nuances. Instead, they present a simplified view. The Wi-Fi button is more than just a switch. It’s a gateway. It’s a power-saving tool, and a troubleshooting asset. Armed with this knowledge, you're no longer just a user. You are now an informed explorer of your HP laptop.
Final Thoughts: Mastering the Wi-Fi Realm
The Wi-Fi button on your HP laptop is not just a simple control. It is an integral part of your digital experience. You should now appreciate its significance. Understand its functionality. Therefore, you can troubleshoot connectivity problems. By understanding the button's influence, you are now in control. So, next time you use that button, remember its hidden power. You now know The Secret Your Tech Guru Isn't Telling You!
Dell WiFi Down? Get It Back ONLINE Now!HP Laptop WiFi Button: The Secret Your Tech Guru Isn't Telling You!
Alright, tech aficionados! Let's dive into a piece of hardware that often gets overlooked, yet holds the key to unlocking seamless Wi-Fi connectivity on your HP laptop: the elusive WiFi button. You know, that little gem that sits there, patiently waiting to be pressed, usually with a symbol that looks like a radio tower. But let’s be honest, how often do we truly understand what it does? More importantly, what secrets is your tech guru keeping from you? This is where we come in. We're not just going to tell you how to use it; we're going to delve into the why and the what if. Buckle up, buttercups!
1. The Unsung Hero: Unveiling the HP Laptop WiFi Button
Think of your WiFi button as the gatekeeper to your digital world. It's the bouncer at the door to the internet party. It's the one thing standing between you and cat videos, Zoom calls, and that urgent email from your boss. Yet, it’s often just there. Hidden in plain sight. We often take it for granted, like breathing or the sun rising. But what if we told you there's more to this little button than meets the eye? We're talking about more than just turning your Wi-Fi on and off. We're talking about troubleshooting, understanding, and ultimately, taking control of your HP laptop's wireless destiny.
2. Beyond the On/Off: The Button's Hidden Powers
So, what else does this little guy do? Well, the primary function, of course, is to toggle your Wi-Fi radio. But it can be much more elegant than that! Sometimes, it’s a simple software switch. Other times, it interacts with dedicated hardware, a physical chip designed exclusively for wireless communication. Knowing which method is deployed on your specific HP model often determines a whole host of additional functionality we shall discuss.
3. Locating Your Wi-Fi Button: A Treasure Hunt!
First things first: where is it? Unlike the power button, which is usually front and center, the WiFi button is a bit of a sneaky character. You might find it in several usual spots:
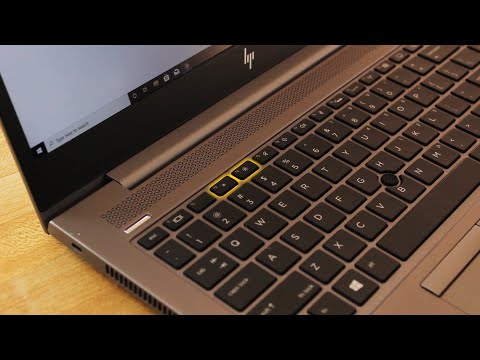
- Above the Keyboard: Often nestled among the function keys (F1-F12), often marked with a radio wave symbol.
- Along the Side: Some HP laptops feature a physical switch on the side.
- Keyboard Shortcuts: Sometimes, you control the WiFi button by using a combination of keys (e.g., Fn + F2).
Finding it demands a little detective work, so consult your laptop's manual if you’re stumped. It’s like finding the right ingredient in the kitchen – once you know where it is, you’re set.
4. When the Button Betrays: Troubleshooting Tips
Now, let’s be real: sometimes, that little button doesn’t cooperate. Wi-Fi refuses to connect? Fear not, fellow travelers! Here are some troubleshooting steps:
- The Obvious Check: Is your WiFi button actually turned on? Sounds silly, but check!
- Restart Reality: Reboot your laptop. Sometimes, the digital gremlins just need a good ol' reset.
- Driver Drama: Check your wireless network adapter drivers in Device Manager. Outdated drivers cause problems.
- Airplane Mode Abyss: Make sure Airplane mode isn't activated. Yes, it happens to the best of us.
- Physical Inspection: On some models, the switch can become dislodged internally or physically be faulty. Check for any damage.
5. The Great Debate: Software vs. Hardware Control
Here’s a question that will raise your tech-savviness a few notches: Is your WiFi button controlled by software, hardware, or a bit of both? Understanding this distinction can help you troubleshoot more effectively. Hardware controlled buttons generally have a direct impact on the radio adapter using a physical switch or a dedicated chip. Software control is based on an application.
6. The Software Switch: A Deeper Dive
If your button is software-controlled, it’s essentially toggling a setting within the operating system. This means that your operating system is, in effect, receiving the signal and subsequently acting. You may find this less reliable or vulnerable to software bugs, but it also helps conserve power.
7. Hardware Control: A Direct Approach
Hardware control is more immediate and often more reliable. The button physically cuts or connects the power to your Wi-Fi adapter. This is like pulling the plug from the wall – the connection is instantly severed. This model is less susceptible to software glitches, but it can drain more power if continuously active.
8. The Power Saving Paradox: Battery Life Considerations
This is where things get interesting. Keeping your Wi-Fi on all the time can guzzle battery life. This is why the WiFi button is so useful! Turning off your Wi-Fi when you're not using it will extend your battery life longer.
9. The "Fn" Key Conundrum: Keyboard Combinations
Many HP laptops use the Fn key (Function key) in combination with another key to control Wi-Fi. Usually, it's one of the F1-F12 keys, marked with a radio wave symbol. If your button is among this number, pressing Fn + the appropriate key toggles the wireless functionality. This can sometimes be disabled in your BIOS settings if you prefer separate switch controls.
10. The BIOS Factor: Customizing your WiFi Control
Speaking of BIOS, you might be able to customize how your WiFi button functions within your laptop's BIOS settings. This is something your tech guru might not tell you, as BIOS settings are usually for advanced users.
11. Security Secrets: The WiFi Button as a Security Measure
Disabling your Wi-Fi via the button is an important security measure. Disabling it while using a public network or when you’re not actively browsing can protect your device from potential threats.
12. Beyond the Basics: Advanced Usage Scenarios
- Network Profiling: Some HP laptops allow you to create network profiles. Use the button to quickly switch between them.
- Hardware Diagnostics: In some cases, the button can be used (in conjunction with other keys) to launch hardware diagnostic tests.
13. The Impact of Software Updates: Driver Dynamics
Regularly updating your drivers is critical for optimal WiFi performance. The WiFi button can be a victim of corrupted old drivers or malfunctioning new ones. Keep an eye on driver updates from HP's website.
14. Decoding the LED Indicator: What the Lights Tell You
Most HP laptops have an LED indicator to show the status of your WiFi connection. If it's solid blue, you’re connected. If it's blinking, it's searching. A red light usually indicates a problem. Learning to read these lights is like learning a secret language that your laptop speaks.
15. Future-Proofing Your Wireless Connectivity: The Next Steps
The world of wireless technology is continuously evolving. Newer standards like Wi-Fi 6 and Wi-Fi 6E are already out there. Keep an eye on the latest developments and ensure your laptop's Wi-Fi adapter is future-proof to enjoy faster and more reliable connections.
Closing Thoughts
So, there you have it! The secrets behind the HP laptop WiFi button, unveiled. This seemingly simple button is a gateway to controlling your wireless world, protecting your battery life, and troubleshooting connectivity issues. The next time you press that button, do it with a bit more insight and understanding. You're now armed with the knowledge to navigate the digital world with confidence!
FAQs
1. My WiFi button doesn't seem to be working. What should I do?
First, ensure the button is physically turned on and that the software hasn't disabled your WiFi. Then restart your laptop. Check your network adapter drivers and consider updating them. Consider checking and toggling Airplane mode as well. If problems persist, consult the HP support website.
2. Is it safe to leave my WiFi on all the time?
While it's convenient, leaving your WiFi on constantly can drain your battery and open up potential security risks. Turn it off when not in use, particularly on public networks.
3. What does the radio wave symbol next to the button mean?
That symbol represents radio waves and, by extension, wireless communication. It's a visual clue that this button controls your WiFi.
4. My laptop's WiFi suddenly stopped working after a Windows update. What happened?
A recent Windows update may have installed an incompatible or corrupted driver. Revert to the previous driver version or download the latest driver from the HP website.
5. Can I disable the WiFi button entirely?
While you can't typically "disable" the physical button, you can disable its functionality through Windows settings, or sometimes by changing the BIOS. This is often not recommended because in case there's a problem, it can be difficult to activate Wi-Fi again.
- Principal Keywords: HP WiFi Button Secrets.
- SEO Headline: HP Laptop WiFi Button Secrets: The Hidden Truth!
- Pathway: HP WiFi Button Secrets
- Meta Summary: Uncover the secrets of your HP laptop's WiFi button! Learn troubleshooting tips, battery-saving hacks, and more. Don
Turn ONOFF FN key in HP Laptop

By Harinadh Ankireddy Turn ONOFF FN key in HP Laptop by Harinadh Ankireddy
HP Laptop Brightness Keys Not Working FIX
By Graphically Challenged HP Laptop Brightness Keys Not Working FIX by Graphically Challenged
HP Laptop Wifi Not Working in Windows 11 10 8 7 - How To Fix Wi-Fi Problems

By Victor Explains HP Laptop Wifi Not Working in Windows 11 10 8 7 - How To Fix Wi-Fi Problems by Victor Explains

Title: The orange wifi button problem - solved, fixed.
Channel: Stan IT
The orange wifi button problem - solved, fixed. by Stan IT
Wifi On Laptop
Here's the title: The Definitive Guide to Mastering the Art of Sourdough Bread Baking at Home
The Definitive Guide to Mastering the Art of Sourdough Bread Baking at Home
For centuries, sourdough bread has captivated palates and cultures alike. Its tangy flavor, chewy texture, and artisan appeal have made it a staple worldwide. Yet, the seemingly complex process of crafting this culinary masterpiece often intimidates aspiring bakers. This comprehensive guide aims to demystify sourdough, providing you with the knowledge and techniques necessary to create exceptional loaves in the comfort of your own kitchen. We will delve into every aspect of sourdough, from nurturing your starter to achieving that perfect crust and crumb.
The Foundation: Cultivating Your Sourdough Starter
The heart and soul of any outstanding sourdough bread reside in the vibrant ecosystem of your starter. Often referred to as a "levain" or "mother," this living culture is a symbiotic blend of wild yeast and beneficial bacteria that leavens and flavors the dough.
Creating Your Starter from Scratch:
Embarking on this journey begins with a blend of equal parts unbleached, all-purpose flour and filtered, chlorine-free water. Combine these in a clean glass jar, stirring until a smooth slurry forms. Cover the jar loosely with a lid or cloth and allow it to rest at room temperature, ideally between 70-75°F (21-24°C).
Over the next few days, observe the mixture. You are looking for signs of activity – bubbles, slight expansion, and perhaps a faint sour aroma. On day two or three, discard half the mixture and feed it again with equal parts flour and water. This discard process is crucial to maintaining balance and preventing the culture from becoming overly acidic too soon. Continue this pattern for about a week, making sure to discard half and feed daily.
Recognizing a Healthy Starter:
A mature starter will exhibit a range of characteristics. It will double or triple in size within a few hours after feeding. The surface will be bubbly, and the aroma will be pleasantly sour, reminiscent of yogurt or ripe apples. Avoid any molds or discoloration. If you notice orange or pink streaks, discard the entire starter.
Maintaining Your Starter:
Once your starter is active, regular maintenance is critical. The frequency of feeding depends on your baking schedule and the ambient temperature. If you bake frequently, feeding it daily is recommended. If you bake less often, store it in the refrigerator. When stored cold, you should feed it once per week.
Feeding Your Starter:
When refreshing your starter, always discard a portion (usually half). This ensures that the remaining culture has an adequate supply of nutrients. Use a 1:1:1 ratio for your feed. For example, if you have 10 grams of starter, you will add 10 grams of flour and 10 grams of water. Always stir thoroughly, then cover and let it rest at room temperature until it has shown signs of activity.
Choosing Your Flour: The Cornerstone of Texture and Flavor
The type of flour you select significantly influences the final outcome of your sourdough bread. While all-purpose flour can produce acceptable results, experimenting with different flours opens up a world of flavor and texture possibilities.
Flour Options:
- All-Purpose Flour: A versatile workhorse, creating a good base structure. However, it has a lower protein content, resulting in slightly less open crumb. Look for unbleached options for the best flavor development.
- Bread Flour: Boasting a higher protein content (around 12-14%), bread flour develops a stronger gluten structure. This leads to a chewier crumb and a higher rise.
- Whole Wheat Flour: This flour contributes a rustic flavor and a more complex structure. However, it can sometimes hinder the rise due to the bran interfering with gluten development. Use it in moderation, especially when starting out.
- Rye Flour: Rye flour adds a distinct tangy flavor and moist texture. It behaves differently than wheat flour and may require adjustments in your hydration level.
Flour Variations and Blending:
Experimenting with flour blends can enhance both flavor and texture. For instance, combining bread flour with a small percentage of whole wheat flour can add complexity, while rye flour brings a unique tang. The key is to understand how different flours react.
The Art of the Autolyse: Unlocking Gluten Development
The autolyse is a simple yet transformative step that dramatically enhances the final texture of your sourdough bread. This technique involves mixing the flour and water together and letting it rest, typically for 30-60 minutes, before adding the starter and salt.
The Purpose of Autolyse:
The autolyse allows the flour to fully hydrate, facilitating gluten development. It relaxes the gluten strands, making the dough more extensible and easier to shape. This results in better oven spring and a more open crumb.
Executing the Autolyse:
Combine your flour and water in a mixing bowl and stir briefly until just combined. If you are using whole grains, you may want to let the autolyse sit longer. Cover the bowl and rest at room temperature. After the resting period, add your starter and salt.
Mixing, Kneading, and Bulk Fermentation: The Building Blocks of Structure
Once the autolyse is complete, the dough is ready for the next crucial phase: mixing, kneading, and bulk fermentation.
Mixing the Dough:
Gently fold the starter and salt into the autolysed dough. This can be done by hand or with a stand mixer.
Kneading (Optional):
While sourdough is known for its no-knead characteristics, some kneading can enhance gluten development. For hand kneading, develop a rhythm and the dough will become smooth and elastic. In a stand mixer, begin on low speed and gradually increase it.
Bulk Fermentation: The Heart of Flavor and Structure:
Bulk fermentation is the primary fermentation phase. This is where the sourdough starter works its magic, producing carbon dioxide to leaven the dough and lactic acid to develop flavor. During this phase, the dough is left at room temperature.
Assessing Bulk Fermentation:
The duration of bulk fermentation depends on several factors, including the temperature of your kitchen, the strength of your starter, and the type of flour used. A good rule of thumb is to observe the dough. Look for a 30-50% increase in volume and the presence of bubbles throughout the dough.
The Fold Technique
During bulk fermentation, you'll perform "folds" every 30-60 minutes for the first few hours. This technique helps strengthen the gluten structure by stretching and folding the dough over itself.
Shaping, Proofing, and Baking: Bringing It All Together
After bulk fermentation, the dough is ready to be shaped. Proofing, the final rise, is also a very important step. Finally, baking is the culmination of all the previous steps.
Shaping the Dough:
Gently turn the dough out onto a lightly floured surface. Flatten it and then form it into a round or oblong shape. For a round loaf, gently pull the edges of the dough towards the center to create tension on the outside of the dough.
Proofing: Preparing for the Oven:
Proofing is the final rise. Once the dough is shaped, place it in a banneton basket lined with flour to maintain its shape. Cover, and let it proof at room temperature for a shorter time or in the refrigerator for longer. Cold proofing develops flavor more.
Baking: Achieving the Perfect Crust and Crumb:
Preheat your oven to a high temperature (usually around 450-500°F or 232-260°C), ideally with a Dutch oven inside. Carefully place the proofed loaf (dough) inside the preheated Dutch oven. Cover the Dutch oven with the lid and bake for a set time (20-25 minutes) for the oven spring. Then remove the lid and reduce the oven temperature, baking until the crust is golden brown.
The Importance of Oven Spring:
Using a Dutch oven helps trap steam, leading to exceptional oven spring. This rapid expansion of the dough in the oven creates a light and airy crumb.
Cooling: The Final Step:
Once baked, remove the loaf from the oven and allow it to cool completely on a wire rack before slicing. This critical step prevents the crust from becoming soggy and allows the crumb to set.
Troubleshooting Common Sourdough Challenges
Even experienced bakers encounter challenges. Here are some common issues and how to address them:
- Flat Loaf: This can be due to several factors: an under-proofed starter, insufficient gluten development, under-proofing, or oven temperature that is too low.
- Dense Crumb: This suggests under-proofing or over-proofing, an inactive starter, or an incorrect baking schedule.
- Sour Taste: This is desirable, but if too acidic, it can indicate the starter is over-fermented or the bulk fermentation was too long.
- Cracked Crust: This can occur during baking if the loaf has too much tension on its surface before baking. Ensure the dough is shaped properly and scored before baking.
Beyond the Basics: Unleashing Your Culinary Creativity
Once you master the fundamental techniques, the world of sourdough is your oyster. Experiment with different flour types, add-ins (seeds, nuts, dried fruits, etc.), and recipes to create unique masterpieces. Incorporate sourdough starter into other baking projects, like pancakes, waffles, and even pizza dough.
