how to turn laptop into wifi repeater

Title: How to make any Windows computer or laptop as WiFi Repeater or WiFi Extender
Channel: UniqueTutorials
How to make any Windows computer or laptop as WiFi Repeater or WiFi Extender by UniqueTutorials
turn laptop into wifi repeater
Laptop to WiFi Hotspot: The SHOCKINGLY Easy Trick!
Unlock the Secret: Turn Your Laptop into a WiFi Powerhouse!
Ever felt stranded in a digital desert, yearning for a WiFi oasis? We've all been there. That frustration is truly universal. It’s the modern-day equivalent of being cut off from the world. Fortunately, there's a surprisingly simple solution. You can transform your trusty laptop into a personal WiFi hotspot. Prepare yourself for a revelation, because this is easier than you think!
Bridging the Gap: Why You Need a Laptop Hotspot
Think about the times you’ve needed internet access. Maybe you were working remotely in a park. Perhaps your home WiFi decided to take a vacation. Or perhaps you were sharing data with a friend. In those scenarios, a laptop hotspot is a lifesaver. It offers a convenient way to connect multiple devices to the internet. Furthermore, it provides flexibility and independence. In addition, it’s a great backup plan.
The Magic Behind the Curtain: How It Actually Works
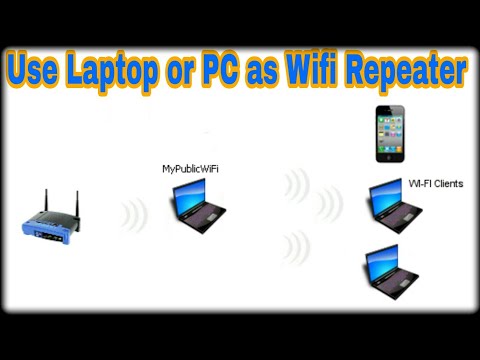
The core principle is remarkably straightforward. Your laptop, equipped with a built-in WiFi adapter, broadcasts an internet signal. This signal acts as a gateway. It's essentially your laptop becoming a personal WiFi router. Consequently, other devices can connect to this signal. They then share the internet connection your laptop is currently using. This usually comes from your mobile data plan or ethernet connection.
Step-by-Step Guide: Activating Your Laptop's Hidden Power
Now, let's get down to brass tacks. The process varies slightly depending on your operating system. However, the basic steps remain consistent.
For Windows Users:
- Navigate to Settings: Click on the Start menu and select "Settings."
- Find the Network & Internet: Choose "Network & Internet."
- Mobile Hotspot: Select "Mobile hotspot" from the options on the left side.
- Enable and Configure: Turn on “Mobile hotspot”. Customize your hotspot name and password. For the hotspot name, choose something easy to remember. Opt for a strong password for security.
- Connect Your Devices: Search for your hotspot's name on other devices and enter the password. And that's it - your devices are connected!
For Mac Users (macOS Ventura and later):
- Open System Settings: Click the Apple menu and select "System Settings."
- Select "Network": In the sidebar, click “Network.” (You may need to scroll down.)
- Choose "Personal Hotspot": Enable or configure it.
- Connect Your Devices: Connect your other devices. It’s that simple.
Troubleshooting Common Hiccups: Smooth Sailing Ahead
Sometimes, things don't go according to plan. Don't worry, this is normal. Here are some common problems and their solutions.
- Connectivity Issues: Double-check your laptop's internet connection. Additionally, ensure your other devices are within range of the hotspot.
- Password Problems: Make sure you are entering the correct password. Remember, it's case-sensitive.
- Slow Speeds: Consider that multiple connected devices can affect your internet speed. Therefore, limit the number of devices. Then, close bandwidth-intensive applications.
- Hotspot Not Showing Up: Restart your laptop and the device trying to connect. Also, it may be a software issue, so run any available updates.
Therefore, there are some simple solutions.
Beyond the Basics: Enhancing Your Hotspot Experience
You can further customize your experience. Consider the following tips.
- Monitor Data Usage: Keep an eye on your data consumption. You will avoid unexpected charges.
- Protect Your Privacy: Always use a strong password. Never share it casually.
- Optimize Your Location: Place your laptop in a central location. This maximizes signal strength.
The Takeaway: Empowering Your Digital Lifestyle
Converting your laptop into a WiFi hotspot is not merely a neat trick. Instead, it's a fundamental skill. It's about embracing digital freedom. It is about always staying connected. Furthermore, it provides a solution for various scenarios. For instance, from impromptu work sessions to sharing data with friends. Ultimately, this simple technique opens doors for you. So, go forth and unlock the full potential of your laptop! Finally, you’ll be able to savor the ultimate connection.
Dell Laptop WiFi Vanished? 😱 Get It Back NOW!Laptop to WiFi Hotspot: The SHOCKINGLY Easy Trick!
Hey everyone, ever found yourself in a Wi-Fi desert? You're on the road, at a friend's place with spotty internet, or maybe your home Wi-Fi is just…down. Disaster, right? Fear not, because we’re about to unlock a super-secret, incredibly easy trick that turns your laptop into a personal Wi-Fi hotspot. Forget juggling multiple devices or relying on unstable public networks. This is about taking control and staying connected – anywhere, anytime.
The Problem: The Modern Digital Nomad’s Nightmare
Let’s be honest, we’re all digital nomads to some degree these days. Whether you're a full-time remote worker, a student, or just someone who likes to catch up on their favorite shows, a reliable internet connection is essential. So, what happens when your primary internet source fails you? Frustration. Anxiety. And maybe even a complete shutdown of your productivity. Having to hunt for public Wi-Fi, with all its security risks and slow speeds, is like navigating a digital minefield. This is where turning your trusty laptop into a Wi-Fi hotspot becomes a game-changer.
The Solution: Your Laptop, Your Personal Wi-Fi Generator
This isn't some complicated tech wizardry; it’s a simple process that leverages the built-in capabilities of your laptop. Think of your laptop as a tiny, portable Wi-Fi router. The beauty of this trick is its simplicity and effectiveness. We're essentially teaching your laptop to share its internet connection – usually from your wired Ethernet connection or your mobile data – with other devices. It's like sharing a slice of your delicious virtual pie!
Prepping Your Laptop: Before We Start
Before we dive headfirst into the magical hotspot transformation, let’s make sure you’re ready. This is like prepping your ingredients before you bake a cake.
- A Laptop (Duh!): Obviously, you need a laptop. Any modern laptop running Windows, macOS, or even Linux will work.
- An Internet Connection: This is the source of your new hotspot. This could be a wired Ethernet connection at home, or your mobile data connection if you have a mobile broadband plan.
- A Little Patience: The process is straightforward, but like learning any new skill, it might take a minute or two to get the hang of it.
Turning Your Windows Laptop into a Hotspot: The Step-by-Step Guide
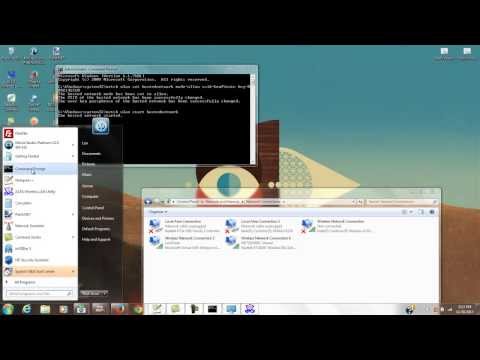
Let’s get down to business! Here's how to transform your Windows laptop into a Wi-Fi hotspot:
- Open Settings: Click the Start button (the Windows logo, usually in the bottom-left corner) and then click the 'Settings' icon (it looks like a gear).
- Navigate to Network & Internet: In the Settings window, click on 'Network & Internet'.
- Mobile Hotspot: Select 'Mobile Hotspot' from the menu on the left.
- Enable Mobile Hotspot: There will be a switch that says "Share my internet connection from." Select the internet connection you want to share (Ethernet or Wi-Fi). Then, toggle the "On" switch.
- Edit Network Details: Click the 'Edit' button under 'Share my internet connection from'. Here, you can customize your hotspot:
- Network Name: Choose a name for your Wi-Fi network (SSID). Make it something memorable!
- Network Password: Create a strong password. This is crucial for security.
- Connect Your Devices: On your other devices (phone, tablet, etc.), find your newly created Wi-Fi network in the list of available networks and connect using the password you set. Voila! You’re connected.
Turning Your macOS Laptop into a Hotspot: The Apple Way
Alright, Apple fans, here's how to make your Mac a Wi-Fi hotspot:
- Open System Preferences: Click the Apple icon in the top-left corner of your screen and select 'System Preferences'. (If you're on a more recent macOS, this will be 'System Settings'.)
- Select Sharing: Click on the 'Sharing' icon.
- Internet Sharing: In the left-hand sidebar, select 'Internet Sharing'.
- Share Your Connection From: Select the internet connection you want to share (Wi-Fi, Ethernet, etc.).
- To Computers Using: Check the box next to 'Wi-Fi'.
- Wi-Fi Options: Click the 'Wi-Fi Options…' button. Here, you can customize:
- Network Name: Give your hotspot a name.
- Channel: Leave this on automatic unless you know what you're doing.
- Security: Choose WPA2 Personal (recommended) and create a strong password.
- Start Sharing: Check the Internet Sharing box to turn it on. A prompt might appear asking if you want to allow the internet sharing - Click 'Start'.
- Connect Your Devices: Your other devices can now connect to the hotspot just like any other Wi-Fi network.
Troubleshooting Common Hotspot Hiccups
Sometimes, things don't go according to plan. Here are a few common issues and how to fix them:
- My Other Devices Can't See the Hotspot: Double-check that your hotspot is actually enabled and that you’ve entered the correct network name and password. Also, ensure all of your devices are within range.
- Slow Internet Speed: This is often related to the original internet connection. If your source internet is slow, your hotspot will also be slow. Try a speed test on your main laptop to confirm.
- Connection Drops: Ensure that your source internet is stable. Also, consider that many devices connecting to the hotspot will naturally slow down speeds.
Security First: Protecting Your Personal Hotspot
Just like any Wi-Fi network, security is paramount.
- Strong Passwords: Use a strong, unique password for your hotspot. Avoid easy-to-guess passwords like birthdays or common words.
- Encryption: Ensure your hotspot uses WPA2 or WPA3 encryption. This encrypts the data transmitted over the network.
- Monitor Connected Devices: Regularly check which devices are connected to your hotspot and remove any that you don't recognize.
- Turn it Off When Not in Use: Don't leave your hotspot running unnecessarily. This is a security risk and consumes battery.
Beyond the Basics: Advanced Hotspot Tweaks
Want to take your hotspot game to the next level?
- Bandwidth Limiting: Some devices have bandwidth limiting options. This lets you restrict the amount of data a device can use, preventing one device from hogging all the bandwidth.
- MAC Address Filtering: You can create a list of approved MAC addresses to allow only specific devices to connect to your hotspot.
- Third-Party Software: There are a variety of third-party apps available that offer even more advanced hotspot customization and features.
The Benefits: Why This Simple Trick Matters
Why does this little trick matter? Because it gives you freedom.
- Stay Connected Anywhere: Whether you're traveling, working remotely, or just dealing with a temporary internet outage, your laptop can be your lifeline to the web.
- Conserve Data: If you have a limited mobile data plan, you can connect multiple devices to your laptop's Wi-Fi hotspot to avoid using cellular data on each device.
- Share with Friends and Family: Share your internet connection with others, especially when they don't have access to a reliable Wi-Fi network of their own.
- Increase Productivity: The option to always be connected, keeps you going without relying on public Wi-Fi, where your data can be at risk.
Don’t Get Left Behind: Embrace the Power of Your Laptop
We've walked through a simple process, but the impact is significant. The ability to create a Wi-Fi hotspot from your laptop isn't just a cool trick; it's an essential skill in the digital age. It's about taking control of your connectivity, empowering yourself, and never being stranded again. Much like having a spare tire in your car, this is a failsafe you just might need one day. With the information and steps provided, you can transform your laptop into a Wi-Fi hotspot – empowering you to stay connected, productive, and entertained no matter where you are.
Closing Thoughts: Freedom at Your Fingertips
The ability to turn your laptop into a Wi-Fi hotspot is a perfect example of how technology can empower us. It's a simple trick that can solve a multitude of problems, from dealing with spotty Wi-Fi to sharing internet access with friends. The best part? It's surprisingly easy to do! So, go ahead, give it a try. Embrace the freedom of connectivity. You'll be surprised at how often you use this new skill. It's truly a game-changer. Now you have the knowledge. The power. Go forth and connect!
FAQs
1. Is it Safe to Use My Laptop as a Wi-Fi Hotspot?
Yes, it is generally safe! But, like any network, you must protect your hotspot with a strong password and encryption. Don't forget to turn it off when not in use. Your security is your responsibility.
**2. Will Using My Laptop
Unlock Your Laptop's WiFi Password: The Secret's Inside!Turn your Laptop into a Wi-Fi Hotspot or Repeater
By Tech Freaks Turn your Laptop into a Wi-Fi Hotspot or Repeater by Tech Freaks
Turn your Laptop into a Wi-Fi repeater NETVN
By NETVN82 Turn your Laptop into a Wi-Fi repeater NETVN by NETVN82
How to transform your old laptop into a wifi repeater
By AK The Geek How to transform your old laptop into a wifi repeater by AK The Geek
Title: Turn your Windows 7 Laptop into a Wi-Fi Hotspot or Repeater
Channel: Len Farneth
Turn your Windows 7 Laptop into a Wi-Fi Hotspot or Repeater by Len Farneth
Working With Laptop
Here's the article:
Unveiling the Secrets of Craft Coffee: A Guide to Brewing Excellence at Home
We often hear the term "craft coffee" tossed around, but what does it truly signify? More than just a buzzword, craft coffee represents a dedication to quality, sustainability, and a truly exceptional coffee experience. This comprehensive guide serves as your passport to understanding craft coffee, from the bean's origin to the final, exquisite cup you hold in your hands. Prepare to elevate your coffee ritual from the mundane to the magnificent.
The Journey Begins: Understanding Coffee Origins and Bean Varieties
The magic of craft coffee lies in the meticulous attention given to every stage of the process. It commences with the bean itself. Forget generic "coffee" and delve into the fascinating world of coffee origins and bean varieties. Consider the vibrant tapestry of coffee-growing regions:
- Ethiopia: The birthplace of coffee, Ethiopia boasts a diverse range of flavor profiles. Think bright, floral notes from Yirgacheffe, or the complex, berry-like characteristics of Sidamo. The altitudes, soil composition, and processing methods unique to each region contribute profoundly to the final cup.
- Colombia: Known for its consistent quality and balanced flavor, Colombian coffee often presents a smooth, nutty profile with hints of caramel. Various regions, such as Medellín and Armenia, produce beans with distinct characteristics, reflecting the specific microclimates and farming practices.
- Kenya: Celebrated for its intense acidity and complex fruit flavors, Kenyan coffee offers a lively and invigorating experience. Look for beans from the AA grade lots, often prized for their bold character and vibrant citrus notes.
- Sumatra (Indonesia): For those who prefer a bolder experience, Sumatra provides full-bodied coffees with earthy notes and a low acidity level. Look for Mandheling or Gayo Mountain beans for optimal quality.
- Costa Rica: This country delivers consistently clean and balanced coffees, often with citrus and chocolate notes. The rigorous quality control standards in place ensure a high-quality product across the board.
Beyond the origin, understanding different Coffea species is crucial. Arabica beans, comprising the majority of craft coffees, offer a wide range of flavors and aromas. Robusta beans, known for their high caffeine content, are often used in espresso blends to enhance crema and body. The specific varietal – for example, Geisha, Pacamara, or Typica – plays a significant role in the final cup’s flavor. Each varietal possesses unique characteristics, influencing the cup's sweetness, acidity, and body.
From Farm to Roastery: The Art of Processing and Roasting
The journey from the coffee farm to your cup involves several critical steps, each influencing the final flavor.
- Processing Methods: The way coffee cherries are processed after picking significantly impacts flavor.
- Washed Process: This method involves removing the cherry's fruit before drying, resulting in clean, bright, and acidic coffees which are best if you are looking for a brighter taste.
- Natural Process (Dry Process): Cherries are dried with the fruit intact, imparting a sweeter, fruitier, and often more complex profile to the beans.
- Honey Process (Pulped Natural): The outer layer of the cherry is removed, but some of the fruit pulp remains during drying. This process results in a balance of sweetness, acidity, and body.
- Roasting: A Symphony of Transformation: Roasting is where raw green coffee beans transform into the aromatic and flavorful beans we recognize. Roasters apply heat to develop the bean's inherent flavors and create the desired roast profiles.
- Light Roast: Typically highlights the bean's origin characteristics, emphasizing acidity and nuanced flavors. Flavors tend to be fruity, floral, and complex.
- Medium Roast: Balances acidity and body, offering a wider range of flavors. A good choice for versatile drinking.
- Dark Roast: Produces a bolder, more intense flavor profile with a tendency towards chocolatey and smoky notes.
- The Importance of Freshness: Craft coffee is highly perishable. Roasted coffee beans should ideally be consumed within 2-3 weeks of roasting to experience the peak of flavor and aroma. Look for roasters who provide roast dates on their packaging.
Mastering the Brew: Essential Brewing Methods for Craft Coffee
Brewing craft coffee is an art requiring precision and attention to detail. Each brewing method produces a unique cup profile, depending on your preferences; different equipment will allow you to obtain some of the best brewing results you may have ever had. Here are some of the most popular methods, along with helpful tips:
- Pour Over (e.g., Hario V60, Chemex): This method offers exceptional control over the brewing process.
- Grind Size: Medium-coarse to medium, depending on the brewing device and desired extraction.
- Water Temperature: Aim for 195-205°F (90-96°C) -- this is an important factor for a great cup.
- Bloom: Saturate the grounds with twice the amount of water as coffee for about 30 seconds.
- Pouring Technique: Slowly and evenly saturate the grounds, using a controlled pour, to extract maximum flavors.
- French Press: Known for its full body and rich flavor.
- Grind Size: Coarse. Otherwise, it can produce an overly bitter and "muddy" cup.
- Steep Time: 4 minutes.
- Plunge Slowly: Avoid over-extracting by plunging slowly and evenly.
- Aeropress: A versatile manual brewing device that produces a clean, smooth cup.
- Grind Size: Fine to medium-fine – this will vary based on the specific recipe.
- Steep Time: Typically 1-2 minutes.
- Inverted Method: A popular technique that allows for better control over the brewing process.
- Espresso: Requires specialized equipment, but is a cornerstone of many coffee drinks.
- Grind Size: Very fine.
- Water Pressure: 9 bars of pressure.
- Extraction Time: Approximately 25-30 seconds for a double shot.
Elevating the Experience: Water, Grinders, and Other Essentials
Beyond the brewing method itself, several factors contribute to a truly exceptional craft coffee experience.
- Water Quality: Water is the primary ingredient in coffee, so its quality greatly impacts the final cup. Use filtered water that is free of contaminants and minerals.
- The Right Grinder: A Crucial Investment: A high-quality burr grinder is essential for achieving a consistent grind size, which is critical for even extraction. Blade grinders produce inconsistent particle sizes, leading to uneven flavors. Consider a conical burr grinder.
- The Perfect Ratio: Coffee-to-Water: The coffee-to-water ratio is a foundational element of brewing. A common starting point is a ratio of 1:15-1:17 (coffee to water) and adapt to your preference.
- Storage: Preservation is Key: Store your whole bean coffee in an airtight container, away from light, heat, and moisture. Grind your beans just before brewing to preserve the delicate aromas.
- Experiment and Refine: The path to craft coffee mastery is a journey of exploration. Experiment with different beans, grind sizes, brewing methods, and ratios to discover your ideal cup.
- Keep a Journal: Track your brewing parameters and tasting notes to refine your technique and preferences over time.
- Taste and Adjust: Don't be afraid to adjust your brewing parameters based on your taste.
- Learn to Cup: Cupping is a formal way to assess coffee quality, and is a great way to learn new tastes and qualities.
Craft Coffee and Sustainability: A Commitment to Ethical Sourcing
Craft coffee is not solely about taste; it also emphasizes ethical sourcing and sustainability. Look for these indicators when purchasing coffee:
- Fair Trade Certification: Fair Trade certification ensures that farmers receive a fair price for their beans, supporting their livelihoods and promoting sustainable farming practices.
- Direct Trade Relationships: Roasters who work directly with farmers can ensure a higher level of transparency, quality, and value sharing.
- Organic Certification: Organic certification guarantees that the coffee is grown without synthetic pesticides or fertilizers, promoting environmental integrity.
- Sustainable Farming Practices: Look for certifications related to environmental protection, water conservation, and waste management.
- Supporting Local Roasters: Buying from local roasters reduces the carbon footprint associated with transportation, and supports local businesses and communities.
Tasting Coffee: Unlocking the Flavor Wheel
Developing your palate for craft coffee is a rewarding experience. Here’s how to analyze coffee:
- Aroma: Smell the dry grounds and the brewed coffee to assess the aroma. Note the intensity and dominant notes, such as floral, fruity, nutty, or chocolatey.
- Acidity: Acidity provides the brightness and liveliness of the coffee. Judge the acidity level and sharpness through the finish.
- Body: Body is the coffee's mouthfeel. Is the coffee light, moderate, or full-bodied?
- Flavor: Assess all flavor notes. As you hold the coffee on your palate, identify and evaluate the different flavors.
- **
