connect laptop to sony bravia wifi

Title: How to Mirror Screen cast your laptop to Sony Bravia TV via Wi Fi
Channel: TIP OF THE DAY
How to Mirror Screen cast your laptop to Sony Bravia TV via Wi Fi by TIP OF THE DAY
connect laptop to sony bravia wireless, connect laptop to sony tv via wifi, how to connect laptop to sony bravia wirelessly, how to connect laptop to sony tv wireless
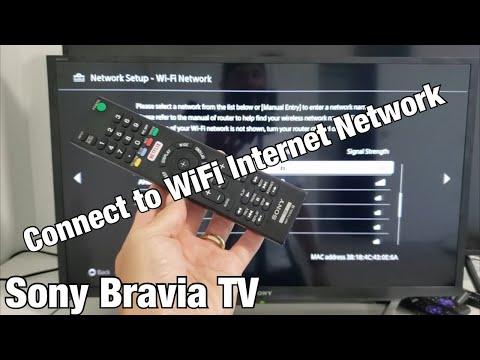
Sony Bravia WiFi Setup: Connect Your Laptop in 60 Seconds!
Unlock the Wireless World: Supercharge Your Sony Bravia's WiFi Setup!
The quest for seamless connectivity can sometimes feel like navigating a labyrinth. Frustration mounts when your shiny new Sony Bravia refuses to cooperate. Nevertheless, fret not! Setting up your TV's WiFi doesn't require a PhD in electronics. It is a straightforward process. We're going to demystify connecting your laptop. You will be streaming content faster than ever.
Preparing for Liftoff: Essential Pre-Flight Checks
Before we begin, let’s gather our supplies. First, you need your Sony Bravia remote control. Next, ensure your laptop is nearby. Furthermore, confirm your home WiFi network is up and running. Finally, locate your WiFi password. Because without it, you're grounded. Make these preparations easy. It will guarantee a smooth setup experience later.
Step 1: Navigating the Bravia's Digital Core – The Settings Menu
Your journey commences with the Bravia's settings menu. Locate the "Home" button on your remote. Typically, it features a house-shaped icon. Press it to unveil the main menu on your TV screen. Afterwards, navigate to the "Settings" option. You may see a gear icon representing settings. Once you've found Settings, select it. Now, you're ready to configure your network settings.
Step 2: Embracing the Wireless Frontier – WiFi Configuration
Within the Settings menu, you should now seek out "Network" or "Network & Internet." Select this option. Subsequently, you'll find a submenu. It offers network connection choices. Choose the "WiFi" option. Now, the bravia begins the hunt. It will start scanning for available wireless networks. This may take a few moments. So, please be patient.
Step 3: Selecting Your Digital Portal – Choosing Your Network
A list of available WiFi networks is on screen. Scroll through the list. Pinpoint your home network. This is essential. Double-check that you pick the right one. Then, select your network by pressing the "OK" button on your remote. Remember this crucial step. This ensures you're connecting to the correct network.
Step 4: Unlocking the Gateway – Entering Your WiFi Password
Now comes the moment of truth. You need to enter your WiFi password. A virtual keyboard will appear on your screen. Use your remote’s directional keys to navigate the keyboard. Select each character of your password. Be meticulous. Capitalization and symbols matter. After entering the password, confirm your entry. Then, select "Connect."
Step 5: The Moment of Truth: Verifying the Connection
In a few seconds, your Sony Bravia will test the connection. If everything is correct, you should see a "Connected" message. Congratulations! You have successfully connected your TV to your WiFi. However, if the connection fails, review your password. Also, make sure your router is working. Then, try again.
Step 6: Taking Your Bravia to New Heights – Testing Your Connection
With your TV connected to the WiFi, it's time to test. Return to your Home screen. Then, select an app. This could be Netflix, YouTube, or any streaming service. If the app loads and streams content without issues, pat yourself on the back! You’ve successfully set up your WiFi. You can now enjoy endless entertainment.
Connecting Your Laptop: A Slightly Different Ballgame
Connecting a laptop to your Sony Bravia, however, is slightly different. It often involves screen mirroring or casting. First, make sure both your laptop and TV are on. Next, ensure they are on the same WiFi network. Then, check your laptop’s settings. Look for an option like "Connect to a wireless display." You can usually find it in the display settings.
Mirroring Miracles: Screen Mirroring for Laptop Users
Your laptop should now search for available devices. Your Bravia will usually appear in the list. Select your TV. Then, follow the on-screen prompts. Afterward, your laptop's screen should mirror on your TV. However, not all laptops support screen mirroring natively. Consider using apps like Miracast or Chromecast. These apps can also facilitate screen mirroring. However, it is important to ensure both devices are compatible.
Casting Content: A Streamlined Way to Watch
If your laptop has Chromecast built in or you have a Chromecast device, casting is easy. Open a compatible app, like Chrome. Then, select the cast icon. It looks like a rectangle with a WiFi symbol. Select your Sony Bravia from the available devices. The content will stream directly to your TV. This frees up your laptop for other tasks.
Troubleshooting Troubles: What If Things Go Wrong?
Sometimes, things don't go as planned. Don't despair! Here are some troubleshooting tips. First, restart your TV and router. This often resolves minor glitches. Also, double-check that your WiFi password is correct. Moreover, update your TV's software. You can typically find this in the settings menu. Also, check for interference. Other electronic devices can sometimes disrupt the WiFi signal. Make sure your TV is within a reasonable distance of your router.
Elevate Your Entertainment: Bask in the Wireless Glory
Once your Sony Bravia is connected, your entertainment possibilities expand exponentially. You can now stream movies. You can also enjoy TV shows. Browse the web, and share content from your laptop. Enjoy the wireless freedom and elevate your home entertainment experience. You have now conquered the digital frontier.
Laptop WiFi Nightmare? Windows 10 Fix INSIDE!Sony Bravia WiFi Setup: Connect Your Laptop in 60 Seconds!
Alright, tech adventurers! Ever felt like you're living in a digital desert, miles away from the streaming oasis that is your Sony Bravia? Picture this: you've got a mountain of popcorn, a comfy couch, and a burning desire to watch that new movie everyone's raving about. But your laptop's stubbornly refusing to connect to your Bravia, leaving you stranded with static and silence. Sound familiar? Trust me, we've all been there. But fear not, because today, we're diving headfirst into the world of Sony Bravia WiFi setup! And the best part? We're aiming to get your laptop connected within a breezy 60 seconds. Get ready to transform your viewing experience from "meh" to "marvelous"! Let's get connected.
1. Your Bravia's Best Friend: Understanding the Connection
Before we launch into the how-to of connecting your laptop to your Sony Bravia via WiFi, let's quickly cover the basics. Think of your Bravia as a super-smart, ultra-stylish visual chef. It wants to feed you delicious content. But it needs the ingredients first, and your laptop is the delivery truck. The magic happens over your home WiFi network, the invisible bridge connecting everything. Understanding this simple relationship eases the process. It's like having a map before you start a road trip – understanding where you're going makes the journey much smoother.
2. Check Your Arsenal: What You'll Need Before We Start
Now, let's make sure you have everything you need. This isn't a complicated mission, but a little preparation goes a long way. Here’s your essential tech toolkit:
- Your Sony Bravia TV: Obviously! Make sure it's powered on and ready to go.
- Your Laptop: Running, and most importantly, connected to your existing WiFi network. (This is a critical first step!)
- Your Home WiFi Network: You'll need your network name (SSID) and, ideally, your password. (If you've forgotten your password, no worries – we'll touch on troubleshooting soon.)
- Patience: We'll keep it quick, but some things are quicker with a little patience!
3. The WiFi Waltz: Accessing Your Bravia's Settings Menu
Alright, time to get your hands a little dirty (virtually, of course!). First, grab your Bravia remote. Think of it as your magic wand. We're going to navigate to your Bravia's settings menu. This is typically accessed by pressing the "Menu", "Home", or "Settings" button on your remote (it varies slightly depending on your Bravia model – consult your manual if you're stuck). Once in the menu, look for something related to "Network" or "Internet". It might be under "Settings," "Network & Internet," or something similar. We’re hunting for the place where we can tweak the TV's internet settings.
4. Choosing Your WiFi Connection: Connecting to your Network
Once you're in the network settings, you'll likely see an option to "Set up Network" or "Connect to Network." This is your launchpad! Select it. Your Bravia should now scan for available WiFi networks in your area. This is like your TV scouting for potential partners in content creation.
5. Finding Your Network: The SSID Search
A list of available WiFi networks should pop up on your screen. Look for your network name (SSID). It should be the same as the name you see on your laptop or smartphone when connected to your home WiFi. If you don't see your network, give the TV a second to refresh. If it still doesn't appear, double-check that your router is switched on and broadcasting a signal.
6. Password Power: Entering Your WiFi Key
Once you've found your network name, select it. You’ll then be prompted to enter your WiFi password. This is the secret handshake that allows your Bravia to join your network. Use the on-screen keyboard to carefully type in your password. Double-check for typos before you hit "OK" or "Connect." Getting this wrong is like trying to unlock your car with the wrong key.
7. Testing Time: Verifying the Connection
After you've entered your password, your Bravia will attempt to connect to the network. You should see a progress bar or an indicator showing the connection is in progress. Once connected, you’ll usually see a confirmation message, which is like a digital high-five. Your TV is now officially part of your home network!
8. The Magic of Screen Mirroring: Connecting Your Laptop’s Screen
Now, for the grand finale: casting your laptop's screen onto your Bravia. This method varies based on your laptop's operating system. Newer Bravia models often support popular screen mirroring technologies such as Apple's AirPlay or Google's Chromecast built-in. Some older laptops require external devices or software. Research the specific capabilities of your model, which might vary based on it's age. It is crucial to ensure both your laptop and Bravia are on the same WiFi network
9. Windows Wonders: Connecting With Windows
For Windows laptops, you will need to use the operating system's built in screen mirror capabilities. First, ensure you've ensured both of your devises are connected to the network, and then locate the "Connect" option, often found in the notifications menu. It's like a hidden portal waiting to be unlocked. Once selected, your TV should appear.
10. Apple Affinities: Connecting With macOS
If you’re an Apple person, rejoice! This is typically a breeze. Make sure your laptop is on the same Wi-Fi network as your Bravia. Click the AirPlay icon in your menu bar (it looks like a rectangle with a triangle), and select your Bravia from the list of available devices. Boom! Your screen should instantly appear on your TV.
11. Troublshooting Tactics: When Things Go Wrong
Sometimes, despite our best efforts, things don't go according to plan. Here are a few common troubleshooting tips:
- Double-Check Your Password: This is the most frequent culprit! Make sure you’ve entered your WiFi password correctly.
- Restart Everything: Turn off your Bravia, your laptop, and your router, then turn them back on. Sometimes a good old-fashioned reboot works wonders.
- Check Your Router: Make sure your router is working correctly and isn't experiencing any technical difficulties.
- Update Your Firmware: Ensure both your Bravia and your laptop have the latest software updates. This often fixes compatibility issues.
- Contact Support: If all else fails, don't hesitate to contact Sony support or your internet service provider.
12. Streaming Nirvana: Unleashing Your Laptop’s Potential
Once connected, the world of streaming is your oyster! You can now watch movies, browse the web, and showcase photos and videos from your laptop on the big screen. It's like upgrading from a small phone screen to an IMAX theater. This also offers a variety of uses like giving presentations!
13. Beyond the Basics: Exploring Advanced Features
Once you've mastered the basics, explore some of the advanced features your Bravia offers. Many models have built-in apps like Netflix, YouTube, and Amazon Prime Video, allowing you to stream directly from your TV. You may also want to look into ways to improve your Wi-Fi connection, such as putting your router in a more central location or upgrading to a newer model.
14. Keeping it Secure: Protecting Your Network
Security is paramount. Always use a strong password for your WiFi network. Enable WPA2 or WPA3 encryption on your router to protect your network from unauthorized access. Consider a firewall to further enhance your security.
15. The Future is Now: Staying Up-to-Date
Technology evolves at lightning speed! Keep up with new developments in screen mirroring technology. Stay informed about new features and compatibility updates for your Bravia and laptop. This will allow you to get the most out of this.
Conclusion: Your Laptop, Your Bravia, Your Entertainment Revolution
And there you have it! We've navigated the world of Sony Bravia WiFi setup together, hopefully in record time. Connecting your laptop to your Bravia opens up a world of possibilities, from streaming your favorite shows to sharing photos and videos with friends and family. So, grab your popcorn, settle into your couch, and get ready to enjoy the ultimate viewing experience. You've earned it! Go forth and conquer the world of seamless entertainment!
FAQs
Q1: My Bravia can't find my WiFi network. What should I do?
A: Double-check that your router is powered on and broadcasting a signal. Ensure your Bravia is within range of your router. Try restarting both your router and your TV. If the problem persists, consult your router's manual for troubleshooting steps.
Q2: I forgot my WiFi password. How do I find it?
A: You may be able to find your WiFi password in your router's settings or on your laptop or smartphone if you've previously connected to the network. You can also contact your internet service provider for assistance.
Q3: Can I connect my laptop to my Bravia using a cable?
A: Yes, you can connect your laptop to your Brav
Unlock Your Phone's WiFi Hotspot: Wired Laptop Trick!How to Connect & Mirror Laptop Screen on Any Smart TV Wirelessly No App

By MJ Tube How to Connect & Mirror Laptop Screen on Any Smart TV Wirelessly No App by MJ Tube
Wireless Connect Laptop to Sony Bravia TV in Hindi Sony Bravia Screen Mirroring Connect Laptop

By lovsan Wireless Connect Laptop to Sony Bravia TV in Hindi Sony Bravia Screen Mirroring Connect Laptop by lovsan
How to Connect MacBook Screen to TV or Monitor Wirelessly, Free, No WIFI, No Apple TV 2023

By rizisuper How to Connect MacBook Screen to TV or Monitor Wirelessly, Free, No WIFI, No Apple TV 2023 by rizisuper
Title: Sony Bravia TV How to Connect to Wifi Network Internet
Channel: WorldofTech
Sony Bravia TV How to Connect to Wifi Network Internet by WorldofTech
Wifi On Laptop
Here is your title: The Ultimate Guide to Crafting the Perfect Sourdough Starter
The Ultimate Guide to Crafting the Perfect Sourdough Starter
Embarking on the journey of sourdough baking is like entering a sacred culinary realm, a world where the humblest ingredients – flour and water – transform into a living, breathing entity capable of yielding bread of unparalleled flavor and texture. At the heart of this transformation lies the sourdough starter, a vibrant colony of wild yeasts and beneficial bacteria. This article serves as a comprehensive roadmap, guiding you through every stage of starter creation, from the initial whispers of fermentation to the robust, reliable culture that will become the cornerstone of your sourdough adventures. Prepare to unlock the secrets to a thriving starter, one that produces breads that will elevate your baking to new heights.
Understanding the Magic: What is a Sourdough Starter?
A sourdough starter, often affectionately called "the mother," is far more than just a simple mixture of flour and water. It's a dynamic ecosystem, a self-sustaining community of wild yeasts (primarily Saccharomyces cerevisiae) and lactic acid bacteria (LAB) that thrive in a mutually beneficial relationship. These microorganisms, present naturally in flour and the environment, feed on the starches in the flour, producing carbon dioxide (the leavening agent that makes bread rise) and lactic acid (which contributes to the characteristic sour flavor and helps preserve the bread). The health and vitality of your starter directly influence the quality of your bread, impacting its rise, flavor, and overall success.
Assembling Your Toolkit: Essential Ingredients and Equipment
Before you begin, gather the necessary tools and ingredients to ensure a smooth and successful start.
Flour: The type of flour significantly impacts the starter's development. While all-purpose flour can be used, a blend of flours often yields the best results. Experiment with a combination of unbleached all-purpose flour, whole wheat flour (which provides more nutrients for the yeast and bacteria), and even a small percentage of rye flour (known for promoting acidity). Always opt for high-quality, unbleached flour.
Water: Use filtered, non-chlorinated water. Chlorine can inhibit yeast activity. Room temperature water, ideally around 70-75°F (21-24°C), is ideal for optimal fermentation.
Container: A clean glass jar, preferably with a wide mouth, is ideal. Glass allows you to easily monitor the starter's activity. Ensure the jar is large enough to accommodate the starter's expansion during fermentation, typically at least double the volume of the initial mixture. Avoid metal containers, as they can sometimes react with the acids produced.
Measuring Tools: Accurate measurements are critical. Use a kitchen scale to measure both flour and water by weight, rather than volume, for the most consistent results. A digital scale is highly recommended.
Scraper: A flexible silicone spatula or a plastic scraper is essential for mixing the starter and scraping down the sides of the jar.
The Initial Mix: The First Steps to Yeast Heaven
The process begins with a simple yet crucial step – the initial mix.
Combine the Flour and Water: In your clean glass jar, combine equal parts flour and water by weight. A common starting point is 50 grams of flour and 50 grams of water. This ratio creates a 1:1 hydration starter.
Stir Vigorously: Thoroughly mix the flour and water until no dry flour remains. The consistency should resemble a thick paste, somewhat like pancake batter.
Cover and Rest: Loosely cover the jar with a lid (not airtight) or a piece of plastic wrap secured with a rubber band. This allows air circulation while preventing the starter from drying out. Place the jar in a warm, stable environment, ideally between 70-78°F (21-26°C).
The First Feed: Patience is a Virtue
This initial mix is a starting point. The real magic begins with regular feeding, which provides the yeast and bacteria with the nutrients they need to thrive.
The Waiting Game: Over the next 24 hours, keep a close eye on your mixture. Initially, you may see very little activity. This is perfectly normal.
The First Feed: After 24 hours, or when you see the first signs of activity (tiny bubbles, a slight increase in volume, or a subtle sour smell), it's time for the first feed. Discard about half of the starter (you can save the discard for other culinary uses, such as pancakes or crackers – more on that later). Add equal parts by weight of fresh flour and water to the remaining starter, following the 1:1 ratio (e.g., 50 grams flour + 50 grams water). Stir well.
Repeat and Observe: Cover the jar loosely and return it to its warm, stable environment. Repeat the feeding process every 24 hours, or as needed, observing the changes in the starter's behavior.
Monitoring the Transformation: Recognizing the Signs of Life
The key to successfully nurturing a sourdough starter is understanding its behavior. Pay close attention to the following indicators:
Bubbles: The presence of bubbles is a clear sign of fermentation. Initially, you may see small bubbles throughout the mixture. As the starter matures, the bubbles will become larger and more numerous, culminating in a bubbly, airy consistency.
Volume Increase: A healthy starter will increase in volume after feeding, then gradually fall back down. The extent of the rise and fall is an indicator of its strength.
Odor: Initially, the starter may have a slightly unpleasant smell. As it matures, the aroma will transition to a pleasant, yeasty, and slightly sour scent.
Appearance: A healthy starter will appear light and airy, with a creamy or slightly off-white color. A grayish or moldy appearance is a sign of trouble.
Feeding Frequency: Finding the Right Rhythm
The frequency of feeding depends on several factors, including the temperature of your environment and the stage of your starter.
Early Days (Days 1-7): Feed your starter every 24 hours, regardless of its activity. This consistent feeding helps establish a thriving colony of microorganisms.
Maturing Starter (Days 7-14+): As your starter matures, you may need to adjust the feeding schedule. Once it's consistently doubling in size within 4-8 hours after feeding, and then falling back down, you can reduce the feeding frequency to once every 12 hours or even less. Observe how active your starter is, and adjust the feeding schedule accordingly to maintain a consistent rise.
Feeding Ratios: While a 1:1 flour-to-water ratio is common, you can experiment with different ratios. A 1:2:2 ratio (1 part starter: 2 parts flour: 2 parts water) is often used for maintenance, promoting greater acidity.
Troubleshooting Common Problems
Even with careful attention, issues may arise. Here are common challenges and solutions:
No Activity: If your starter shows no signs of activity after several days, ensure the water is not chlorinated, the flour is fresh, and the environment is warm enough. Continue feeding it regularly.
Mold: If mold appears, discard the entire starter and start over. Prevention is key – ensure all equipment is clean and use high-quality flour and water.
Watery Layer: A layer of dark liquid (hooch) on top of the starter indicates underfeeding or starvation. Pour off the hooch and feed the starter immediately.
Weak Rise: If your starter rises but doesn't double in size, or if the rise is inconsistent, adjust the feeding schedule, experiment with different flour ratios, or maintain a warmer environment.
Off Odors: A strong smell of acetone or vinegar can indicate an imbalance in the microbial community. Continue regular feedings and observe the results. Adding a little bit of whole wheat flour can sometimes help balance the acidity.
Maintaining Your Starter: Keeping the Mother Happy
Once your starter is mature and reliable, proper maintenance is crucial to its longevity and performance.
- Regular Feeding: Continue feeding your starter regularly, based on its activity and the desired baking schedule.
- Refrigeration: For long-term storage, refrigerate the starter. Before refrigerating, feed the starter. It can be stored for up to a week without needing to be fed. Retrieve the starter and feed it a few days before you plan to bake.
- Feeding Before Baking: Before using your starter for baking, feed it once or twice to ensure it's at its peak activity. You can adjust how much it is fed, according to your baking needs. A small feeding can revive it in a short time, or you can feed it a larger portion to activate it more.
Using Your Starter: Baking the Perfect Loaf
Once your starter is active and bubbly, you're ready to bake!
The Float Test: Before using your starter, perform the float test. Take a small spoonful of starter and drop it into a glass of water. If it floats, it's ready to go. If it sinks, it needs more time.
Recipe Conversion: Sourdough recipes often require a specific amount of starter. Weighing your starter ensures accuracy.
Bulk Fermentation: Incorporate the active starter into your
