how to turn wifi on and off on a laptop
Title: Cara mengatasi wifi yang hilang atau turned of dengan mudah
Channel: Abdul Rohman
Cara mengatasi wifi yang hilang atau turned of dengan mudah by Abdul Rohman
how to turn wifi on and off on laptop, how to turn wifi on and off on dell laptop, how to turn wifi on and off hp laptop, how to turn wifi off on lenovo laptop, how to turn off wifi on laptop windows 10, how to turn off wifi on laptop with keyboard, how to turn off wifi on laptop windows 7, how to turn off wifi on dell laptop with keyboard, how to turn off wifi on asus laptop, how to turn off wifi on acer laptop
Laptop WiFi: The SHOCKINGLY Easy On/Off Trick!
Unveiling the Laptop WiFi Secret: It's Simpler Than You Think!
Ever felt like your laptop’s WiFi is playing a subtle game of hide-and-seek? Frustration can quickly mount. You are not alone. Many users struggle with seemingly unreliable connectivity. Let's unearth a surprisingly straightforward solution. It can instantly address your WiFi woes.
The Elusive WiFi Toggle: Where's the Button?
First things first. Where do you even begin to control your WiFi? The answer, thankfully, is generally quite simple. Most laptops offer an easily accessible method for toggling WiFi. This is usually achieved through a dedicated physical switch or a software-based function. In fact, the location varies. It depends entirely on your laptop’s make and model.
Physical Switch Hunters: A Visual Inspection
If you're on a quest for a physical switch, start with a visual scan. Look along the sides of your laptop’s casing. The front and back edges are also potential hotspots. Check for a small switch. It might be labeled with a WiFi symbol, a radio tower icon, or simply "WiFi." A quick glance often reveals the hidden treasure. Many laptops now don't employ this physical switch. Moreover, some brands place it on the keyboard.
Keyboard Shortcuts: Unleashing the Power
Failing to find a physical switch? Don't despair! Keyboard shortcuts offer another pathway. Often, a function key in conjunction with another key controls your WiFi. Look for a key displaying an icon similar to the WiFi symbol. Commonly, this is an "Fn" key. Then, press and hold it. Simultaneously, hit the key with the WiFi icon. Experiment with these combinations. You will eventually get it right.
Checking Your System Tray: A Digital Command Center
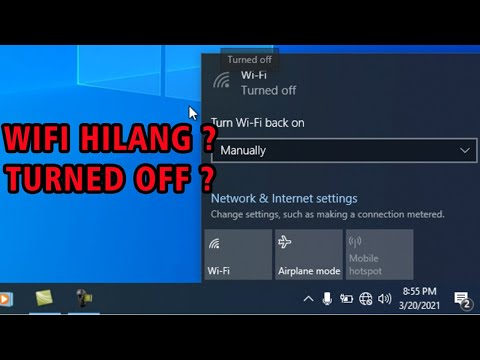
The system tray, situated in the bottom right corner of your screen (Windows), often houses your WiFi controls. Click the WiFi icon. You will see a list of available networks. It also shows the status of your WiFi connection. You can easily disable or enable your WiFi from here. The interface is usually quite intuitive and straightforward.
Troubleshooting: When Things Get Tricky
Sometimes, the solution isn't immediately apparent. Let's consider a few common troubleshooting steps. Start with a simple restart. Then, reboot your laptop. This frequently resolves minor glitches. Ensure your WiFi adapter drivers are up-to-date. Outdated drivers can cause connectivity issues. You can update them through the Device Manager in Windows.
Diving into the Device Manager
Press the Windows key and the "X" key. Select "Device Manager" from the menu. Expand the "Network Adapters" section. Right-click on your WiFi adapter. Choose "Update driver." Follow the on-screen prompts. After this, your WiFi might start working. If the issue persists, consider uninstalling and then reinstalling the driver.
Network Settings: Delving a Little Deeper
Sometimes, your network settings require adjustment. Navigate to your network settings. You can find them through the settings app. Ensure your WiFi is enabled. Check whether the Airplane mode is off. Make certain you are connected to the correct network. In addition, verify your network password.
The Airplane Mode Paradox
Airplane mode can inadvertently disable your WiFi. It's designed to cut off all wireless communication. Therefore, always double-check that Airplane mode is disabled. Find the Airplane mode toggle. It is commonly found in the Action Center. You can access it by clicking the notification icon.
The Importance of a Strong WiFi Signal
A weak WiFi signal can cause connection issues. Move closer to your router. Alternatively, remove any obstructions. Walls and other devices may interfere with the signal. Consider upgrading your router if the problem continues. It might be time for a new one.
Hidden Network Troubles: A Deeper Dive
In some cases, a hidden network configuration can be the culprit. Ensure your laptop isn't set to automatically connect to a hidden network you are unaware of. Moreover, review your network settings. Look for any unusual configurations. This is a rare problem, however.
WiFi Troubleshooting: A Step-by-Step Guide
Let's summarize some essential troubleshooting steps. First, try restarting your laptop. Second, check the physical switch (if present). Third, try keyboard shortcuts. Fourth, inspect your system tray icons. Fifth, update your network drivers. Sixth, check your network settings. Seventh, disable Airplane mode. Eighth, ensure a strong WiFi signal.
Conclusion: WiFi Mastery Awaits!
Mastering your laptop's WiFi on/off function is a must. It's far easier than it appears. By understanding where the control lies and the simple troubleshooting steps, you can reclaim control. You now can navigate the digital realm without frustrating interruptions. Keep your internet connection flowing. Enjoy your online experience without interruptions. The internet is yours!
Unleash Your PS4 on Your Laptop: The SHOCKINGLY Easy WiFi-Free Connection!Laptop WiFi: The SHOCKINGLY Easy On/Off Trick!
Alright, tech aficionados and Wi-Fi warriors, let's be real for a second. How many times have you wrestled with your laptop's Wi-Fi, silently screaming at it to connect, disconnect, or just behave? We've all been there. That frustrating dance of clicking, waiting, and praying the little signal bars magically materialize. But what if I told you there's a secret – a shockingly easy trick – to mastering that WiFi on/off switch? Prepare to have your minds blown (or at least mildly impressed). Because today, we’re diving deep into the world of laptop WiFi, debunking the complexities, and uncovering the simple magic that’ll have you snapping your connection on and off like a pro.
1. The Wi-Fi Woes: A Common Tech Headache
Let's face it, spotty Wi-Fi is the nemesis of the modern age. We rely on it for everything – work, entertainment, keeping in touch with loved ones. A weak or unreliable connection can throw a wrench into your day, making everything from streaming your favorite show to attending a crucial video meeting a complete nightmare. Remember that time you missed that important email because your Wi-Fi decided to take a vacation? Yeah, we've all been there, haven't we? It's like trying to navigate a maze blindfolded.
2. Unmasking the Mystery: Where is That WiFi Switch, Anyway?
Before we get to the “shockingly easy trick,” let’s do a quick tour of the landscape. Where is that pesky Wi-Fi switch? Well, it depends on your laptop.
- Physical Switch: Some older laptops (and some newer ones!) have a dedicated physical switch, often located on the side or front of the device. It might be small, easy to miss, and sometimes marked with a little antenna icon.
- Function Keys: This is probably the most common method. Look for a key with a Wi-Fi symbol (generally an antenna with radiating lines) typically found on the top row of keys, often sharing a function (like F2 or F3, etc.). You’ll need to press it in conjunction with the “Fn” (Function) key.
- Software Control: Windows and MacOS both have built-in ways to control your Wi-Fi through their respective settings panels. This is usually the go-to method if you’re unsure.
3. The "Shockingly Easy Trick:" The Function Key Fiesta!
Alright, here it is, the moment you've been waiting for. Drumroll, please… the shockingly easy trick for toggling your laptop's Wi-Fi on and off is… the Function Key + Wi-Fi symbol key combination! That’s it!
Now, I understand, it seems simplistic. But I have seen people struggle for hours. The beauty lies in its simplicity and speed. Once you master it, you'll be toggling your Wi-Fi faster than you can say "connected."
The key is to identify the Wi-Fi symbol on your function keys. Once you've found it (it's normally an antenna icon), simply press the "Fn" key (usually located near the bottom left corner of your keyboard) and the Wi-Fi key simultaneously. Presto! Your Wi-Fi should switch on or off. It's like having a superpower, but for your internet connection.
4. Why This Trick Works Like a Charm
Why is this function key combination so effective? Because it's a direct, hardware-level control. It bypasses the need to navigate through endless menus or complex software settings. It’s a direct connection to your laptop's Wi-Fi module, allowing for instant control. Think of it as the digital equivalent of flicking a light switch. Bang! On or off.
5. Troubleshooting Troubles: When Things Go Awry
Of course, even the best tricks sometimes hit a snag. What do you do if the function key combo doesn’t work? Don’t panic. Here are a few troubleshooting steps:
- Check the Physical Switch: If your laptop has a physical Wi-Fi switch, make sure it’s in the “on” position. Sounds obvious, but it’s easy to overlook!
- Keyboard Drivers: Rarely, a malfunctioning keyboard driver can interfere with function key functionality. Update your keyboard drivers in your device manager.
- Airplane Mode: Ensure Airplane mode isn't activated, as it disables all wireless connections, including Wi-Fi.
- Software Interference: Some software, like VPNs, can sometimes interfere with Wi-Fi functionality. Try temporarily disabling such software.
6. Mastering the Art of the Toggle: Practice Makes Perfect
Like anything, mastering this trick takes a little practice. Start by toggling your Wi-Fi on and off a few times. Get a feel for the keys and the response time. Soon, it’ll become second nature. This is something I personally do several times a day, with the constant changing of locations.
7. The Benefits of Instant Wi-Fi Control: A World of Possibilities
Why should you care about being able to instantly toggle your Wi-Fi? The advantages are vast!
- Battery Saving: When you're not actively using the internet, turning off Wi-Fi can significantly extend your laptop's battery life.
- Security: Disconnecting from Wi-Fi when connected to a public network reduces your vulnerability to potential security threats.
- Focus: Disabling Wi-Fi can help you concentrate on your work by eliminating the distractions of notifications and online content.
- Troubleshooting: Quickly turning Wi-Fi off and then back on can often resolve minor connection issues.
8. Going Beyond On/Off: Exploring Advanced Wi-Fi Settings
Once you've mastered the on/off trick, you can delve deeper into your laptop's Wi-Fi settings. Both Windows and MacOS offer a wealth of options, including:
- Network Selection: Choosing the right Wi-Fi network.
- Network Security: Protecting your connection with a strong password.
- Troubleshooting Tools: Diagnosing and resolving connection problems.
- Advanced Settings: Fine-tuning your connection for optimal performance.
9. Wi-Fi in the Wild: Public Networks and Security Tips
Using Wi-Fi in public places like coffee shops or airports? Be extra cautious!
- Avoid Unsecured Networks: Always connect to networks that require a password.
- Use a VPN: A Virtual Private Network (VPN) encrypts your internet traffic, adding an extra layer of security.
- Be Aware of Your Surroundings: Be mindful of who might be looking at your screen or eavesdropping on your connection.
- Disable File Sharing: Turn off file sharing to prevent unauthorized access to your device.
10. The Future of Wi-Fi: What's Next?
The tech world never stands still. We're constantly seeing improvements in Wi-Fi technology. Faster speeds, wider coverage, and more secure connections are on the horizon. Technologies like Wi-Fi 6 and 6E are already making waves, offering significant performance improvements. The future of Wi-Fi is exciting, promising even more seamless and reliable internet access.
11. Beyond the Basics: Optimizing Your Connection Speed
While mastering the on/off switch is a great start, optimizing your Wi-Fi connection speed can make a big difference in your experience.
- Router Placement: Position your router in a central location, away from walls and obstructions.
- Channel Optimization: Experiment with different Wi-Fi channels to find the one that provides the best performance.
- Router Firmware Updates: Keep your router's firmware up-to-date to ensure optimal performance and security.
- Reduce Interference: Minimize interference from other electronic devices.
12. Troubleshooting Tips for Slow WiFi
Let's address the frustrating experience of slow Wi-Fi:
- Restart Your Router: A simple restart can often fix temporary glitches.
- Check Your Internet Plan: Ensure you're subscribed to an internet plan that meets your needs.
- Run a Speed Test: Use a speed test website to measure your actual internet speed.
- Contact Your ISP: If the problem persists, contact your internet service provider.
13. The Hidden Power of Wi-Fi: Beyond Browsing the Web
Wi-fi has evolved into so much more than just web access. It is the gateway to:
- Smart Home Integrations: Controlling and monitoring your smart devices.
- Streaming Media: Enjoying online movies, music, and TV shows.
- Online Gaming: Connecting and playing with friends or others.
- File Sharing: Wireless sharing of files and documents between devices.
14. From Beginner to Pro: Your Wi-Fi Mastery Journey
Congratulations! You've just unlocked a powerful tool for taking control of your laptop’s Wi-Fi. It will now be far more efficient and easier to manage your on-off cycle. Remember, practice makes perfect. Keep experimenting, exploring, and refining your Wi-Fi skills.
15. The Secret to Smart Computing: Embracing the Power of Control
The key to smart computing isn't just about knowing the latest tech trends; it's about mastering the fundamentals. This simple Wi-Fi trick empowers you to take control
HP Laptop WiFi Nightmare? Solved! (No Adapter Found Fix)Turn WiFi Back On Manually Windows 10 Method 26

By vHub Turn WiFi Back On Manually Windows 10 Method 26 by vHub
laptop wifi turn back off manually laptop wifi not working

By As Technical laptop wifi turn back off manually laptop wifi not working by As Technical
How to Turn on Wifi on Window 10 in Laptop Wifi Not Turning on Problem Solved Wifi Turned Off

By Zeeshan Awan How to Turn on Wifi on Window 10 in Laptop Wifi Not Turning on Problem Solved Wifi Turned Off by Zeeshan Awan

Title: Cara Mengatasi Wifi Turn Back On
Channel: Agus Hariansyah
Cara Mengatasi Wifi Turn Back On by Agus Hariansyah
Working With Laptop
Here is the title of the article: The Definitive Guide to Mastering the Art of Sourdough Bread Baking at Home
The Definitive Guide to Mastering the Art of Sourdough Bread Baking at Home
Embark on a flavorful journey into the captivating world of sourdough bread baking. This comprehensive guide provides the essential knowledge and meticulous instructions needed to craft artisanal sourdough loaves within the welcoming confines of your own kitchen. We aim not just to teach you how to bake bread, but to empower you to become a true sourdough artisan, capable of consistently producing loaves that rival the finest bakeries. Forget the fleeting fads; sourdough represents a timeless culinary tradition, celebrated for its complex flavors, airy crumb, and impressive shelf life. Let's delve into the secrets behind this enduring bread.
Understanding the Essence of Sourdough: The Starter
The heart and soul of any exceptional sourdough loaf lies in its starter, a vibrant culture of wild yeasts and beneficial bacteria. This living organism, meticulously cultivated and lovingly maintained, is what gives sourdough its characteristic tang and unique texture. Its creation is akin to nurturing a pet; consistency and care yield the most rewarding results.
Cultivating Your Own Flourishing Starter:
The process begins with a blend of flour and water, typically equal parts by weight. Unbleached, all-purpose flour performs admirably, though experimentation with rye or whole wheat flour can impart distinct flavors and aromas. Combine these ingredients in a clean, non-reactive container – glass jars work exceptionally well.
Initially, the mixture will resemble a thick paste. Cover the container loosely with a lid or a breathable cloth secured with a rubber band. Allow it to rest at room temperature, ideally between 70-75°F (21-24°C). Each day, discard a portion (typically half) of the starter and replenish it with fresh flour and water, maintaining the initial ratio. This "feeding" process provides the culture with the nutrients it requires to thrive.
Over the first week or two, you'll observe subtle changes – the mixture may bubble, rise, and exhibit a slightly sour aroma. These are positive indicators that the wild yeasts and bacteria are beginning to colonize. The exact timeline will vary based on environmental factors, but patience is key.
Recognizing a Mature and Active Starter:
A mature starter is the cornerstone of successful sourdough baking. Indicators of maturity include:
- Significant Rise and Fall: A healthy starter will at least double in volume within a few hours of feeding, then gradually deflate. This "rise and fall" cycle is a testament to the activity of the yeasts.
- Pleasant Sour Aroma: The starter should emit a distinct, slightly tangy, but not overwhelmingly unpleasant, aroma. A hint of acetic acid is typical.
- Bubbles throughout: Visually, the starter should be teeming with bubbles, both large and small, throughout its mass.
- Uniform Texture: It should possess a smooth, slightly viscous consistency.
Once your starter consistently demonstrates these characteristics, you can confidently begin baking. Remember, a thriving starter is a continuous project.
The Flour Factor: Selecting the Right Ingredients
The choice of flour profoundly impacts the flavor, texture, and overall performance of your sourdough bread. Experimentation is encouraged, but understanding the fundamentals is crucial.
Flour Types and Their Roles:
- All-Purpose Flour: A versatile workhorse, all-purpose flour provides a good balance of protein and is suitable for beginners. However, it may produce a less complex flavor compared to flours with higher protein content.
- Bread Flour: With a higher protein content than all-purpose flour, bread flour develops stronger gluten, resulting in a chewier texture and better oven spring (the initial rise in the oven). It's an excellent choice for experienced bakers seeking a more robust loaf.
- Whole Wheat Flour: Adds a nutty flavor and a denser crumb. Its higher bran content can sometimes make the dough more challenging to work with, requiring a higher hydration level.
- Rye Flour: Imparts a distinctive, earthy flavor and contributes to a moist crumb. Rye flour lacks gluten, so it’s often used in combination with wheat flour for a more stable structure.
- Spelt Flour: A more digestible, ancient grain, spelt provides a subtle nutty flavor and a delicate crumb.
The Importance of Quality and Freshness
Invest in high-quality flour from reputable sources. Freshly milled flour retains more of its nutrients and flavor. Store flour in a cool, dry place to preserve its freshness.
Hydration and Dough Development: The Foundation of Texture
Hydration, or the ratio of water to flour in your dough, is a critical element that significantly influences the final texture of your sourdough. Higher hydration levels generally result in a more open crumb, but can also make the dough more challenging to handle.
Understanding Hydration Levels:
- Low Hydration (60-65%): Produces a firmer dough that's easier to manage. The crumb will be denser.
- Medium Hydration (70-75%): Offers a good balance between workability and crumb structure. Many recipes fall into this range.
- High Hydration (75% and above): Yields a very open, airy crumb, but requires more experience in handling the dough.
The Autolyse: A Crucial Step
The autolyse is a simple yet impactful technique where the flour and water are mixed together, without the addition of the starter or salt, and allowed to rest for a specified period. This allows the flour to fully hydrate, which contributes to gluten development and simplifies the mixing process. An autolyse typically lasts 30 minutes to an hour.
Kneading Techniques and Gluten Development:
There are several methods for developing gluten, each with its advantages:
- Hand Kneading: A traditional method that requires physical effort but allows you to feel the dough's texture.
- Stand Mixer with Dough Hook: This is efficient and minimizes the physical strain, especially for high-hydration doughs.
- Stretch and Folds: This gentle method is well-suited for high hydration doughs and involves gently stretching and folding the dough over itself at regular intervals during bulk fermentation. It strengthens the gluten structure without overworking the dough.
The Bulk Fermentation: Where Flavor Blossoms
Bulk fermentation is the stage during which the dough rests and ferments before being shaped. During this time, the wild yeasts and bacteria in the starter work their magic, producing carbon dioxide that leavens the dough and contributes to the signature sourdough flavors. The length of this stage directly influences the flavor profile of the bread.
Factors Influencing Bulk Fermentation:
- Temperature: Warmer temperatures accelerate fermentation, while cooler temperatures slow it down. The ideal range is generally between 70-78°F (21-26°C).
- Starter Activity: A more active starter will ferment the dough more efficiently.
- Flour Type: Whole wheat flours tend to ferment faster than all-purpose flours.
- Hydration Level: Higher hydration doughs tend to ferment slightly faster.
- Dough Strength: A well-developed gluten network retains the gas produced during fermentation, leading to a better rise.
Visual and Tactile Cues:
- Increase in Volume: The dough will visibly increase in size, typically by 30-50% or more.
- Bubbles: The dough should be riddled with bubbles, both large and small, throughout its mass.
- The Finger Poke Test: Gently poke the dough with a floured finger. If the indentation slowly springs back, the dough is ready. If it springs back immediately, it needs more time. If it collapses, it may have over-fermented.
Shaping and Proofing: The Final Touches
Shaping the dough is a crucial step that significantly affects the final form and texture of your loaf. Proper shaping creates tension in the dough, which helps it rise effectively in the oven.
Shaping Techniques:
- Round (Boule): Suitable for a classic, rustic loaf. Develops good tension through a series of folds.
- Oblong (Batard): A versatile shape that's also well-suited for sandwich bread.
Proofing: The Final Rise
After shaping, the dough undergoes its final proofing stage, often in a banneton basket (a proofing basket) lined with flour, which helps to maintain the shape and prevent sticking.
- The Cold Proof: Refrigerating the shaped loaf overnight (or longer) slows down fermentation and enhances flavor development. It also makes the dough easier to score.
Baking: Unveiling the Art of the Oven
Baking sourdough requires a bit more attention than baking with commercial yeast. The goal is to achieve a crispy crust and a well-risen interior.
Oven and Baking Equipment:
- Dutch Oven: A Dutch oven is ideal for sourdough baking. During the initial part of the bake, the lid traps steam, which helps the bread rise and develop a beautiful crust.
- Baking Stone or Steel: Using a baking stone or steel produces a crispier crust and helps the bread to rise.
- Oven Thermometer: Ensure your oven is maintaining the correct temperature.
Baking Procedures:
- Preheat: Preheat your oven with the Dutch oven inside to 450-500°F (232-260°C)
