asus laptop wifi doesn't have a valid ip configuration

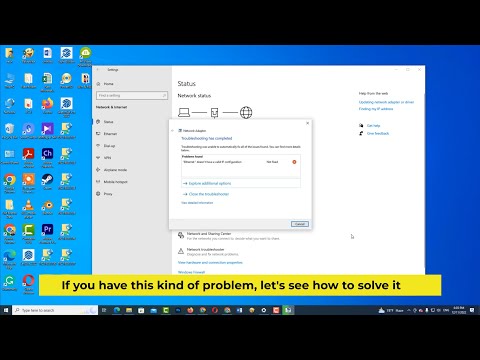
Title: WiFi Doesn't have a valid IP configuration on Windows 10
Channel: FIXsage
WiFi Doesn't have a valid IP configuration on Windows 10 by FIXsage
ASUS Laptop WiFi Nightmare? FIX Your IP Address NOW!
ASUS Laptop WiFi Woes Vanquished: A Speedy IP Address Solution!
Have you ever battled a persistent gremlin in the form of a lagging ASUS laptop? The culprit might be tangled up with your IP address. This digital address whispers instructions to your device. It directs data flow. And when it goes awry, frustration reigns. You’re not alone. Many ASUS laptop users confront intermittent WiFi dropouts. So, let's conquer this common connectivity crime!
The WiFi Whimper: Recognizing the Symptoms
First, let's diagnose the problem. Your ASUS laptop displays various symptoms of WiFi distress. Your connection is sluggish, or you frequently disconnect. Maybe web pages load with excruciating slowness. Or streaming videos buffer endlessly. Furthermore, your Wi-Fi signal strength appears strong, yet your internet access falters. If these issues resonate with your experience, focus your energy on a possible IP address issue.
Enter the IP Address: Your Digital Passport
Your IP address functions like a digital passport. It helps your device navigate the vast internet landscape. Every device on your network possesses one. Consequently, a conflict or misconfiguration can spawn connectivity problems. Think of it like a traffic jam on a busy highway. However, we can often resolve these issues quickly.
Static vs. Dynamic: Understanding Your Options
There are two primary types of IP address configurations. You have a static IP address and a dynamic IP address. A static address remains constant, a fixed value. A dynamic address is assigned by your router, often automatically. Most home networks utilize dynamic IP addresses. That said, a static IP can sometimes offer a more stable connection. We will explore both scenarios.
Method 1: The Simple Reboot and Refresh Routine
Often, the simplest solutions are the most effective. Start with the basics. Restarting your ASUS laptop and your router can resolve many temporary IP address conflicts. Because this clears the cache. Also, it allows your devices to establish a fresh connection. Unplug your modem and router for about a minute. Then, plug them back in. After they fully reboot, restart your laptop. This simple step frequently clears up the problem.
Method 2: Releasing and Renewing Your IP Address (Dynamic)
For dynamic IP addresses, you can force your laptop to request a new one. It's generally a straightforward process. Here’s how to do it, step by step.
- Access Command Prompt: Search for "cmd" in the Windows search bar, and open the Command Prompt.
- Release your Current IP: Type
ipconfig /releaseand press Enter. This releases your current IP address from your network. - Renew Your IP: Now, type
ipconfig /renewand press Enter. This requests a new IP address from your router. - Test Your Connection: Once the command completes, test your internet connection.
Method 3: Manually Setting a Static IP (Advanced)
If the dynamic IP method doesn't provide a lasting solution, you might consider setting a static IP address. Be cautious when doing this, as incorrect settings might hamper your connectivity. It's best to access your router's configuration first, to identify the valid IP address range. This ensures you don't choose a duplicate address.
- Access Network Settings: Go to your Windows Settings (Windows key + I) and click on "Network & Internet."
- Change Adapter Options: Click "Change adapter options."
- Select Your WiFi: Right-click on your WiFi adapter and select "Properties."
- Internet Protocol Version 4 (TCP/IPv4): Select "Internet Protocol Version 4 (TCP/IPv4)" and click "Properties."
- Use the Following IP Address: Select "Use the following IP address."
- Enter Your Information: Input the static IP address, subnet mask, default gateway, and DNS server addresses. You will typically get this information from your router settings.
- Save Changes: Click "OK" to save the changes. Restart your laptop.
Method 4: Checking Your Router Configuration
Sometimes the issue lies within your router. This is outside your laptop’s direct control. Access your router’s settings through its web interface. Verify the DHCP server settings are enabled. This typically directs your router to assign IP addresses to connected devices automatically. Also, examine the Wireless settings. Make sure your security key is correctly entered.
Beyond the Basics: Troubleshooting Further
If these steps don’t fix the problem, there are other things to try. Double check your network drivers. Update them to the latest versions. Ensure your firewall isn't blocking internet access. Run a network troubleshooter, which Windows offers. And lastly, consider contacting your internet service provider (ISP). They might detect a problem on their end.
The Victory Lap: Enjoying Seamless WiFi
By following these steps, you can reclaim your ASUS laptop's WiFi performance. You'll be back online. Enjoy streaming, browsing, and working. Addressing IP address issues often restores a smooth, uninterrupted internet experience. Ultimately, resolving these WiFi troubles unlocks your productivity. Therefore, take charge. You are the master of your digital destiny.
HP Laptop WiFi Nightmare? FIX IT NOW! (Windows 10)ASUS Laptop WiFi Nightmare? FIX Your IP Address NOW!
We've all been there. That sinking feeling when the little WiFi icon on your ASUS laptop throws a temper tantrum. One minute you're cruising the internet like a digital speedster, the next, poof – you're staring at a blank screen, wondering if your streaming service has finally decided to stage a coup. But before you start contemplating a technology-induced existential crisis, let's take a deep breath and tackle the beast: the dreaded WiFi connection issue. Specifically, when your ASUS laptop seems to be waging war on your internet, often centered around your IP address. This article isn't just about fixing the problem; it's about understanding why it's happening and arming you with the knowledge to conquer it. Consider it your personal WiFi survival guide!
1. The WiFi Whammy: Why Your ASUS Laptop Is Acting Up
Let's be honest; technology can be capricious. Your ASUS laptop, despite being a marvel of modern engineering, isn't immune to glitches. WiFi issues can stem from a variety of culprits. Think of it like a plumbing system; a clogged pipe (your IP address) can make the whole network, the internet, flood, or come to a halt.
- The IP Address Impasse: This is often the central villain. Your IP address, the unique digital fingerprint that identifies your laptop on the network, might be clashing with other devices, stuck in a loop, or simply not getting assigned correctly.
- Router Roadblocks: Your router, the gateway to the internet, could be the problem. It might be overloaded, its firmware outdated, or its settings configured improperly.
- Driver Dilemmas: Outdated or corrupted network drivers can be the bane of your WiFi existence. They're the translators between your laptop and the network, and if they're speaking gibberish, you're in trouble.
- Interference Inferno: Let's not forget the physical world! Walls, other electronic devices, and even your microwave can interfere with your WiFi signal, causing instability. It impacts the IP address as connection is dropped.
- Software Sorcery: Malware, conflicting applications, or even a rogue browser extension can hijack your network settings, leading to WiFi woes.
2. Diagnosing the Digital Disease: Spotting the Symptoms
Before we jump into the fixes, let's make sure we're on the right track. Here are some telltale signs that your ASUS laptop's WiFi is in distress, and an IP address issue could be the root cause:
- "No Internet" or "Limited Connection": The most obvious symptom. You might see a yellow exclamation mark over your WiFi icon.
- Slow Loading Speeds: Pages take ages to load, or videos buffer endlessly.
- Frequent Disconnections: Your WiFi constantly drops, forcing you to reconnect.
- Inability to Obtain an IP Address: Your laptop struggles to obtain a valid IP address from your router. This leads to a 'dead-end' connection.
- Website Errors: You receive error messages when attempting to visit websites. This could include an IP address block.
- Trouble Connecting to Specific Sites: You can access some websites but not others.
- Network Discovery Issues: Your laptop doesn't show itself on the network as a connected device.
3. Reboot to Rescue: The Simple Solutions First
Sometimes, the simplest solutions are the most effective. Before you dive into the technicalities, try these quick fixes:
- The Classic Reboot: Restart your ASUS laptop and your router. This often clears temporary glitches that could be affecting your IP address assignment. Think of it as a digital reset.
- Airplane Mode Tango: Enable and then disable Airplane Mode on your laptop. This can sometimes reset your network connection. It’s like giving your WiFi a shot of digital caffeine.
- Forget and Reconnect: Delete the WiFi network from your list of saved networks, then reconnect using your password. This forces a fresh connection and IP address assignment.
4. Diving Deeper: Checking Your IP Address Setup
If the simple fixes didn't work, we need to dig a little deeper. Let's check how your laptop is configured to obtain its IP address:
- Automatic IP Address: This is the default setting. Your laptop automatically asks your router for an IP address.
- Manual IP Address: In rare cases, you might have set a static IP address. This can cause conflicts if it's not configured correctly.
Here's how to check in Windows:
- Open Settings: Click the Start menu and select the Settings gear icon.
- Network and Internet: Click this option.
- WiFi (or Ethernet for wired connections): Select the network you're connected to.
- Properties: Select the 'Properties' option.
- IP Address Assignment: Scroll down to find the IP address settings. Check if it's set to "Automatic (DHCP)" or "Manual".
5. The Static IP Solution: When Automatic Fails
If automatic IP assignment isn't working, you could try setting a static IP address, but proceed with caution. This is like giving your laptop a permanent address. It can sometimes resolve issues, but you need to be very careful not to create conflicts.
Important: Before you set a static IP, you'll need some information from your router. Find the router's IP address (usually something like 192.168.1.1 or 192.168.0.1).
Here's how to set a static IP in Windows:
- Follow steps 1-4 from Section 4.
- Click "Edit" next to "IP assignment".
- Select "Manual".
- Enable "IPv4".
- Enter the following information:
- IP Address: Choose an IP address within the same range as your router's IP address (e.g., 192.168.1.x, where x is a number between 2 and 254, and that isn’t already used by another device.)
- Subnet Mask: This is usually 255.255.255.0.
- Default Gateway: Your router's IP address.
- Preferred DNS Server: You can use your router's IP address for this or try Google's public DNS (8.8.8.8 and 8.8.4.4).
- Alternate DNS Server: If required, use 8.8.4.4 or a similar alternative.
- Click "Save".
6. The Command Prompt Crusade: Releasing and Renewing
The Command Prompt is your digital superhero cape. Here’s how to use it to troubleshoot IP address issues:
- Open Command Prompt: Type "cmd" in the Windows search bar and open the Command Prompt application.
- Release the IP: Type
ipconfig /releaseand press Enter. This releases your current IP address. - Renew the IP: Type
ipconfig /renewand press Enter. This requests a new IP address from your router. - Flush DNS: Type
ipconfig /flushdnsand press Enter. This clears the DNS cache, which can sometimes cause connection problems.
7. Driver Doctor: Updating Your Network Drivers
Outdated drivers are like rusty gears in a machine. They can cripple performance. Here's how to update your network drivers:
- Open Device Manager: Right-click the Start Menu and select "Device Manager."
- Network Adapters: Expand the "Network adapters" section.
- Update Driver: Right-click your WiFi adapter (e.g., "Intel(R) Wireless-AC 9260") and select "Update driver."
- Search Automatically: Choose "Search automatically for drivers." Windows will try to find and install the latest driver.
- Manually Update (If Necessary): If automatic updates don't work, you can visit the ASUS website and download the latest drivers for your specific laptop model.
8. Router Rescue: Firmware and Configuration
Your router is the gatekeeper. Let's ensure it's functioning properly:
- Firmware Update: Check your router's manual or manufacturer's website for instructions on updating the firmware. This often improves stability and performance.
- Channel Selection: Your router broadcasts on a specific channel. If there's too much interference, try changing the channel in your router's settings. Use a WiFi analyzer app (like WiFi Analyzer on Android) to see which channels are least congested.
- Check the Router's DHCP Server: DHCP (Dynamic Host Configuration Protocol) is the service that assigns IP addresses. Make sure DHCP is enabled in your router's settings. Make sure the number of clients does not exceed the router's capability.
- Reboot the Router: Reboot the router after changing configuration settings to ensure the changes are applied correctly.
9. Firewall Fun: Allowing Network Access
Your firewall, for security reasons, might be blocking your laptop. Here’s how to check and fix it:
- Check Windows Firewall: Type
Fix ethernet doesn't have a valid ip configuration issue in windows 10 Windows 11
By IT Magics Fix ethernet doesn't have a valid ip configuration issue in windows 10 Windows 11 by IT Magics
WiFi Doesn't have a valid IP configuration in Windows 11 10 87 - How To Fix WI-FI Error

By Victor Explains WiFi Doesn't have a valid IP configuration in Windows 11 10 87 - How To Fix WI-FI Error by Victor Explains
2025 Fix Ethernet doesnt have a valid IP configuration in Windows 1011

By How To Fix Tech 2025 Fix Ethernet doesnt have a valid IP configuration in Windows 1011 by How To Fix Tech

Title: How to Fix Wi-fi Doesnt Have A Valid IP Configuration
Channel: TechSimplify
How to Fix Wi-fi Doesnt Have A Valid IP Configuration by TechSimplify
My Laptop Work
Here's the title for your article: The Ultimate Guide to Choosing the Perfect Wedding Photographer for Your Special Day
The Ultimate Guide to Choosing the Perfect Wedding Photographer for Your Special Day
The anticipation of your wedding day is a thrilling experience, a tapestry woven with dreams, emotions, and meticulously planned details. Among these crucial elements, securing a skilled and empathetic wedding photographer stands paramount. They are entrusted with the profound responsibility of capturing the ephemeral moments, the stolen glances, the joyous laughter, and the heartfelt tears – all of which collectively compose the narrative of your most significant day. This comprehensive guide serves as your trusted companion, navigating you through every facet of selecting the perfect photographer, ensuring that your memories are documented with artistry and precision.
Defining Your Photographic Vision: Styles and Preferences
Before embarking on your search, cultivate a clear understanding of your aesthetic preferences. Wedding photography encompasses a diverse range of styles, each with its unique charm and approach. Begin by exploring different styles to ascertain which resonates most deeply with your vision for your wedding album.
Classic Photography: These photographers emphasize timeless imagery, employing traditional poses and compositions to create elegant and sophisticated photographs that will endure for generations. They often prioritize formal portraits alongside candid documentation of key moments.
Photojournalistic/Documentary Photography: Characterized by an unobtrusive approach, these photographers immerse themselves, capturing authentic moments as they unfold. Their focus is on storytelling, preserving the natural flow of the day with minimal intervention, revealing true emotions.
Fine Art Photography: Emphasizing artistic expression, fine art photographers often employ a painterly aesthetic, incorporating soft light, delicate details, and creative compositions. This style frequently involves pre-wedding styled shoots to enhance the album's artistic value and aesthetic appeal.
Contemporary Photography: A versatile style, contemporary photography often blends various approaches, embracing creativity and incorporating modern techniques. These photographers are known for experimenting with unique angles, unconventional compositions, and innovative editing styles.
Vintage Photography: This style seeks to emulate the look and feel of older film photographs. It involves techniques such as film processing, color grading, and adding grain or texture to evoke a sense of nostalgia.
Consult online platforms like Pinterest, Instagram, and wedding blogs for inspiration. Create a mood board showcasing images that capture your desired aesthetic. This visual aid will be invaluable when communicating your preferences to potential photographers. Detail the colours, tones, and emotional atmosphere you wish to evoke in your photographs.
Researching and Vetting Potential Photographers: Finding the Right Fit
Armed with a clear vision, initiate your search for photographers. This process requires meticulous research and careful consideration of their portfolios and client testimonials.
Online Search and Portfolio Review: Begin by searching online for photographers in your local area or the location of your wedding. Examine their websites and online portfolios. Pay close attention to the consistency of their work, the quality of their images, and their ability to tell a cohesive story across a complete wedding day. Scrutinize their editing style - is it aligned with your preferences? Do the images evoke the emotions you're seeking?
Client Testimonials and Reviews: Scour online resources such as Google Reviews, The Knot, and WeddingWire for client testimonials and reviews. These provide valuable insights into the photographer's professionalism, responsiveness, and overall client experience. Look for common themes in the feedback, both positive and negative, to gauge their reputation.
Initial Contact and Consultation: Once you've shortlisted potential candidates, reach out to them to schedule consultations. Prepare questions to evaluate their personality, experience, and approach to their craft. Ask about their shooting style, their backup equipment, and their contingency plans. Arrange a meeting in person, or via video call, to assess chemistry. Ensure you are comfortable with them – ideally, they should feel like a trusted friend.
Reviewing Full Wedding Galleries: Request to see full wedding galleries, not just the curated selection presented on their website. This allows you to assess their consistency and ability to capture every aspect of the wedding day, from the preparations to the reception. A complete gallery provides a more realistic portrayal of their capabilities.
Understanding Pricing and Packages: Thoroughly review their pricing and packages. Ask for a detailed breakdown of what is included in each package and identify any additional costs, such as travel fees, album creation, or prints. Ensure their pricing aligns with your budget before proceeding further. Confirm any post-wedding timeframes for image delivery.
Meeting with Your Top Choices: Assessing Personality and Compatibility
The photographer's personality is as important as their technical skills. They will be intimately involved in your wedding day, observing emotionally intimate moments. Thus, it is essential to feel comfortable and at ease with them.
The Importance of Chemistry: During your consultation, observe how the photographer interacts with you and your partner. Do you feel a connection? Do you share a similar vision for the day? A positive rapport will contribute significantly to a relaxed and enjoyable experience.
Discussing Your Vision: Clearly communicate your specific desires and expectations for your wedding day. Share your wedding timeline, your preferred shot list, and any specific details you wish to be captured. A skilled photographer will listen attentively, offer helpful suggestions, and tailor their approach to your unique needs.
Asking Critical Questions: Don't hesitate to ask questions. Inquire about their experience shooting at your chosen venue, their backup equipment, and their approach to handling unforeseen challenges. Also, confirm their policies regarding image ownership, copyright, and usage rights. Learn about their team if they have one.
Reviewing Contracts Carefully: Before signing a contract, scrutinize every clause. Pay close attention to payment terms, cancellation policies, and any details pertaining to image delivery. Ensure you understand all the terms and conditions before committing.
Preparing for Your Wedding Day: Collaborating with Your Photographer
Once you've selected your photographer, fostering a close relationship will help ensure a seamless and successful outcome.
Pre-Wedding Consultation and Planning: Arrange a pre-wedding consultation to finalize your timeline, shot list, and any specific requests. This is an opportunity to iron out any remaining details and ensure everyone is on the same page.
Creating a Shot List: Collaborate with your photographer to create a detailed shot list, including essential family portraits, group photos, and any specific moments you wish to capture. This helps ensure that no crucial moments are missed.
Sharing Vendor Contact Information: Provide your photographer with the contact information for all other vendors, including your wedding planner, florist, and venue coordinator. This facilitates seamless communication and coordination on the day of your wedding.
Communication and Coordination: Maintain clear and open communication with your photographer in the weeks leading up to the wedding. Address any last-minute changes or concerns promptly, and ensure they are aware of any special requests.
Wedding Day Etiquette: On the wedding day, designate a responsible person (like a bridesmaid or the wedding planner) to assist the photographer. They can help gather family members, organize group shots, and ensure that everything runs smoothly.
Post-Wedding: Receiving and Cherishing Your Memories
The final step is receiving your wedding photographs and the enduring joy of reliving your special day.
Image Delivery and Albums: Confirm the timeline for image delivery with your photographer. They will usually provide a digital copy of the final images, often stored on an external drive or via online galleries. Consider the options for album or print creation.
Reviewing and Sharing Your Photos: Once you receive your photos, take your time to review them and relive the memories. Share them with family and friends, creating a lasting legacy.
Creating Heirloom Albums and Prints: Invest in a beautifully crafted wedding album or prints that reflect your style and allow you to cherish your wedding memories for years. Choose a photobook that you can pass on to loved ones.
Protecting Your Memories: Back up all your digital images in multiple locations, including a cloud service and external hard drives. This will safeguard your memories from potential loss or damage.
Conclusion: The Lasting Value of Exceptional Photography
Choosing the perfect wedding photographer is an investment in the enduring legacy of your special day. By following this comprehensive guide, you can confidently navigate the process, selecting a skilled artist who will transform fleeting moments into timeless treasures. The images will serve as cherished reminders of the love, joy, and celebration that defined your wedding day, a legacy you can share with generations to come. Your wedding photos are not just images; they are the tangible embodiment of your story – a story worth preserving with the utmost care and artistry.
