cannot find laptop on nat gaming at&t wifi

Title: Fix any Internet and Network Issues with this simple trick
Channel: HowtoInsider
Fix any Internet and Network Issues with this simple trick by HowtoInsider
OMG! My Laptop Vanished on AT&T Wi-Fi! (NAT Gaming Nightmare)
Laptop Lost & Found: A Wi-Fi Whodunit (and NAT Gaming Horror Story!)
It was a Friday night. The air crackled with the promise of weekend freedom. Pizza boxes littered the coffee table, and virtual worlds beckoned. My laptop, my trusty portal to digital realms, sat innocently beside me. Or so I thought.
The Disappearing Device: A Technological Houdini Act
Then, it vanished. Poof! Gone. One moment, I was strategizing in [Mention a specific online game you enjoy]; the next, I was staring at an empty space. My heart leaped into my throat. Panic, that unwelcome guest, settled in. This wasn't some misplaced item; this was a digital disappearing act. My laptop, my digital companion, had become a technological ghost.
AT&T Wi-Fi, the Unseen Culprit?
I immediately started my investigation. Where could it be? Had I simply misplaced it? I retraced my steps. The last place I remembered using it was, you guessed it, connected to my trusty AT&T Wi-Fi. Could the network be the culprit? It was a strange thought, but I had to consider all possibilities.
The Dreaded NAT: A Gaming Graveyard Monster
Now, let's pause for a moment. Let’s talk about NAT (Network Address Translation). For the uninitiated, NAT makes online gaming a complicated affair. It’s the silent gatekeeper. It often blocks incoming connections. This issue can be a real headache.
This brings me to the gaming aspect. I am an avid gamer. Therefore, my immediate concern switched to NAT problems. My online gaming experiences were frequently interrupted. This created frustrating lag. I was no stranger to NAT’s annoyances. Little did I know, it would soon become a much bigger problem.
A Frantic Search Begins: Digital Footprints and Frustration
I began a frantic search. I checked every nook and cranny. Under the couch? Nope. Behind the TV? Not there. I felt like a detective in a detective story. Each passing minute amplified my anxiety. My mind raced, desperately trying to piece together the puzzle.
Troubleshooting the Mystery: Initial Steps
First, I attempted the obvious. I rebooted the Wi-Fi router. Sadly, nothing happened. I checked the network for connected devices. My laptop was not listed. I felt a growing sense of dread. The missing machine remained missing. I needed to find a solution.
The Wi-Fi Weak Link: Signal Strength and Interference
Then, I evaluated my Wi-Fi. Could there be signal issues? I also considered interference. My internet speed had been acting up lately. I could not find a solution. I made another search attempt.
The AT&T App and Its Limitations
Following that, I switched to the AT&T app. I was hoping to find answers there. However, the app only offered basic information. It did not provide any clues. My hope faded further.
Seeking Tech Support: A Sisyphean Task?
I turned to the last resort. I contacted tech support. After being on hold, I was finally connected. I explained my situation. The tech support agent guided me through the standard troubleshooting steps. These were the same steps I had taken. I already tried the basic steps. Sadly, the problem did not go away.
The Resolution (or Lack Thereof): A Digital Unsolved Case
Consequently, I never found my laptop. The mystery remains. Perhaps it was a glitch in the matrix. Maybe it was a rogue Wi-Fi signal. To this day, the exact cause remains unknown. Despite the loss, some valuable lessons emerged.
Lessons Learned: Security First, Always
First, always back up your data. Second, don’t rely on a single network connection. Third, improve your Wi-Fi security. Fourth, keep careful track of your devices. Finally, remember to breathe. Although my laptop remains missing, I have come to terms with the incident.
The Gaming Aftermath: Bouncing Back
Eventually, I adapted. I purchased a new machine. This time, I focused on stronger security. I also upgraded my network and internet provider. Nevertheless, the memory of the vanished laptop still lingers. It is a reminder of a time when things were a little more complicated.
Final Thoughts: Wi-Fi Woes and the Human Element
In conclusion, my laptop's disappearance was a stressful episode. It highlighted the fragile nature of our digital existence. Also, the experience has taught me resilience. I have added another chapter to my life. Therefore, I can now explore even newer digital adventures. It all happened over the course of a single weekend. So, be cautious. Protect your valuable tech. After all, you never know when you might become the victim of a digital mystery.
Laptop WiFi Hotspot: The Ultimate Guide to Free & Fast InternetOMG! My Laptop Vanished on AT&T Wi-Fi! (NAT Gaming Nightmare)
We've all been there. You're about to clutch a glorious victory in your favorite online game, the tension is thicker than molasses, and then… poof. Your laptop, the trusty steed upon which your digital prowess relies, disappears into the nebulous ether of the internet. And, of course, it happens right when you're connected to the notoriously finicky AT&T Wi-Fi. The culprit? Often, the dreaded NAT (Network Address Translation) and its particularly nasty bite when it comes to gaming. Let's dive into this digital disappearing act and unravel the mysteries of why your laptop seemingly vanishes into thin air on your AT&T Wi-Fi.
1. The Case of the Missing Laptop: A Gamer's Worst Nightmare
Picture this: You're knee-deep in a raid, your fingers are flying across the keyboard, and your guildmates are relying on you. Suddenly, the world blurs, your ping spikes into the stratosphere, and then… disconnect. Your game freezes, then crashes, and you're left staring at a loading screen, or worse, a blank desktop. This, my friends, is the essence of the AT&T Wi-Fi NAT gaming nightmare. It's like trying to navigate a crowded city using a single, tiny, one-way street. Everything gets bottlenecked, and some things just don't make it through.
2. Understanding NAT: The Gatekeeper of Your Wi-Fi
So, what exactly is NAT? Think of it as the bouncer at a very exclusive club (your home network). It’s a security protocol that allows multiple devices (your laptop, phone, smart fridge – you get the idea) to share a single public IP address. This is crucial because we’ve essentially run out of unique IP addresses, so NAT cleverly allows many devices to use the same one. However, for gaming, NAT can be a pain.
3. The NAT Gaming Bottleneck: Why Lag is Your New Best Friend
The problem with NAT, from a gaming perspective, is that it can restrict the flow of data. Games need to send and receive information constantly, and NAT is like a narrow pipeline. Too much data trying to squeeze through at once leads to lag, packet loss, and ultimately, disconnects. It's like trying to run a marathon through a crowded subway tunnel – exhausting and inefficient.
4. AT&T Wi-Fi: The Suspect in this Digital Crime
AT&T Wi-Fi, while offering generally good coverage, often employs a more aggressive form of NAT. Their equipment is designed to prioritize general internet use, which can, unfortunately, leave gamers in the lurch. This isn't necessarily AT&T's fault; they're catering to a massive customer base. But it does mean that NAT can be a bigger problem on their network compared to other providers. Think of it as a higher-security lock on your network's front door – great for keeping hackers out, not so great for speedy gaming.
5. Identifying the Culprit: Is it Truly NAT?
Before you start throwing your controller, how do you know if NAT is the problem? There are several telltale signs:
- High Ping: Constantly experiencing high latency (ping) in your games.
- Packet Loss: Frequent instances of packet loss, resulting in choppy gameplay and rubberbanding.
- Disconnects: Repeatedly getting disconnected from your game servers.
- Difficulty Connecting: Trouble connecting to online game servers in the first place.
- Strict NAT Type: If you can check your NAT type within your game or console settings, a "Strict" or "Moderate" NAT type is often a red flag.
6. Checking Your NAT Type and Router Settings
Most games, and especially the console platforms, will indicate your NAT type. This is a crucial first step in diagnosing the problem. You can typically check this within your game’s network settings or your console's system settings. Then, you will need to access your router settings to adjust them. This often involves logging into your router's configuration page (usually by typing an IP address into your web browser – something like 192.168.1.1 or 192.168.0.1).
7. Port Forwarding: The Key to Opening the Digital Door
Port forwarding is like giving your game a VIP pass at the NAT club. It involves manually telling your router to allow specific data traffic for your game to pass through the NAT firewall. This is often the most effective solution. You’ll need to find the specific ports your game uses (easily found online). Then, in your router settings, you designate those ports to your laptop's IP address.
8. DMZ (Demilitarized Zone): Full Access, Full Responsibility
A DMZ is a more radical approach. Think of it as giving your laptop its own private internet connection, effectively bypassing NAT entirely. This can drastically improve your ping and connection stability. However, it also means your laptop has less protection from potential threats. Use this option with caution and make sure you have strong antivirus software installed.
9. UPnP (Universal Plug and Play): The "Easy" Button (Sometimes)
UPnP is a feature that aims to automate the port forwarding process. It’s designed to allow your devices to automatically open the necessary ports. While convenient, UPnP is not always reliable, and it can sometimes create security vulnerabilities. A mixed bag, but worth a try.
10. The Wired Connection Advantage: A Solid Foundation
If possible, always connect your laptop to your router via an Ethernet cable. This provides a more stable and direct connection compared to Wi-Fi. Wired connections are often less susceptible to the issues caused by NAT, especially in the face of signal interference.
11. Restarting Your Router: A Common First Aid
Sometimes, the simplest solutions are the best. Restarting your router and modem can clear up temporary glitches and improve your connection. This is like hitting the reset button on your computer, often surprisingly effective.
12. Optimizing Your Wi-Fi: The Wireless Battlefield
If you must use Wi-Fi, make sure your signal is strong and clear. Avoid interference from other devices (microwaves, Bluetooth speakers, etc.). Consider moving your laptop closer to the router or upgrading your Wi-Fi router to a more robust model.
13. Contacting AT&T Support: When All Else Fails
If you've tried everything and are still experiencing problems, it's time to contact AT&T support. They may be able to help you troubleshoot the issue or offer suggestions specific to your account and equipment.
14. The IP Address Tango: Static vs. Dynamic
Consider setting a static IP address for your laptop. This ensures that your laptop always uses the same IP address on your network, which simplifies the port-forwarding process. Dynamic IP addresses can change, making port forwarding a moving target.
15. Beyond the Wi-Fi: Exploring Alternative Solutions
If you're consistently struggling with NAT issues, you might want to consider exploring alternatives, such as using a VPN (Virtual Private Network) service or switching to a different internet service provider (if available). VPNs can sometimes bypass NAT issues by creating a secure tunnel to another server.
In the end, dealing with the AT&T Wi-Fi NAT Gaming Nightmare is like being a digital detective. It involves understanding the culprits, investigating the symptoms, and finding the right solution to get you back in the game.
Closing Thoughts: Victory Awaits!
This whole NAT situation is enough to make a gamer’s head spin, right? But fear not! By understanding the basics of NAT, identifying the problem, and implementing the solutions we've discussed, you can tame the beast and reclaim your gaming glory. Your laptop will no longer mysteriously vanish in the heat of battle, and you can finally experience lag-free victories. Now go forth, and conquer your opponents!
FAQs
1. What is NAT, and why is it bad for gaming?
NAT (Network Address Translation) is a security protocol that allows multiple devices to share a single public IP address. While essential for internet functionality, it can create bottlenecks for gaming, leading to high ping, packet loss, and disconnects because of restricted data flow.
2. How do I check my NAT type?
You can typically check your NAT type within your game's network settings or your console's system settings. Look for indicators like "Strict," "Moderate," or "Open."
3. What is port forwarding, and how do I do it?
Port forwarding involves manually assigning specific network ports to your laptop’s IP address, ensuring that your game's data can pass through NAT. To do this, log into your router's settings, locate the port forwarding section, and enter the necessary port numbers for your game.
4. Is UPnP a good solution for gaming?
UPnP (Universal Plug and Play) aims to automate port forwarding. While convenient, it’s not always reliable and can introduce security risks. It's worth trying, but may not always resolve NAT issues.
5. What are the alternatives to AT&T Wi-Fi's NAT problems?
Consider using a wired connection (Ethernet), setting a static IP address, utilizing a VPN (Virtual Private Network), or exploring alternative internet service providers if AT&T's NAT continues causing issues.
1)
Laptop WiFi Nightmare? This One Weird Trick Fixes It!How To Fix Strict NAT Type On PC

By Mac Junky Flips How To Fix Strict NAT Type On PC by Mac Junky Flips
If your PC won't connect to the internet shorts pctips tech

By RTC Tutorials If your PC won't connect to the internet shorts pctips tech by RTC Tutorials
Change DNS in Windows

By XLS Tech Change DNS in Windows by XLS Tech
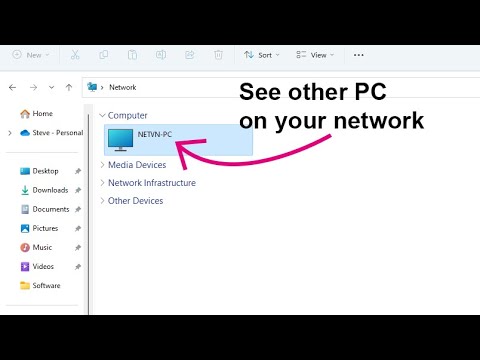
Title: Fix Cant See Other Computers on Network Windows 1011
Channel: NETVN82
Fix Cant See Other Computers on Network Windows 1011 by NETVN82
Laptop Working
Here's the article:
Title: Unveiling the Secrets of Perfecting Your Homemade Sourdough: A Comprehensive Guide
The aroma. The texture. The perfect tang. Sourdough, a craft as old as civilization itself, holds a special place in the hearts (and stomachs) of food enthusiasts worldwide. But beyond the simplicity of flour, water, and salt lies a world of nuance, a delicate dance between the baker and the wild yeasts and bacteria that bring this magnificent bread to life. This comprehensive guide promises to be your trusted companion on the journey to mastering homemade sourdough, transforming you from a novice to a confident baker capable of producing loaves rivaling the finest artisan bakeries.
Understanding the Heart of Sourdough: The Starter
The cornerstone of any exceptional sourdough loaf is undoubtedly the starter, a living culture of wild yeasts and lactic acid bacteria. Cultivating a thriving starter is akin to nurturing a pet; it requires consistent care, attention, and understanding.
The Initial Flour and Water Marriage: Your journey begins with a simple combination: unbleached, all-purpose flour and filtered, chlorine-free water. The ratio is typically a 1:1 ratio by weight, meaning equal parts flour and water. In a clean glass jar or container (wide-mouthed jars are preferable for ease of feeding), combine these two ingredients. Mix thoroughly, ensuring no dry flour pockets remain. Cover loosely with a lid or plastic wrap, allowing air circulation.
Daily Awakening: For the first few days, observe. You'll likely notice minimal activity – perhaps a few bubbles. This is normal. Keep the starter at a consistent, warm temperature (ideally between 70-75°F or 21-24°C). Each day, discard a portion of the starter (usually half), and feed the remaining portion with fresh flour and water in the same 1:1 ratio. Mix well. The discard can be used in other baked goods to reduce waste.
Recognizing the Signs of Life: Over the course of a week or two, you’ll witness the miracle of fermentation. The starter will begin to bubble, and the volume will noticeably increase after feeding, then fall. A sour, pleasantly tangy aroma will develop – this is the signature scent of a healthy starter.
Maintaining the Culture: Once active, your starter is ready to bake. Frequency of feedings depends on the temperature. In a warm environment, feeding once or twice daily might be necessary. In a cooler environment, you might feed it every other day. The key is consistency. Observe the starter's activity and adjust the frequency accordingly. Always feed your starter before using it for baking.
Troubleshooting Common Issues: A starter that doesn't rise or produce bubbles might be too cold or not fed often enough. A weak starter can also be revived with a series of feedings, using unbleached flour. Bad smells can indicate an infection – in which case, discard the starter and start again.
Crafting the Perfect Sourdough Dough: A Step-by-Step Guide
Once your starter is vigorous, you're ready to embark on the magic of sourdough bread making. This recipe yields one beautiful loaf.
The Autolyse: Unleashing Potential: In a large mixing bowl, combine 750 grams of bread flour (or a blend of bread flour and whole wheat or rye for added flavor and texture) with 550 grams of water. Mix gently until just combined. Cover the bowl and allow the mixture to rest for 30-60 minutes. Autolyse promotes gluten development; making for a better structure.
Incorporating the Starter: After the autolyse, add 200 grams of active, bubbly starter and 18 grams of salt to the dough. Gently mix the ingredients using your hands.
The Stretch and Fold: Building Strength: Over the next few hours, perform a series of stretch and folds. Every 30-60 minutes for the next two-to-three hours, wet your hands to avoid the dough from sticking, and gently stretch a portion of the dough upward, then fold it over onto itself. Repeat this process, rotating the bowl, until you’ve worked your way around the entire dough. Then, cover the bowl and let it rest. These folds build strength, trapping the air from the fermentation process.
Bulk Fermentation: The Transformation: Allow the dough to bulk ferment at room temperature (ideally between 70-75°F or 21-24°C). The time can vary widely, depending on the room temperature and the activity of your starter, but usually takes between 4-6 hours. The key is to watch the dough, not the clock. During bulk fermentation, the dough should increase in volume by about 50-75% and show signs of bubbles. If it is warmer, it will need less time. If it is cooler, it will need more.
Shaping the Loaf: Gently flour your work surface. Turn the dough out of the bowl. Gently shape the dough into a round or oblong loaf, using minimal handling. This should be a gentle, careful process.
Cold Proofing: Developing Flavor: Place the shaped loaf in a well-floured banneton basket or a bowl lined with a floured cloth. Cover and refrigerate the loaf for 12-24 hours. This slows down fermentation, developing complex flavors.
Baking to Perfection: Achieving the Ideal Crust and Crumb
The baking process is where all your effort culminates into a culinary masterpiece.
Preheating the Oven: Preheat your oven to 500°F (260°C) with a Dutch oven inside. The Dutch oven provides a steamy environment crucial for crust formation. Allow the Dutch oven to heat for at least 30 minutes to ensure it is scorching hot.
Scoring the Loaf: Carefully remove the heated Dutch oven from the oven. Gently remove the loaf from the fridge and carefully place the loaf in the hot Dutch oven. Using a sharp knife or lame, score the top of the loaf. Experiment with different scoring patterns to add visual appeal.
Baking with Steam: Cover the Dutch oven with the lid and bake for 20 minutes at 500°F (260°C). This creates steam, which helps the loaf expand. After 20 minutes, remove the lid and reduce the oven temperature to 450°F (232°C).
Completing the Bake: Continue baking, uncovered, for another 25-35 minutes, or until the crust is deeply golden brown and the internal temperature reaches 200-210°F (93-99°C).
Cooling and Enjoying: Remove the loaf from the Dutch oven and cool completely on a wire rack before slicing and enjoying. Resist the temptation to cut into the loaf too soon—cooling allows the internal structure to set, resulting in a perfect crumb.
Troubleshooting Common Sourdough Baking Challenges
Even experienced bakers encounter problems. Here are some common issues and solutions.
- Flat Loaves: A problem is often caused by under-proofing, a weak starter, or failure to develop sufficient gluten. Ensure your starter is active, the dough proofs long enough, and use the stretch and fold technique.
- Dense Crumb: This can result from under-proofing, not enough hydration, or improper shaping. Pay attention to the dough’s rise during bulk fermentation and cold proofing. Be gentle when shaping the loaf.
- Sour Taste Too Strong: This is caused by over-proofing. Carefully monitor the bulk fermentation and cold proofing times. Experiment with starter feeding schedules.
- Uneven Crumb: Often due to inconsistent shaping, poor gluten development, or dough that has been handled too much. Gentle shaping techniques and proper folds are essential.
Variations and Enhancements: Expanding Your Sourdough Horizons
Once you've mastered the basic recipe, explore endless possibilities.
- Adding Grains: Incorporate whole-wheat flour, rye flour, or other grains into the dough for added flavor, texture, and nutritional value. Start by substituting a portion of the bread flour with another flour, and adjust hydration as necessary.
- Flavorful Additions: Add seeds, nuts, herbs, or dried fruit to the dough during the final stretch and fold. This needs to be done in the last fold.
- Experimenting with Hydration: Higher hydration (more water) results in a more open crumb but can be more challenging to manage. Start with the recipe's recommendations and carefully increase the hydration as you gain experience.
- Shaping for Success: Round loaves, oval loaves, boules, batards—the options are endless. Experiment with different shaping techniques.
Conclusion: Your Sourdough Journey Begins Now
Baking sourdough is a rewarding experience, a journey of discovery that enriches your life. Remember, practice and patience are essential. Embrace the learning process, and enjoy the process. Each loaf is a lesson, and each bite a testament to your perseverance.
